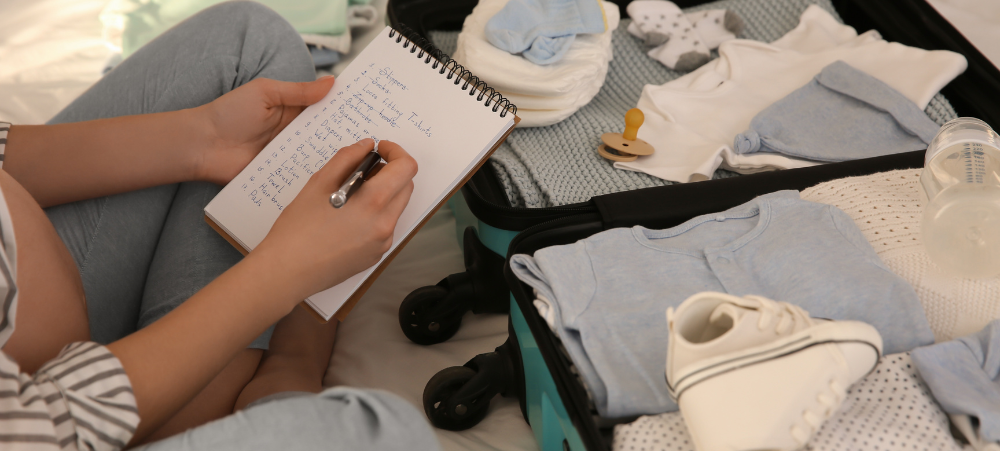
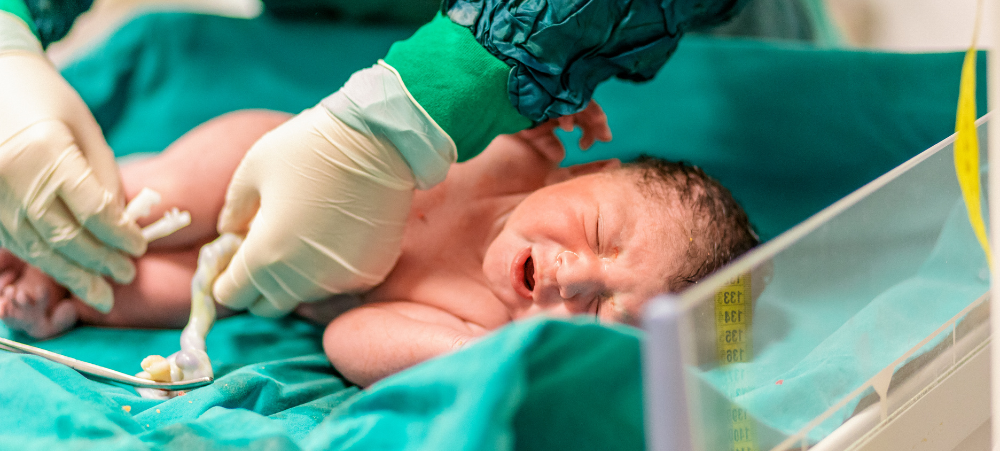
Parenting Hub

Baby-wearing Benefits and How to Choose the Right Carrier

Baby-wearing is a practice that has been used for centuries across cultures, and it’s no surprise why—it offers a multitude of benefits for both parents and babies. From enhancing the bond between parent and child to making everyday tasks easier, baby-wearing is a practical and nurturing way to care for your little one. But with so many types of carriers available, choosing the right one can be overwhelming. In this article, we’ll explore the benefits of baby-wearing and provide helpful tips on how to select the perfect carrier for your needs. The Benefits of Baby-wearing How to Choose the Right Baby Carrier With so many options available, choosing the right baby carrier can feel overwhelming. Here are some important factors to consider when selecting the perfect carrier for you and your baby: Conclusion Baby-wearing offers a multitude of benefits for both parents and babies, from fostering a deeper emotional bond to providing convenience and comfort. With so many options available, it’s important to choose a carrier that suits your baby’s needs, your lifestyle, and your comfort level. Whether you’re out for a walk or tackling household tasks, Baby-wearing allows you to keep your baby close while maintaining your hands-free freedom. Choose wisely, and enjoy the closeness and connection that Baby-wearing provides!

Parenting Hub

When to Transition from Crib to Bed: A Parent’s Guide

The transition from crib to bed is a major milestone in both your child’s development and your parenting journey. For many parents, it signals the end of an era and the beginning of a new phase in their child’s independence. However, deciding when and how to make this transition can be challenging. Every child is different, and there is no one-size-fits-all approach. In this guide, we’ll explore key signs that it may be time to move your little one from the crib to a bed, offer tips for a smooth transition, and provide advice on how to make the process as stress-free as possible for both you and your child. When to Transition from Crib to Bed: Key Signs How to Make the Transition Smooth Alternative Options to Consider If you’re unsure about jumping straight from a crib to a regular bed, there are intermediate options to consider: Conclusion The transition from crib to bed is a big step in your child’s development, and there is no one “right” time to make the switch. Every child is different, so it’s important to look for the signs that your little one is ready. Whether they’re climbing out of the crib, showing an interest in independence, or simply outgrowing their space, the key is to make the transition gradual and supportive. With patience, reassurance, and a bit of planning, you can help your child make the move to a bed with ease and confidence.

Parenting Hub

Dealing with Colic: Soothing Techniques for Parents

Colic is a challenging and often overwhelming experience for both babies and their parents. Characterised by excessive crying and fussiness, colic typically occurs in infants between the ages of 2 weeks and 3-4 months, and while it’s a common phase, it can leave parents feeling helpless and exhausted. The good news is that colic, though distressing, is temporary, and there are various soothing techniques that can help calm your baby and provide you with some relief. Here’s how you can manage colic and bring comfort to your little one during this tough phase: 1. Offer a Feeding Break Colic episodes often occur after feedings, which may be linked to excessive gas, reflux, or an overactive or under-active let-down. If your baby seems particularly fussy after eating, try holding them upright for a little longer to allow gravity to help with digestion. You can also try offering smaller, more frequent feedings to reduce the chance of overeating, which can lead to discomfort. If you’re breastfeeding, make sure your baby latches correctly to avoid swallowing excess air, which can contribute to colic symptoms. 2. Burp Your Baby Frequently Babies tend to swallow air while feeding, which can contribute to gas buildup and discomfort. Frequent burping during and after feedings can help release trapped air and prevent colic flare-ups. Try burping your baby after every ounce of milk or every few minutes during breastfeeding. Use gentle, soothing techniques, such as patting or rubbing your baby’s back in an upright position, to encourage the air bubbles to come out. 3. Create a Calming Environment Sometimes, colic may be triggered by overstimulation, so creating a calming environment can be helpful. Dimming the lights, playing soft music or white noise, and reducing the amount of noise and movement around your baby may help soothe them. A calm atmosphere can allow your baby to relax and reduce crying spells. Consider using a baby swing, rocker, or cradle, as the gentle motion can have a calming effect. 4. Try Gentle Tummy Massage A gentle tummy massage can help relieve gas and ease discomfort. Gently rub your baby’s belly in a clockwise motion to promote digestion and help release trapped gas. Alternatively, you can try a “bicycle” motion with your baby’s legs by gently moving their legs in a circular motion as if they were peddling a bike. This can help alleviate tension in the abdomen and ease discomfort caused by gas. 5. Use Soothing Sounds Certain soothing sounds can calm babies and reduce fussiness. White noise machines, the sound of a vacuum cleaner, or a gentle lullaby may help drown out other distracting noises and provide a sense of comfort. The familiar sound of the womb can have a calming effect, and many babies respond positively to these types of sounds. Experiment with different options to find what works best for your baby. 6. Offer a Warm Bath A warm bath can be incredibly soothing for both the baby and the parent. The warm water helps to relax the muscles and can provide comfort during a colic episode. While your baby is in the bath, gently massage their back or legs to help them relax further. The calming effect of the water, combined with the soothing touch, can help reduce tension and ease the discomfort associated with colic. 7. Swaddle Your Baby Swaddling can provide comfort and security for some babies, as it mimics the snug environment of the womb. Wrapping your baby in a soft blanket can help them feel more secure and reduce the startle reflex, which may contribute to crying episodes. Be sure not to swaddle too tightly, as babies need space to move their hips and legs freely. If your baby seems to resist being swaddled, try using a sleep sack as an alternative. 8. Offer a Pacifier Sucking is a natural self-soothing technique for babies. If your baby is not hungry but continues to cry, offering a pacifier can help calm them. The act of sucking can be very soothing and may distract your baby from discomfort. Be mindful of when your baby is using the pacifier—if it seems to be a tool for soothing without causing additional distress, it can be a helpful solution. 9. Consider Your Baby’s Diet If you’re breastfeeding, consider any foods you may be eating that could potentially upset your baby’s stomach. Common culprits include dairy, caffeine, and spicy foods. Try eliminating one item at a time to see if there’s any improvement. If you’re formula-feeding, check with your paediatrician to see if a different type of formula might help ease your baby’s discomfort, such as a gentle or hypoallergenic formula designed for sensitive tummies. 10. Stay Calm and Seek Support Dealing with colic can be physically and emotionally exhausting. It’s important to remember that you’re doing the best you can, and it’s okay to ask for help. If you feel overwhelmed, reach out to a trusted friend, family member, or a healthcare professional for support. Take breaks when you need them, and don’t hesitate to lean on others. Your baby’s colic phase will eventually pass, but your well-being is just as important, and taking care of yourself will help you take care of your baby. Conclusion While colic is undoubtedly a challenging phase for both parents and babies, there are a variety of soothing techniques you can try to help comfort your little one. From feeding adjustments and tummy massages to calming environments and swaddling, finding the right combination of techniques will go a long way in easing your baby’s discomfort. Remember, colic is temporary, and with patience and persistence, you and your baby will get through this phase together.

Parenting Hub

How to Create the Perfect Birth Plan

A birth plan is a document that outlines your preferences and wishes for labor and delivery, giving you the opportunity to communicate your choices to your healthcare team in advance. It is a helpful tool for ensuring your voice is heard during one of the most significant events of your life. While birth plans can offer structure, it’s important to stay flexible, as childbirth can be unpredictable. This guide will walk you through how to create the perfect birth plan, offering tips on what to include, how to communicate your preferences, and why flexibility is key. 1. Understand the Purpose of a Birth Plan Before diving into creating your birth plan, it’s essential to understand that it’s not a rigid, set-in-stone contract. A birth plan is more of a guideline that reflects your preferences and values, but it’s important to be open to change if circumstances evolve. Childbirth can be unpredictable, and your healthcare providers will be ready to make decisions based on what’s safest for you and your baby. That said, a birth plan allows you to express your wishes and prepare for the birthing process. 2. Start with a Calm, Open Mind Creating a birth plan can feel overwhelming at first, especially if you’re a first-time parent. It’s important to approach the process with a calm, open mindset. While you may have a vision for your ideal birth, it’s essential to keep in mind that things don’t always go as planned. Your birth plan should reflect your desires, but also acknowledge that flexibility and adaptability are key to ensuring both you and your baby are safe and comfortable. 3. Key Elements to Include in Your Birth Plan While every birth plan is unique, there are several key aspects you should consider when creating your document: Labor Preferences Delivery Preferences Post-Birth Preferences 4. Be Clear About What You Want, but Stay Flexible It’s crucial to communicate your preferences clearly, but also remember to stay flexible. Birth is unpredictable, and certain interventions or changes in plans may become necessary to ensure your safety and the safety of your baby. While it’s okay to have a clear vision of your ideal birth, it’s also helpful to include in your birth plan that you’re open to modifications if necessary. For example, you could write: 5. Involve Your Birth Team in the Process Once you’ve drafted your birth plan, be sure to review it with your healthcare provider or midwife. They can offer advice on what’s realistic, especially if you’re planning to give birth at a hospital. They may also help clarify any medical procedures or policies that might affect your preferences. By involving your birth team early in the process, you can ensure everyone is on the same page and work together to create the best possible experience for you and your baby. 6. Keep It Short and Simple While you may have many wishes and preferences, it’s best to keep your birth plan short and to the point. Most birth professionals will appreciate a concise plan that covers your key preferences without overwhelming them with excessive detail. Aim for a one-page document that includes your most important points. 7. Prepare for the Unexpected Even the most well-prepared birth plans may need to be adjusted. While it’s great to have a vision for your birth, it’s essential to prepare mentally for the possibility that things might not go as expected. For example, your plan might need to change if there are complications, if you need an emergency C-section, or if other interventions are necessary. The key is to prioritise your health and the health of your baby, and trust that your birth team will be there to support you every step of the way. 8. Update Your Plan as Needed As your due date approaches, it’s a good idea to revisit your birth plan and make any necessary updates based on new information or circumstances. For instance, if you decide on a different type of pain management or have a change of heart about your preferences, be sure to revise your plan. Stay flexible, but also ensure your wishes are communicated clearly. Conclusion Creating the perfect birth plan is about preparing yourself mentally and emotionally for the birth process while ensuring your wishes are known. While a birth plan can be a great way to communicate your preferences, it’s important to remain open to adjustments as things evolve. Focus on your overall goal of a safe, healthy birth for both you and your baby, and trust that your healthcare team will be there to help guide you through the process. The perfect birth plan is one that is flexible, realistic, and supportive of both your desires and the changing nature of childbirth.

Bonitas – innovation, life stages and quality care

The First Signs of Labour

If you’re expecting your first baby you’ve probably read up a little (or a lot) on pregnancy and birth process. Labour is something you’ve probably wondered about and seeing as every pregnancy is different, many moms experience different labour signs. However, there are a few tell-tale signs to look out for that you are about to meet your new baby soon.  What to look (or feel) out for  You may be worried that you won’t distinguish normal late pregnancy signs from the fact that you’ve started labour. Luckily your due date should give you an indication of when you could expect your baby to arrive, but this won’t always be the case. Here are some indicators that your baby is on the way.  One of the more obvious signs of labour beginning is regular contractions. This will be different to the Braxton Hicks contractions you may have been experiencing leading up to this point. Labour contractions are longer, stronger and more frequent – when they come every 5 minutes you should call your doctor or midwife.  Another sign your baby is on her way is your cervix dilating or beginning to open. This can start happening in the days or weeks before you deliver. Your baby will also move down into your pelvis during this time – which is known as your baby dropping.  When your labour begins, the mucus plug which seals your cervix opening comes away. This jelly-like pink mucus is known as a show, and you may notice it when it passes out your vagina.  Lower back pain, diarrhoea and looser feeling joints are all other signs that your labour may be starting. Another sign is your water breaking, this can happen in a gush but a trickle is more likely, most moms-to-be go into labour within 24 hours of their water breaking.  Be sure to keep your birth partner in the loop about how you are feeling mentally and physically around the time of your birth. If you are at all worried about your baby or experience anything abnormal be sure to let your doctor know as soon as possible. 

Parenting Hub

Baby on the Way? How to Financially Prepare for Parenthood

Expecting a baby is an exciting and life-changing experience, but it can also bring significant financial responsibility. Preparing your finances for the arrival of a little one ensures that you can focus on bonding with your baby and adapting to parenthood without worrying about unexpected financial pressures. Here are some essential steps to financially prepare for parenthood. 1. Reassess Your Budget The first step in preparing financially for your baby is to take a close look at your current budget. Adding a baby to your family will likely increase expenses, from diapers to healthcare costs, so it’s essential to know where your money is going. You’ll need to account for baby-related costs such as: Cutting back on non-essential spending, such as dining out or subscription services, can free up funds to put toward these new expenses. 2. Create an Emergency Fund Having an emergency fund is always important, but it’s especially crucial when preparing for a baby. Medical emergencies, unexpected costs, or a temporary reduction in income can be stressful during this time. Aim for a savings cushion of 3-6 months of living expenses. If you don’t have an emergency fund yet, now is the time to start building one. 3. Understand Your Insurance You’ll need to update your health insurance to include your baby. Be sure to review both your medical and maternity coverage. Some plans have a waiting period before adding a baby, so it’s important to understand when you need to make those updates. Additionally, take time to review your life insurance and consider increasing coverage if necessary. Life insurance can help ensure your family’s financial security in case of an unexpected event. 4. Start Saving for Baby’s Future Although it may seem like a far-off consideration, it’s never too early to begin saving for your baby’s future education and expenses. Opening a savings account or a 529 plan (if you’re in the U.S.) for college savings can help reduce the financial burden later on. Starting small can be effective—automatically transferring a small amount each month can add up over time. 5. Consider Parental Leave and Adjusting to a New Income Review your workplace benefits and understand how much parental leave is available to you and whether it is paid. Many parents opt to adjust their income expectations based on their leave time or transition to a single-income household. Consider how this may affect your financial plans and try to save in advance to cover the time when you may have a reduced income. 6. Prepare for Tax Changes A new baby can impact your taxes. In many cases, you can claim your child as a dependent, which may provide tax benefits such as the Child Tax Credit or dependent care credits. However, be sure to consult with a tax professional to understand all available deductions, credits, and tax strategies based on your specific circumstances. 7. Create a Will No one likes to think about worst-case scenarios, but it’s essential to have a will in place to protect your baby’s future. A will ensures that your child is cared for by someone you trust and that their assets are handled according to your wishes. It also allows you to designate guardianship and name trustees to manage any financial assets you might pass down to them. 8. Track Baby-Related Costs Once your baby arrives, it’s easy for expenses to start accumulating rapidly. Keep track of the costs for both essentials and extra items like toys, clothing, and family activities. This will help you better understand where your money is going and ensure you’re staying on track with your budget. There are apps available that can help track your spending and make budgeting easier. Conclusion Preparing financially for a baby can feel overwhelming, but breaking it down into manageable steps can ease the process. By assessing your budget, creating an emergency fund, adjusting your insurance, and saving for the future, you can confidently welcome your little one into the world. Financial readiness can reduce stress and help you focus on what truly matters—enjoying the special moments with your new baby. Sources:

Parenting Hub

Pregnancy Nutrition Myths: What’s Fact and What’s Fiction?

Pregnancy is an exciting yet overwhelming time, filled with advice from well-meaning family, friends, and social media. While proper nutrition is essential for both mother and baby, there are many myths surrounding what pregnant women should or shouldn’t eat. Let’s separate fact from fiction and ensure expecting moms make informed choices. Myth #1: You Need to Eat for Two Fiction: Many believe pregnancy requires double the food intake.Fact: While you need extra nutrients, excessive calorie intake can lead to unhealthy weight gain. The NHS recommends only about 300 extra calories per day in the second and third trimesters. Focus on nutrient-dense foods rather than increasing portion sizes unnecessarily. Myth #2: Avoid All Seafood Fiction: Many assume that all seafood is harmful during pregnancy.Fact: Certain fish like salmon, sardines, and trout are excellent sources of omega-3 fatty acids, crucial for the baby’s brain development. However, pregnant women should avoid high-mercury fish like shark, swordfish, and king mackerel. The FDA suggests eating 2-3 servings of low-mercury fish per week. Myth #3: No Caffeine Allowed Fiction: Some believe caffeine should be completely eliminated.Fact: While excessive caffeine can increase the risk of complications, moderate intake (200 mg per day, roughly one cup of coffee) is generally considered safe, according to the American College of Obstetricians and Gynaecologists (ACOG). Myth #4: Cravings Indicate Nutrient Deficiencies Fiction: Many think pregnancy cravings signal what your body needs.Fact: While some cravings may reflect minor deficiencies, they are more likely linked to hormonal changes. Instead of giving in to unhealthy cravings, try to opt for nutritious alternatives. Myth #5: Dairy Should Be Avoided Fiction: Some claim dairy causes excessive weight gain or allergies in the baby.Fact: Dairy is an excellent source of calcium and protein, essential for the baby’s bone development. Unless you have lactose intolerance or allergies, consuming dairy products like milk, cheese, and yogurt is beneficial. Myth #6: Spicy Food Can Induce Labor Fiction: Eating spicy food will trigger labor.Fact: No scientific evidence supports this claim. While spicy foods may cause heartburn or indigestion, they do not induce labor. Labor is triggered by hormonal and physiological changes rather than diet. Myth #7: Herbal Teas Are Always Safe Fiction: Many assume that all herbal teas are natural and safe.Fact: Some herbs can cause contractions or affect pregnancy. The American Pregnancy Association advises avoiding certain teas like chamomile, liquorice root, and raspberry leaf without consulting a healthcare provider. Stick to pregnancy-safe options like ginger or peppermint tea. Final Thoughts Proper nutrition is vital for a healthy pregnancy, but misinformation can lead to unnecessary restrictions or risky choices. Always consult with a healthcare provider or registered dietitian before making dietary changes. Sources:

Bonitas – innovation, life stages and quality care

Premature birth – what to expect

Expecting a baby is an exciting time of your life, and you want to make sure that you do as much as you can to make sure your new child is as healthy as possible. Premature birth is something you want to try to avoid or manage as carefully as possible. In many cases the cause is unknown, and according to The World Health Organisation, one in ten babies are born preterm. A birth is considered premature when a baby is born before the 37th week of pregnancy. The final few weeks in the womb are important to your baby’s full development, so being born prematurely can lead to longer hospital stays, short term, and long term complications. Why does it happen? Some of the more common risk factors which contribute to preterm births are having had a premature birth before, you’re pregnant with twins/multiples or you have issues with your uterus or cervix. However, often the cause of preterm birth often can’t be identified. Your health is also a factor that impacts on your likelihood to have your baby prematurely. Smoking during your pregnancy (which is not recommended), diabetes, high blood pressure (which can develop into preeclampsia) and being over or under weight are all potential premature birth causes. To try and avoid preterm birth you can talk to your doctor about any existing health issues, such as depression, diabetes or high blood pressure) before getting pregnant – this way you can manage any problems with a treatment plan. Waiting 12 months between pregnancies and eating healthy (making sure that you get the correct prenatal vitamins needed) can also help prevent premature birth. What if my baby is born preterm? If your baby is born prematurely they are at risk for long and short term complications. Many preterm babies lead completely healthy lives, however, the more premature and underdeveloped your baby is when they are born, the more likely they are to have issues. If your baby is born prematurely they may be put into a neonatal intensive care unit into an incubator. Some babies will spend longer in the unit than others, this all depends on when they are able to live without medical support.

Bonitas – innovation, life stages and quality care

Smoking and pregnancy – should I quit

If you’re an avid smoker you’re probably wondering if being pregnant means you should wave your smoking habits goodbye. Unfortunately, even if your health isn’t enough for you to stop, your baby’s health should be. What can happen to my baby if I keep smoking? Smoking during your pregnancy is harmful to your unborn baby. The chemicals in cigarettes are both damaging to you and your baby; nicotine and other harmful poisons increase the risk of health problems for unborn babies. Second hand smoke, vaping and e-cigarettes are all still damaging to your baby’s health and should also be avoided (or quitted). You may need to designate your house a non-smoking area, and ask any friends and colleges not to smoke around you. So what exactly does smoking do to your unborn baby? Smoking lowers the amount of oxygen available to your growing baby and nicotine damages the baby’s brain and lungs. Smoking can make it harder to conceive, and if you do fall pregnant, can lead to miscarriages or stillbirth. Babies can be born premature, have a low birth weight, or be born with birth defects.  Smoking during pregnancy can also affect your baby’s health after they are born, leading to cases of Sudden Infant Death Syndrome, asthma and other respiratory problems and infections. Help – I am really struggling to quit! Even if you have decided that quitting is in both of your best interests, this may be easier said than done. If you are pregnant already it is best to quit without using any medication, as this is healthier for you and your baby. You also won’t be able to transition to vaping or e-cigarettes, as these too, are harmful and usually contain nicotine, which is damaging to health. In order to quit for good, try avoid the triggers that make you want to smoke, and try find something else that you can do when the craving kicks in. Get the support of your family and friends, or join a stop-smoking group or self help plan. Whatever your plan is to stop, you can be sure that both you and your child’s health will benefit from it.

Parenting Hub

Building Your Newborn’s First Aid Kit with Love

When you become a parent, you quickly realise that preparation is key – whether it’s scheduling life around nap times, keeping nappies and wet wipes fully stocked, or having the right supplies ready to care for your little one when pain and fever strikes. Adding Panado® to your baby’s first aid kit gives you peace of mind, knowing gentle relief is on hand when it’s needed most. Baby First Aid Kit Essentials A Digital Thermometer Every first aid kit needs a digital thermometer. Most babies have a normal body temperature ranging from 36.5 °C to 38 °C.1a A fever occurs when their temperature goes above 38 °C.1b Fever in babies can be scary, so having a reliable way to check your tiny tot’s temperature is absolutely essential. A Nasal Aspirator  Since babies under six months old rely almost entirely on their noses to breathe, even a little congestion can make feeding and sleeping a challenge. While colds and infections can worsen congestion, your baby might have a stuffy nose even when they aren’t sick.2a Paired with saline nasal drops, a nasal aspirator gently clears stuffy noses, so your baby can breathe easy.2b  Nail Clippers  For everyday hygiene, include baby-safe nail clippers. Tiny nails grow faster than you’d think (at about 0.1 mm per day)3 and can be surprisingly sharp! Regular trimming helps prevent accidental scratches. Gauze, Bandages, And Antiseptic Cream  As your baby grows and begins exploring the world (and bumping into it), minor cuts and scrapes are bound to happen. Stock your kit with sterile gauze, hypoallergenic adhesive bandages, and mild antiseptic cream to clean and protect small wounds. Teething Gels and Powders  Teething typically starts around six months old4a, and can cause swollen gums, excessive drooling, a mild fever, irritability, crying, and disrupted sleep4b. Some teething gels can help numb sore gums4c. Panado®: Power To Fight Their Pain Colic is most common during the first six weeks of life and affects up to one in four newborns5a. The good news is it typically resolves on its own by the time a baby is three to four months old5b.  A baby’s immune system is still developing, which means they’re more likely to pick up infections6.  An essential item for your first aid kit would be paracetamol. Panado® soothes pain and fever and is fast-acting7, helping your baby bounce back to their happy, bubbly selves.  Panado® peppermint flavoured syrup8 – because it’s “mint to be” – is suitable from birth and is tartrazine, alcohol and sugar free.  Panado®’s paracetamol-based infant drops9 are suitable for babies from the age of 3 months. The calibrated dropper ensures that parents provide the correct amount of medication, based on the weight and age of their child. Panado®’s paediatric range also includes strawberry flavoured syrup10 which is as “berry nice” as it sounds.  Always administer using a medicine measure or a syringe. Do not exceed the recommended dose.  Dosage details can be found at https://panado.co.za/dosage-calculator/ and are calculated according to your child’s age and weight.   From those early days of snuggles and butterfly kisses, to your baby’s first tooth and wobbly steps, parents trust11 Panado® for fast7 pain relief when needed most.  After all, when your little one feels better, the whole world feels brighter.  Panado® products are available at Baby City, Pick n Pay, Checkers, including Hypers, Shoprite, Clicks, Dis-Chem, and Independent Pharmacies. For more information, visit https://panado.co.za/and join the conversations onFacebook. References are available from: https://panado.co.za/references/. For full prescribing information refer to the Professional Information approved by SAHPRA.  Adcock Ingram Limited. Co. Reg. No. 1949/034385/06. Private Bag X69, Bryanston, 2021, South Africa. Customer Care: 0860 ADCOCK / 232625. www.adcock.com. 14.01.20251000000898. January 2025.

Parenting Hub

Why You Need a Baby-Specific First Aid Kit

Babies have unique medical and safety needs compared to older children or adults. Their delicate skin, smaller bodies, and limited ability to communicate require specific items that are safe and appropriate for their age. Having a baby-specific first aid kit means you’re always prepared for common health concerns like fevers, teething discomfort, or minor injuries—and ready to act quickly in case of an emergency. Essential Items for Your Baby First Aid Kit 1. Thermometer 2. Infant Fever and Pain Reliever 3. Saline Nasal Spray and Bulb Syringe/Nasal Aspirator 4. Baby-Safe Antiseptic Cream or Ointment 5. Adhesive Bandages 6. Sterile Gauze Pads and Medical Tape 7. Tweezers 8. Baby Nail Clippers or Scissors 9. Digital Baby Scales (Optional) For Common Ailments 10. Teething Gel or Teething Rings 11. Diaper Rash Cream 12. Gas Relief Drops or Gripe Water 13. Oral Rehydration Solution (ORS) 14. Cool Gel Packs First Aid Tools 15. Baby-Safe Scissors 16. Instant Cold Pack 17. Small Flashlight 18. Medicine Syringe or Dropper Hygiene and Safety Supplies 19. Alcohol-Free Antiseptic Wipes 20. Hand Sanitiser 21. Cotton Balls or Swabs 22. Disposable Gloves Emergency Information Keep a small notebook or card in your kit with: Storing Your Baby First Aid Kit When to Restock or Update When to Call the Doctor Your first aid kit is for minor injuries and illnesses, but certain situations require professional care: Always trust your instincts and seek medical help if you’re unsure about your baby’s condition. Building a baby first aid kit ensures you’re always prepared for the unexpected. By assembling the right supplies and staying informed about your baby’s needs, you can handle minor emergencies with confidence and keep your little one safe and sound.

Parenting Hub

When Should You Introduce Solid Foods to Your Baby?

Introducing your baby to solid foods is an exciting milestone! It marks the beginning of a new chapter in your baby’s development and exploration of the world of flavours and textures. However, knowing when and how to start can feel overwhelming for many parents. Here’s a comprehensive guide to help you navigate this important stage confidently. When Is the Right Time to Introduce Solids? Most health experts, including the World Health Organisation (WHO) and the American Academy of Paediatrics (AAP), recommend starting solid foods around 6 months of age. However, every baby is different, and the readiness for solids can vary. Signs Your Baby Is Ready for Solids: Important: Always consult your paediatrician before starting solids, especially if your baby was born prematurely or has any medical concerns. The Role of Breast Milk or Formula Breast milk or formula remains your baby’s primary source of nutrition until their first birthday. Introducing solids at 6 months is meant to complement milk feeds, not replace them. Begin with small amounts of food, gradually increasing as your baby gets accustomed to eating. How to Introduce Solid Foods 1. Start with Single-Ingredient Foods 2. Experiment with Textures 3. Watch for Allergens Common allergens include eggs, peanuts, dairy, wheat, soy, fish, and shellfish. Introducing these early (around 6 months) in small, controlled amounts may reduce the risk of allergies. Always consult your paediatrician if your baby is at high risk for allergies. 4. Focus on VarietyExpose your baby to a wide range of fruits, vegetables, proteins, and grains to help them develop a diverse palate. Foods to Avoid at First While many foods are safe for babies, there are some you should avoid: Tips for a Smooth Transition to Solids Frequently Asked Questions 1. What if my baby doesn’t like a certain food?It’s common for babies to reject new foods initially. Offer the same food multiple times over a few days or weeks. It can take 10-15 tries before a baby accepts a new flavour! 2. How much food should I offer?Start with 1-2 teaspoons of food once a day and gradually increase the portion as your baby becomes more interested in eating. 3. Can I use store-bought baby food?Yes! Choose options with no added salt, sugar, or preservatives. Alternatively, you can make simple purees at home. 4. Should I offer water?Around 6 months, you can offer small amounts of water in a sippy cup during meals to help your baby learn to drink. A Journey of Discovery Introducing solid foods is an exciting and messy adventure! It’s a time for your baby to explore new tastes and textures while continuing to rely on milk for most of their nutrition. Be patient, go at your baby’s pace, and enjoy this milestone together. Remember, every baby develops differently. Trust your instincts and consult your paediatrician with any questions or concerns. The goal is to create a positive and stress-free experience for both you and your little one as you embark on this journey!

Parenting Hub

Pregnancy Superfoods: What to Eat for Baby’s Development

When you’re expecting, your baby’s growth and development depend on the nutrients you consume. A balanced diet during pregnancy doesn’t just keep you healthy—it helps build your baby’s brain, bones, organs, and more. By incorporating nutrient-dense “superfoods” into your meals, you can give your little one the best start in life. It’s important to remember that every pregnancy is unique. Always consult your doctor or a registered dietitian before making major changes to your diet, especially if you have food allergies, medical conditions, or dietary restrictions. Here’s a guide to the top pregnancy superfoods and how they support your baby’s development. 1. Leafy Greens: The Powerhouses of Nutrients Leafy greens like spinach, kale, and Swiss chard are loaded with essential vitamins and minerals. How to enjoy them: Add leafy greens to smoothies, soups, or salads. 2. Eggs: Nature’s Multivitamin Eggs are a versatile and affordable source of nutrition. How to enjoy them: Scramble them for breakfast, or add boiled eggs to salads and sandwiches. 3. Fatty Fish: The Brain-Boosting Food Fatty fish like salmon, sardines, and mackerel are packed with omega-3 fatty acids. Consult your doctor: Because of concerns about mercury in fish, always check with your doctor about safe consumption amounts. How to enjoy them: Bake or grill salmon for a healthy dinner. 4. Berries: Antioxidant-Rich Snacks Strawberries, blueberries, raspberries, and blackberries are not only delicious but also incredibly nutritious. How to enjoy them: Add berries to yogurt, oatmeal, or smoothies for a tasty treat. 5. Greek Yogurt: A Calcium Boost Greek yogurt is a creamy, protein-packed snack that’s perfect for pregnancy. How to enjoy it: Top Greek yogurt with fresh fruit, nuts, or a drizzle of honey. 6. Nuts and Seeds: Nutrient-Dense Snacks Almonds, walnuts, chia seeds, and flaxseeds are excellent sources of healthy fats and nutrients. How to enjoy them: Sprinkle seeds on salads or oatmeal, and snack on a handful of nuts. 7. Whole Grains: Sustained Energy Quinoa, brown rice, oats, and whole-grain bread provide lasting energy and important nutrients. How to enjoy them: Swap white rice for quinoa or enjoy oatmeal for breakfast. 8. Avocados: Healthy Fats for Growth Avocados are a creamy, versatile superfood loaded with nutrients. How to enjoy them: Spread avocado on toast, or add it to salads and smoothies. 9. Sweet Potatoes: A Beta-Carotene Boost Sweet potatoes are a delicious source of beta-carotene, a plant-based vitamin A. Consult your doctor: Excessive vitamin A can be harmful during pregnancy, so talk to your doctor about safe amounts. How to enjoy them: Bake sweet potato wedges or mash them as a side dish. 10. Beans and Lentils: Protein and Iron Powerhouses Chickpeas, black beans, lentils, and kidney beans are affordable and nutritious. How to enjoy them: Add beans to soups, stews, or salads, and try lentil-based curries or burgers. 11. Oranges and Citrus Fruits: Hydration and Vitamin C Oranges, lemons, and grapefruits are refreshing and nutrient-packed. How to enjoy them: Snack on fresh oranges or add lemon slices to water for a refreshing drink. 12. Water: The Unsung Hero While not technically a food, staying hydrated is just as important as eating well. How to enjoy it: Aim for 8-10 glasses a day, and flavour it with fruit or herbs if plain water feels boring. Tips for a Balanced Pregnancy Diet Final Thoughts A nutrient-rich diet during pregnancy isn’t just about physical health—it’s a way to nurture your baby’s development and set the stage for a healthy future. By focusing on these superfoods and consulting your doctor regularly, you can feel confident that you’re giving your little one everything they need to grow strong and healthy. Remember, balance and moderation are key. A mindful approach to nutrition—combined with your doctor’s guidance—will help make your pregnancy journey as smooth as possible.

Parenting Hub

The Ultimate Guide to Baby-Proofing Your Home

As your little one begins to crawl, walk, and explore the world around them, your home can quickly become a playground filled with potential hazards. Baby-proofing isn’t just about safety—it’s about creating an environment where your child can explore and grow without constant worry. With the right strategies, you can make your home a secure space while keeping it functional for the whole family. Here’s a step-by-step guide to help you baby-proof your home like a pro. 1. Start Early Babies grow fast, and before you know it, they’re on the move. Start baby-proofing when your child begins showing signs of mobility, such as rolling over or scooting. Preparing early ensures you’re ready when they start exploring. 2. Get Down to Their Level To spot potential hazards, get on your hands and knees and see the world from your baby’s perspective. Look for sharp edges, dangling cords, and small objects that could be choking hazards. This exercise will help you identify risks you might otherwise overlook. 3. Secure Furniture and Appliances As babies learn to pull themselves up, unsecured furniture and appliances can tip over and cause serious injuries. 4. Block Off Dangerous Areas Not every part of your home is baby-friendly, so use barriers to restrict access. 5. Protect Electrical Outlets and Cords Curious little fingers love exploring outlets and tugging on cords. 6. Cushion Sharp Corners and Edges Furniture with sharp corners can pose a risk for bumps and bruises. 7. Secure Cabinets and Drawers Cabinets and drawers often contain items that could be dangerous to babies. 8. Keep Small Objects Out of Reach Babies explore the world by putting things in their mouths, so it’s essential to eliminate choking hazards. 9. Baby-Proof Windows and Doors Windows and doors can pose a risk of falls or pinched fingers. 10. Safeguard Water Hazards Water can be one of the most dangerous elements in a home for babies. 11. Be Mindful of Small Details 12. Create a Safe Play Area Designate a specific area in your home for your baby to play and explore freely. 13. Prepare for Emergencies Even with the best baby-proofing efforts, accidents can happen. Be prepared by: 14. Regularly Update Your Efforts As your baby grows and develops new skills, their environment will need to change. Crawling babies and walking toddlers have different safety needs, so reassess your home regularly to address new hazards. Final Thoughts Baby-proofing your home is a vital step in keeping your child safe while encouraging their natural curiosity and exploration. By taking proactive steps to identify and address hazards, you can create a secure environment that allows your baby to thrive. Remember, baby-proofing isn’t a one-time task—it’s an ongoing process that evolves as your child grows. With patience, preparation, and a little creativity, you’ll have peace of mind knowing your home is a safe haven for your little one.

Bonitas – innovation, life stages and quality care

Neonatal jaundice, what is it and what happens if my baby is born with it?

Jaundice is a yellow discolouration of a baby’s eyes and skin and is fairly common in newborn babies. Although it may be alarming to you to see your newborn baby with a slightly yellowish tint, thankfully, most cases of jaundice are considered normal and will go away on their own. You may be wondering why your baby may be born with this condition, or what treatments are available if your little-one has jaundice – read on, we outline the causes and common treatments thereof.  Why would my baby have neonatal jaundice?  Babies are born with neonatal jaundice when they have excess levels of unconjugated bilirubin in their blood. Bilirubin is a yellowy substance which comes from the breakdown of red blood cells, however, baby’s livers sometimes can’t break this substance down fast enough, giving their eyes and skin a yellow tint.  When your baby is born they will be checked for jaundice, as high levels of bilirubin can lead to more serious problems. A baby is more likely to get neonatal jaundice if they are born premature, have a different blood type to their mother or are being breastfed. Babies who are breastfed can develop jaundice if they don’t get enough breastmilk, due to trouble feeding.  What happens if my baby has neonatal jaundice? If your baby has jaundice, this will typically be seen in the second or third day of being born.  Sometimes jaundice will go away on its own and other times it will need to be treated. If your baby is struggling to breastfeed it’s important that he be breastfed more often, or even receive formula as a supplement during this time.  Phototherapy (light therapy)  can also be used to help your baby. Light can turn the bilirubin into a form that can easily pass out the body. If the jaundice is very bad, your baby may receive a blood transfusion which will quickly lower bilirubin levels. 

Parenting Hub

What to Pack in Your Hospital Bag: A Complete Guide

As your due date approaches, packing your hospital bag is an exciting milestone that signals how close you are to meeting your little one. Having everything you need ready to go can make your hospital stay more comfortable and stress-free. To help you prepare, here’s a comprehensive guide on what to pack in your hospital bag for yourself, your baby, and your partner or support person. When Should You Pack Your Hospital Bag? It’s best to have your hospital bag ready by the 36th week of pregnancy, or earlier if you’re anticipating a high-risk pregnancy or a premature delivery. This ensures you’re prepared in case your baby decides to arrive earlier than expected. What to Pack for Mom Your comfort and recovery are priorities, so pack items that will help you feel at ease during labor and your postpartum stay. For Labor and Delivery For Recovery Optional Comfort Items What to Pack for Baby Your newborn won’t need much in those first few days, but these essentials will ensure they’re warm, clean, and ready to go home. What to Pack for Your Partner or Support Person Your partner or support person will also need a few items to stay comfortable and ready to assist you. Important Documents Make sure you have all necessary paperwork ready to go: Pro Tips for Packing Your Hospital Bag What Not to Bring Final Thoughts Packing your hospital bag is an important step in preparing for your baby’s arrival. By having everything you need ready and organised, you’ll feel more at ease and ready to focus on what really matters—welcoming your little one into the world. Use this checklist as a guide, and don’t forget to double-check your bag before heading out the door. Congratulations, and best wishes for your delivery day!

Parenting Hub

Milestone Checklist: What to Expect in Your Baby’s First Year

The first year of your baby’s life is filled with incredible milestones that showcase their rapid growth and development. While every child grows at their own pace, understanding the general milestones can help you track your baby’s progress and celebrate their achievements. Here’s a month-by-month guide to what you might expect in your baby’s exciting first year. Month 1: Adjusting to the World Month 2: Finding Their Voice Month 3: Growing Stronger Month 4: Rolling and Reaching Month 5: Exploring the World Month 6: Sitting Up Month 7: Becoming More Mobile Month 8: Discovering Independence Month 9: Expressing Themselves Month 10: Curious and Adventurous Month 11: Practicing Independence Month 12: Happy Birthday! Important Notes: By tracking these milestones, you’ll not only cherish your baby’s first-year accomplishments but also gain a deeper understanding of their unique personality and abilities. Enjoy the journey—it’s an unforgettable year!

Parenting Hub

Dealing with Morning Sickness: Tips and Remedies

Morning sickness is a common and often challenging symptom of pregnancy, affecting many women in the early stages. Despite its name, morning sickness can occur at any time of the day, and it’s characterised by nausea, vomiting, and a general sense of queasiness. While it can be tough to manage, there are several ways to ease the discomfort and help you navigate this challenging phase with more ease. Here are some tips and remedies for dealing with morning sickness: 1. Eat Small, Frequent Meals One of the most effective ways to manage morning sickness is to avoid letting your stomach become empty. Instead of eating three large meals, try eating smaller, more frequent meals throughout the day. This helps keep your blood sugar levels stable and can prevent nausea from escalating. Aim for a mix of carbohydrates, proteins, and healthy fats, and keep snacks like crackers, nuts, or fruit on hand to nibble on when you need them. 2. Stay Hydrated Dehydration can worsen nausea, so it’s essential to stay hydrated throughout the day. Sip on water, herbal teas, or clear broths regularly to maintain your fluid intake. If drinking large amounts of liquid feels overwhelming, try taking small sips or using ice chips to stay hydrated. Some women find that sipping ginger or peppermint tea can also help calm an upset stomach. 3. Try Ginger Ginger is a natural remedy that has been used for centuries to alleviate nausea and morning sickness. Whether you prefer ginger tea, ginger chews, or ginger ale, the root has anti-nausea properties that may provide relief. Research suggests that consuming ginger in moderation can be effective in reducing symptoms of nausea and vomiting during pregnancy. Always check with your healthcare provider before trying any new remedies. 4. Avoid Strong Smells Pregnancy can heighten your sense of smell, making strong odours even more intolerable. Certain smells—such as cooking food, perfumes, or cleaning products—can trigger or worsen nausea. To reduce exposure to unpleasant smells, try to stay in well-ventilated areas or use essential oils with calming scents, like lavender or citrus. You can also try wearing a mask if you need to be in a situation with strong odours. 5. Rest and Manage Stress Stress and fatigue can make morning sickness worse. Ensuring you get enough rest and taking time to relax can help alleviate some of the discomfort. Listen to your body and take naps or breaks when you need them. Incorporating stress-relieving activities such as deep breathing exercises, meditation, or gentle yoga may also help you feel more at ease. 6. Opt for Plain, Easy-to-Digest Foods Certain foods can be gentler on your stomach during episodes of morning sickness. Choose bland, easy-to-digest foods like plain crackers, rice, toast, or applesauce. Foods that are high in fat, spicy, or greasy can sometimes make nausea worse, so it’s a good idea to avoid them when you’re feeling queasy. Opt for simple foods that won’t upset your stomach but will still give you the nutrients you need. 7. Acupressure and Acupuncture Some women find relief from morning sickness through acupressure or acupuncture. Acupressure bands, which apply gentle pressure to specific points on the wrist, may help relieve nausea. While more research is needed, some studies suggest that acupuncture—performed by a trained practitioner—can also reduce symptoms of morning sickness by stimulating certain points in the body. Talk to your healthcare provider before trying acupuncture or acupressure. 8. Avoid Trigger Foods and Drinks Certain foods and drinks can exacerbate morning sickness. Caffeine, acidic beverages like orange juice, and overly greasy or spicy foods are common triggers. Keep track of which foods make you feel worse, and try to avoid them. If coffee or strong tea makes you nauseous, consider switching to decaf or herbal alternatives like ginger or peppermint tea. 9. Vitamin B6 Supplements Vitamin B6 has been shown to reduce the severity of morning sickness for some women. Many doctors recommend a B6 supplement to help manage nausea during pregnancy. It’s important to follow your doctor’s guidance regarding the appropriate dosage, as they can provide personalised advice based on your health and needs. 10. Consult Your Healthcare Provider If your morning sickness is severe or persistent, or if it interferes with your ability to eat, drink, or keep food down, it’s important to consult your healthcare provider. In some cases, severe morning sickness, known as hyperemesis gravidarum, may require medical treatment. Your doctor may recommend prescription medications, IV fluids, or other treatments to help manage symptoms and ensure you stay healthy. Conclusion Morning sickness can be an uncomfortable and trying symptom of pregnancy, but with the right strategies, it is manageable. By focusing on hydration, eating small meals, trying natural remedies like ginger, and avoiding triggers, you can reduce the discomfort associated with nausea. Most importantly, listen to your body and consult your healthcare provider if symptoms become severe or difficult to manage. Remember, morning sickness is usually temporary, and as your pregnancy progresses, it will likely subside.

Parenting Hub

How to Establish a Sleep Routine for Your Baby

One of the biggest challenges for new parents is helping their baby develop healthy sleep habits. A well-established sleep routine not only promotes your baby’s health and development but also provides you with much-needed rest. Here’s how to create a sleep routine that works for your little one: 1. Start Early (But Be Flexible) While newborns won’t have a structured sleep schedule due to their need to eat every few hours, you can gently introduce a bedtime routine as early as six to eight weeks. Consistency is key, but always adapt to your baby’s changing needs. 2. Recognise Sleep Cues Pay attention to your baby’s signals that they’re tired. These might include: 3. Set a Consistent Bedtime Establish a regular bedtime that works for your family’s schedule. Babies thrive on predictability, so aim to start the bedtime routine around the same time each evening. 4. Create a Relaxing Bedtime Routine Develop a soothing pre-sleep ritual to signal that it’s time to wind down. Some ideas include: 5. Teach Day vs. Night Help your baby distinguish between day and night by: 6. Encourage Self-Soothing By around 3-4 months, gently teach your baby to fall asleep on their own. Place them in their crib drowsy but awake, allowing them to learn self-soothing techniques like sucking their thumb or cuddling a soft toy (if age-appropriate). 7. Make the Sleep Environment Comfortable Ensure your baby’s sleep space is safe and inviting: 8. Be Consistent with Nap Times Daytime naps are essential for your baby’s development and nighttime sleep quality. Aim for regular nap times based on your baby’s age and wake windows. 9. Manage Night Wakings It’s normal for babies to wake during the night, especially in the first few months. Respond calmly and keep interactions minimal to avoid stimulating them. Over time, they’ll learn to sleep for longer stretches. 10. Be Patient and Adaptable Every baby is different, and their sleep patterns will change as they grow. Teething, growth spurts, or illness may disrupt routines, but consistency and patience will help re-establish healthy habits. Final Thoughts Establishing a sleep routine takes time and effort, but the rewards are well worth it. A well-rested baby is a happy baby—and happy parents make for a harmonious home. If you find that sleep struggles persist, consider consulting a paediatrician or sleep specialist for additional guidance. Sweet dreams to you and your little one! 🌙

Sanosan

The Magic of the First Touch: Why Skin-to-Skin Care Matters for Moms and Babies

There’s a special kind of magic in the first moments after a baby is born—a moment that many parents describe as pure, overwhelming love. But beyond the warm fuzzies, those initial skin-to-skin moments hold profound benefits for both mom and baby, creating a foundation for lifelong health and bonding. Skin-to-skin care, sometimes called “kangaroo care,” is the simple act of placing a newborn on their mother’s chest immediately after birth, both wrapped in warmth and love. According to health experts, this practice is not only heart-warming but also scientifically proven to benefit the baby’s physical and emotional development. Why Skin-to-Skin is Essential 1. Stabilising Baby’s Vital Signs When a baby is placed against their mother’s chest, something incredible happens. The baby’s heart rate, breathing, and temperature tend to stabilise. This is because a mother’s body acts as a natural incubator, helping the baby adjust gently to the outside world. 2. Boosting Immunity Skin-to-skin contact helps kickstart breastfeeding, which is essential for a baby’s immunity. “Colostrum, the first milk produced by mothers, is like liquid gold. It’s packed with antibodies that protect babies from infections,” says Sr Londe, an independent midwife consultant for Sanosan skincare.  3. Emotional Bonding For mothers, holding their baby skin-to-skin triggers the release of oxytocin, also known as the “love hormone.” This not only strengthens the bond between mom and baby but also reduces maternal stress and promotes feelings of well-being. 4. Supporting Breastfeeding Success Studies show that skin-to-skin care immediately after birth helps mothers start breastfeeding more easily and maintain it longer. This is because the close contact helps stimulate milk production and encourages the baby’s natural instinct to latch. In South Africa, where cultural practices often emphasise family and community, the idea of closeness and nurturing resonates deeply. Skin-to-skin care aligns beautifully with these values, encouraging a deeper connection between mother and baby from the very beginning. Moreover, healthcare providers in South Africa are increasingly advocating for skin-to-skin care in hospital and home-birth settings. This simple yet powerful practice is accessible to all parents and requires no special equipment—just love, warmth, and time. While moms play the primary role in skin-to-skin care, dads and other caregivers can also join in. Holding a baby skin-to-skin fosters bonding and reassures the baby, building emotional security in the process. As Sr Londe explains, “Babies thrive on connection. The more they feel safe, loved, and secure, the better their development will be. Skin-to-skin care is one of the easiest ways to provide that.” Even beyond the hospital, skin-to-skin care can be a regular part of parenting. Holding your baby close during feeding, quiet time, or after a bath can strengthen the bond you share while continuing to provide those emotional and physical benefits. In the end, the magic of the first touch is not just about a moment—it’s about setting the stage for a lifetime of connection, trust, and love. Whether you’re preparing to welcome a baby or reflecting on your parenting journey, remember the incredible power of skin-to-skin care. It’s a gift that costs nothing but gives so much, creating a lasting impact for both mom and baby. Supporting you on this journey is Sanosan baby and mum’s skincare range that has recently launched in Southern Africa. This skincare range truly cares for you and the planet – every product is designed to be as safe and gentle as possible for your baby. With over 35 years of expertise and a commitment to clinical excellence, Sanosan’s products are rigorously tested and certified under strict European regulations. They are free from parabens, silicones, paraffins, SLS / SLES and phenoxyethanol, and their eco-friendly formulas are 90% natural and use green electricity.  When creating their formulas, Sanosan pays the utmost attention to a high proportion of natural ingredients. They only use active ingredients that are specially tailored to your baby’s skin. Natural milk protein is the central ingredient in Sanosan and is especially nourishing for the skin. Precious substances like organic olive oil and organic olive extract complement these formulations. Sanosan stands for: healthy skin more than 90% natural ingredients biodegradable formulas responsible attitude towards our environment For more info visit https://sanosan.com  Follow Sanosan on: Facebook Instagram Sanosan is available from selected Babies R Us Stores and Clicks Baby and Online stores, amazon.co.za, takealot.com, Makro Online 

Parenting Hub

Understanding Baby Kicks: What’s Normal?

Feeling your baby’s first kicks is one of the most exciting milestones during pregnancy. As your little one grows and becomes more active in the womb, those first fluttering movements evolve into stronger, more noticeable kicks. However, if you’re a first-time parent, you may wonder: what’s normal when it comes to baby kicks? How often should you feel them? And when should you be concerned? Here’s everything you need to know about understanding baby kicks and what to expect throughout your pregnancy. What Are Baby Kicks? Baby kicks, or foetal movements, are the physical sensations that you feel when your baby moves inside the uterus. These movements can vary in type, intensity, and frequency, depending on your baby’s development and the stage of pregnancy. Initially, foetal movements can feel like light flutters, but as the baby grows, the kicks become more distinct and powerful. When Will You First Feel Baby Kicks? Foetal movements typically start around 18 to 20 weeks of pregnancy for first-time mothers. However, those who have been pregnant before may feel their baby’s movements earlier—sometimes as early as 16 weeks. For some women, these early movements can feel like gentle flutters or bubbles, while others might experience them as subtle taps. The sensation of baby kicks is often more noticeable if you’re lying down or sitting still, especially during quiet moments when you’re focused on the movement. What Do Baby Kicks Feel Like? Early movements may feel like: As your baby grows and their muscles become stronger, the kicks become more pronounced and feel like actual “kicks,” “punches,” or “rolls.” These movements can sometimes be strong enough to startle you or cause discomfort, especially if your baby is stretching or moving around a lot. When Should You Start Counting Baby Kicks? Between 24 and 28 weeks, your doctor or midwife may recommend that you begin counting your baby’s kicks. This process, known as foetal movement counting, helps track the baby’s well-being and ensures they are active. Many women begin to feel consistent movements by this stage, and keeping track of them can provide valuable insights into your baby’s health. There are various methods for counting kicks, but the most common way is to monitor how long it takes to feel ten movements. Here’s how you can do it: What’s Normal When It Comes to Baby Kicks? Normal patterns of foetal movement can vary widely, depending on factors such as the time of day, your activity level, and the position of the baby. However, most women experience a steady increase in movement as their pregnancy progresses. Here’s a general idea of what’s typical: What Could Cause Changes in Baby Kicks? While baby kicks are generally a sign of good health, it’s important to recognise changes in the pattern of movement. Here are some common factors that may influence how often you feel baby kicks: When to Contact Your Doctor While occasional changes in baby kicks are normal, a significant decrease in fetal movement can be a sign that something is wrong. Always trust your instincts—if you notice any of the following, contact your healthcare provider immediately: Changes in movement are not always a sign of something serious, but it’s always better to err on the side of caution and get checked. The Bottom Line Baby kicks are a sign of your little one’s health and well-being, and they’re one of the most exciting experiences of pregnancy. It’s normal for these movements to vary throughout your pregnancy in terms of frequency, intensity, and timing. By understanding what’s normal and learning how to track your baby’s movements, you’ll feel more confident and reassured during this special time. Always trust your instincts, and don’t hesitate to reach out to your healthcare provider if you have any concerns about your baby’s movements.

Parenting Hub

Bonding with Your Newborn: Skin-to-Skin and Beyond

Bonding with your newborn is one of the most rewarding experiences for new parents. It lays the foundation for a secure emotional connection and has a lasting impact on your baby’s development. While the concept of bonding is often associated with skin-to-skin contact, there are numerous ways to strengthen your connection with your little one. Here’s how you can nurture that special bond, starting from day one. The Power of Skin-to-Skin Contact Skin-to-skin contact, also known as kangaroo care, involves holding your baby close to your bare chest. This simple yet powerful practice has incredible benefits for both parent and baby. Benefits for Your Baby: Benefits for Parents: How to Practice Skin-to-Skin: Beyond Skin-to-Skin: Other Ways to Bond While skin-to-skin is a great starting point, bonding goes far beyond physical closeness. Here are other meaningful ways to connect with your newborn: 1. Eye Contact Babies are naturally drawn to faces, especially yours. Spend time gazing into your baby’s eyes during feeding, diaper changes, or cuddle time. This not only strengthens your bond but also helps with your baby’s visual development. 2. Gentle Touch Newborns thrive on physical touch. Gentle stroking, infant massage, and cuddles help your baby feel loved and secure. Use soothing motions and talk softly to make the experience even more comforting. 3. Talking and Singing Your baby loves the sound of your voice, even if they don’t understand the words yet. Narrate your day, sing lullabies, or read to them. These activities support language development and create a sense of familiarity. 4. Responding to Cues Pay attention to your baby’s cries, facial expressions, and body language. By responding promptly and lovingly, you build trust and show your baby they are cared for. 5. Feeding Time Whether you’re breastfeeding or bottle-feeding, feeding time is a perfect opportunity to bond. Hold your baby close, maintain eye contact, and talk to them during feeds. 6. Bath Time Bathing your baby can be a relaxing and playful bonding experience. Use gentle strokes and talk soothingly as you bathe them. This helps them feel secure and cared for. 7. Babywearing Using a baby carrier or wrap allows you to keep your baby close while freeing your hands for other tasks. Babywearing promotes bonding through physical closeness and helps soothe your little one. 8. Bedtime Routines Establishing a calming bedtime routine, such as rocking, singing, or reading a book, creates a sense of security and strengthens your connection. Overcoming Challenges in Bonding Bonding doesn’t always happen instantly, and that’s okay. Postpartum recovery, lack of sleep, or other challenges may make it harder to connect. Here are a few tips to navigate these moments: The Lifelong Impact of Bonding The bond you create with your newborn sets the stage for their emotional, social, and cognitive development. It fosters trust, self-esteem, and resilience as your baby grows. Remember, bonding isn’t about perfection—it’s about love, consistency, and being present in the little moments that make up your parenting journey. Whether it’s through skin-to-skin contact, soothing lullabies, or shared smiles, each interaction you have with your baby strengthens the incredible connection between you. Embrace the journey and cherish these precious early days—they pass by in the blink of an eye.

Bonitas – innovation, life stages and quality care

Breastfeeding tips

Symptoms you may experience when not breastfeeding The following information is to be used as a guide to and at the discretion of the end-user and should not replace a doctor’s opinion. Care for your breasts when not breastfeeding The following information is to be used as a guide to and at the discretion of the end-user and should not replace a doctor’s opinion. Try ice packs on your breast for 15-20 minutes at a time. If ice doesn’t help, try using a warm washcloth on your breasts. Wear a well-fitting bra that is not too tight. Let your baby nurse at your breasts for a few minutes at a time. Ask your doctor about methods to help release a small amount of milk from your breasts, which may relieve some of the discomfort. Contact your doctor if you have any questions or concerns or you develop chills, or a fever and your breasts are still uncomfortable and swollen after 1-2 days. Benefits of breastfeeding The following information is to be used as a guide to and at the discretion of the end-user and should not replace a doctor’s opinion. Breastfeeding is a skill and can take time to learn; don’t get discouraged if it’s not easy for you at first.  Breastfeeding educators are available and can be helpful in overcoming some of the hurdles. Choosing to breastfeed your child provides many benefits for both you and your baby. Some of these include: How to breastfeed The following information is to be used as a guide to and at the discretion of the end-user and should not replace a doctor’s opinion. Some simple tips on how to breastfeed: Keeping your breasts healthy The following information is to be used as a guide to and at the discretion of the end-user and should not replace a doctor’s opinion. Keeping your breasts healthy during breastfeeding is important.  Here are some things to watch for:

Parenting Hub

Pregnancy Fitness: Safe Exercises for Each Trimester

Staying active during pregnancy offers numerous benefits, including improved mood, better sleep, reduced pregnancy discomfort, and easier labor and recovery. However, as your body changes through each trimester, it’s important to adapt your fitness routine to ensure both your safety and your baby’s well-being. Here’s a guide to safe exercises for each trimester to help you stay healthy and strong. First Trimester: Laying the Foundation During the first trimester, you may feel more tired or experience nausea, so it’s essential to listen to your body. Focus on gentle, low-impact exercises to maintain your fitness levels without overexerting yourself. Safe Exercises: Tips: Second Trimester: Building Strength and Endurance The second trimester is often called the “honeymoon phase” of pregnancy, as energy levels typically increase, and nausea subsides. This is a great time to focus on building strength and endurance to support your growing baby and prepare for labor. Safe Exercises: Tips: Third Trimester: Preparing for Labor In the third trimester, your body is carrying more weight, and your energy levels might decrease. Focus on gentle exercises that promote relaxation, flexibility, and endurance as you prepare for childbirth. Safe Exercises: Tips: Exercises to Avoid During Pregnancy General Pregnancy Fitness Tips Staying active during pregnancy is one of the best things you can do for yourself and your baby. By choosing safe exercises tailored to each trimester, you can enjoy a healthier, more comfortable pregnancy and prepare your body for the demands of childbirth. Always listen to your body and seek guidance from your healthcare provider to ensure your fitness routine is safe and effective.

Parenting Hub

Introducing Solid Foods: What to Know for Your Baby’s First Bites

Introducing solid foods to your baby is a significant milestone, filled with excitement and a touch of uncertainty. Navigating this new phase requires a balance of patience, preparation, and understanding of your baby’s readiness. Here’s what you need to know to embark on this culinary adventure confidently. Recognising the Right Time Most paediatricians recommend introducing solid foods when your baby is around 6 months old. At this age, babies typically show signs of readiness, such as increased head control, interest in watching others eat, and a diminished tongue-thrust reflex that allows them to swallow food more easily. Every baby is different, so it’s crucial to observe your child’s cues rather than strictly adhering to a timeline. Choosing the First Foods The first foods you introduce should be rich in nutrients and gentle on your baby’s digestive system. Iron-fortified single-grain cereals, such as rice or oatmeal, are often the go-to first choice. Pureed vegetables like sweet potatoes and squash, as well as pureed fruits such as apples and pears, are also excellent choices. It’s essential to introduce one food at a time, waiting three to five days before trying a new one, to monitor any potential allergic reactions. Creating a Safe Eating Environment Safety is paramount when introducing solids. Ensure your baby is seated upright in a high chair to reduce the risk of choking. Use soft spoons and shallow bowls to help them learn to eat comfortably. Always supervise meals and avoid foods that can pose a choking hazard, such as whole grapes, nuts, and chunks of hard food. Encouraging Healthy Eating Habits Introducing solids is not just about nutrition; it’s also about establishing healthy eating habits. Offer a variety of foods to expose your baby to different tastes and textures. Avoid adding salt, sugar, or honey to your baby’s food, as their bodies are not ready for these additives. Allow them to explore self-feeding once they are comfortable with purees, which can foster independence and fine motor skills. Handling Common Concerns Parents may worry about food allergies or intolerances. Symptoms can include rashes, vomiting, or diarrhoea. If you suspect an allergic reaction, consult a paediatrician immediately. Introducing common allergens like peanuts, eggs, and dairy should be done carefully and under medical guidance if there is a family history of allergies. Embracing the Mess Expect messiness and enjoy the experience. Babies learn through touch and play, and mealtimes are no exception. Use bibs, wipeable mats, and patience to manage the inevitable spills and smears. Introducing solid foods is a journey of discovery for both you and your baby. By paying attention to readiness cues, choosing nutritious first foods, and maintaining a safe and supportive environment, you can make this transition enjoyable and beneficial for your little one’s growth and development.

Parenting Hub

Caring for Your Baby’s Skin During the Summer Heat

As the summer sun shines brightly, it’s the perfect time for families to enjoy the outdoors. However, the sweltering heat also demands extra care for your little one’s delicate skin. Babies and toddlers are more susceptible to heat and sun exposure, which can lead to a rash, sunburn, and other skin-related issues. Let’s explore some essential tips to keep your baby’s skin safe and healthy during the hot summer months. 1. Keep Hydrated: Ensuring your baby stays hydrated is crucial during summer. Offer them plenty of fluids, especially if you notice them sweating more than usual. Babies under six months should be exclusively breastfed or given formula, while toddlers can have water and milk. Proper hydration helps maintain skin moisture and prevents dryness or peeling. 2. Dress Appropriately: Choose lightweight, loose-fitting, and breathable clothing made from natural fibres like cotton. These materials allow air circulation and help keep your baby cool. Dress them in light colours to reflect heat, and always opt for a wide-brimmed hat to shield their face and neck from the sun. 3. Apply Baby-Friendly Sunscreen: For babies older than six months, sunscreen becomes your best ally. Use a broad-spectrum, water-resistant sunscreen with an SPF of at least 30. Apply it generously on exposed skin 30 minutes before going outside, and reapply every two hours or after swimming or sweating. For younger babies, try to keep them out of direct sunlight. 4. Create Shade: Whenever possible, keep your baby in the shade, especially during peak sun hours between 10 a.m. and 4 p.m. Use umbrellas, prams with a sunshade, or seek natural shade under trees. If you’re at the beach or park, consider a pop-up tent for extra protection. 5. Maintain a Gentle Skincare Routine: After a day outdoors, gently cleanse your baby’s skin with a mild, fragrance-free soap to remove sweat and sunscreen. Pat the skin dry and moisturise with a gentle, hypoallergenic lotion to maintain skin hydration. 6. Watch Out for Heat Rash: Heat rash is common in babies during hot weather. Keep an eye out for small red bumps or prickly irritation on your baby’s skin. To prevent and treat heat rash, dress your baby in cool clothing, keep the skin dry, and bathe them with lukewarm water. 7. Monitor for Signs of Sunburn: Despite your best efforts, sunburn might occur. Signs include redness, irritability, and warmth to the touch. In case of sunburn, bathe your baby in cool water, apply a soothing lotion, and keep them clothed in lightweight, long-sleeved garments to protect the skin. By taking these precautionary measures, you can ensure that your baby stays comfortable and protected during the summer heat. Remember, a little extra care goes a long way in keeping your little one happy and healthy as you enjoy the sun-drenched days together.

Parenting Hub

Spotlight on maternal anaemia – two out of three expectant SA mothers at risk

World Anaemia Day (February 13) and South Africa’s Pregnancy Awareness Week (February 10-16) both shine the light on anaemia, a global health challenge impacting many pregnant women and their newborns. According to the World Health Organisation (WHO), anaemia affects around 40% of pregnant women globally, with even higher rates in developing regions such as South Africa, where two out of three expectant mothers have low iron levels and one in three is anaemic. This entirely preventable condition continues to be one of the most significant contributors to maternal mortality and adverse pregnancy outcomes worldwide. Maternal anaemia is not just a pregnancy concern, it is a generational health crisis that can impact children’s development for years. However, with proper screening and treatment, adverse outcomes can be successfully prevented, explains Sister Karin Davidson of the Cape Town Infusion Centre, a facility that specialises in medical-grade iron infusions. “Anaemia affects the entire population due to factors like poor iron absorption, poor nutrition, blood loss through menstruation and physical challenges such as illness, pregnancy, rapid growth or sport. Research shows that up to 40% of women enter pregnancy without enough iron – and it’s an entirely preventable and treatable condition,” says Sr Davidson. Long-term impact on children Research has shown that children born to iron deficient or anaemic mothers often face numerous health challenges that can persist through early childhood into adulthood. “Babies store the iron they need for the first six months of their life in-utero and children born with low iron stores can take up to seven years to catch up,” says Sr Davidson.  Issues related to infants born to iron deficient or anaemic mothers include: Anaemia and pregnancy – the risks During pregnancy, blood volume increases by approximately 50%, requiring significantly more iron to produce additional red blood cells. Without adequate iron levels, both mother and baby face serious health risks, including: Detection and prevention Early detection of iron deficiency is crucial. Pregnant women should be aware of common symptoms, including: Regular blood tests during antenatal check-ups are essential for monitoring iron levels and Sr Davidson encourages pregnant patients to advocate for themselves by insisting on iron level screenings during their first pre-natal visit and again in each trimester of pregnancy. Treatment options A multi-faceted approach to treating maternal low iron and anaemia includes: 1.     Dietary modifications “It’s important to note that while nutritional intervention cannot raise low iron levels in an anaemic patient, consistent focus on iron-rich foods, especially in pregnancy can certainly play a part in preventing low iron levels developing in a pregnant patient,” says Sr Davidson. Increasing intake of iron-rich foods such as lean red meat, chicken and fish, dark leafy greens, legumes and iron-fortified cereal is recommended. 2.     Supplementation and medical-grade iron infusions Oral iron supplements are typically a first-line treatment, with healthcare providers prescribing appropriate dosages based on individual needs and iron store levels. For moderate to severe cases, or when oral supplements prove insufficient and when blood tests have shown low or insufficient iron stores, medical-grade iron infusions administered at a registered healthcare facility offer a highly effective solution. These infusions can rapidly restore iron levels, typically requiring only 1-2 treatments to achieve optimal results. “Early intervention and understanding that if you are hoping to conceive then healthy iron stores are essential for both mother and child, along with awareness of concerning symptoms that are sometimes considered normal pregnancy symptoms, are key to getting appropriate support and treatment. If you’re pregnant, insist your doctor checks your levels,” says Sr Davidson. Essential checklist for pregnant women As South Africa observes Pregnancy Awareness Week alongside World Anaemia Day, expectant mothers are urged to: The Cape Town Infusion Centre is committed to managing iron deficiency and anaemia, to empowering patients, and to improving lives. Please contact them if you would like any further information: www.capeinfusions.co.za

Vital Baby

Financial Tips for Expecting Parents

Pregnancy is a time of excitement and anticipation, but for many South African families, it also comes with unexpected financial pressures. While the joy of welcoming a new baby is priceless, the costs associated with pregnancy and early parenthood can quickly add up, leaving many parents feeling overwhelmed. Understanding the Costs From prenatal care to baby essentials, the expenses begin long before the baby arrives. Common hidden costs include: Tips for Managing Pregnancy-Related Expenses While the costs may seem daunting, there are ways to navigate them effectively. South African public health clinics offer free prenatal care for pregnant women, as well as baby wellness care post birth. Pregnancy checks include physical exams, all relevant testing, as well as medication if needed. As additional support, pregnant women can also register for MomConnect, a government health program that provides free maternal health messaging and access to a text-based help-desk.  The financial impact of pregnancy doesn’t stop at birth. Planning for postnatal expenses, such as daycare or additional medical costs, is equally important. Taking proactive steps during pregnancy and budgeting carefully, can set the stage for a more manageable financial journey as your family grows. Sr Londe, an independent midwife and Vital Baby’s trusted advisor who provides advice through monthly Instagram Live videos explains, “Becoming a parent is one of life’s most rewarding journeys, but it’s also a significant financial commitment. By planning carefully and making informed choices, families can focus on what truly matters—welcoming their new baby with peace of mind.”

Parenting Hub

Preparing for Your Baby: A Month-by-Month Checklist

Preparing for your baby’s arrival is a thrilling yet overwhelming experience. To help you navigate this exciting journey, here’s a month-by-month checklist to ensure you are well-prepared for your little one’s arrival. Month 1: Confirm Your Pregnancy Schedule a visit with your healthcare provider to confirm the pregnancy and discuss prenatal care. Start taking prenatal vitamins with folic acid. Begin researching different birthing options and decide on your preferred birth plan. Month 2: Begin Prenatal Care Attend your first prenatal appointment. Discuss family medical history with your healthcare provider. Start documenting your pregnancy journey in a journal. Month 3: Plan Your Finances Review your health insurance and understand maternity coverage. Create a budget for baby expenses such as diapers, clothes, and nursery items. Consider starting a baby savings fund. Month 4: Think about Maternity Leave Discuss maternity leave options with your employer. Consider childcare options if you plan to return to work. Start a light exercise routine suitable for pregnancy. Month 5: Prepare the Nursery Begin setting up the nursery with essential furniture like a crib and changing table. Choose a theme or colour scheme for the nursery. Create a baby registry for family and friends. Month 6: Attend a Prenatal Class Sign up for prenatal classes to learn about childbirth, breastfeeding, and newborn care. Start shopping for baby essentials like clothing and blankets. Plan a maternity photo shoot, if desired. Month 7: Pack Your Hospital Bag Pack a hospital bag with essentials such as clothes, toiletries, and snacks. Finalise your birth plan and discuss it with your healthcare provider. Attend a hospital tour to familiarise yourself with the delivery environment. Month 8: Install the Car Seat Purchase and install a car seat to ensure it fits properly. Finalise any last-minute nursery preparations. Consider a babymoon or a relaxing getaway before the baby arrives. Month 9: Relax and Prepare for Labour Keep your healthcare provider’s contact information handy in case of early labour. Focus on relaxation techniques to help manage labour. Ensure all necessary documents and birth plan details are ready for hospital admission. By following this month-by-month checklist, you can ease the stress of preparing for your new baby and focus on the joy of becoming a parent. Remember to enjoy this special time, and don’t hesitate to ask for help if needed. Happy parenting!

Parenting Hub

Understanding Your Baby’s Sleep Patterns: Tips for Parents

Navigating the world of infant sleep can be one of the most perplexing challenges for new parents. Babies have unique sleep patterns, different from adults, and understanding these can help parents establish healthy sleep routines for their little ones. The Basics of Infant Sleep Patterns Newborns sleep a lot—often between 14 to 17 hours a day—but not all at once. Their sleep is broken into short periods of about 2 to 4 hours, both during the day and night. This is because newborns have not yet developed a circadian rhythm, the internal body clock that regulates sleep and wakefulness. This rhythm begins to mature around 3 to 6 months, allowing babies to sleep for longer stretches, especially at night. Key Sleep Stages Infant sleep cycles are shorter than those of adults, usually lasting about 50 to 60 minutes. They consist of two main stages: active sleep (similar to REM sleep in adults) and quiet sleep (non-REM sleep). In active sleep, babies may move, make sounds, or even briefly wake up. Quiet sleep is deeper, and babies are unlikely to wake unless disturbed. Tips for Encouraging Healthy Sleep Habits Create a Consistent Bedtime Routine: Establishing a soothing bedtime routine can signal to your baby that it’s time to wind down. This could include activities like a warm bath, gentle massage, or reading a book. Ensure a Sleep-friendly Environment: Keep the room dark, quiet, and at a comfortable temperature. Consider using white noise machines to drown out background noises that might wake the baby. Encourage Day-Night Differentiation: Help your baby distinguish between day and night by keeping daytime feeds and play more interactive, and nighttime feeds calm and quiet. Practice Safe Sleep Guidelines: Babies should sleep on their backs in a crib without loose bedding or toys to reduce the risk of Sudden Infant Death Syndrome (SIDS). Be Patient and Flexible: It’s normal for babies to have irregular sleep patterns initially. Adapt to their needs, and remember that these patterns will evolve as they grow. Understanding Sleep Regressions Parents often notice changes in sleep patterns around major developmental milestones, commonly referred to as sleep regressions. These usually occur at around 4 months, 8-10 months, and 18 months. While this can be a challenging period, it’s typically temporary and often resolves within a few weeks. Seeking Professional Advice If your baby consistently has difficulty sleeping or if you have concerns about their sleep patterns, consulting with a paediatrician or a sleep specialist can provide tailored advice and reassurance. By understanding your baby’s sleep patterns and implementing these tips, you can help create a comforting environment that fosters healthy sleep habits, benefiting both your child and your family’s overall well-being.

Scroll to Top