Yummy Recipes…
Squish

Best finger food recipes for babies

Once your baby is accustomed to purees you can start introducing finger foods, usually at around 6 to 8 months. Finger foods are an important part of your child’s food journey, helping them develop biting and chewing skills and developing their coordination and motor skills.   Try these recipes. CREAM CHEESE DIP Little ones love dipping! This dip is super versatile – use Squish 100% Fruit Puree if you’ll be serving it with fruit slices, or add Squish 100% Veg Puree if you’re opting for savoury. Make this dip using any already open Squish 100% Fruit or Veg pouches you have in the fridge – feel free to mix and match flavours. Squish 100% Fruit and Veg Puree pouches come with a resealable lid, which cuts back on food waste when you are introducing new tastes and textures to your baby, and just want to try a small amount at a time. Ingredients ½ cup plain cream cheese  ½ pouch of Squish 100% Fruit or Veg Puree  Lightly steamed vegetable batons or slices of apple or pear Method Place cream cheese in a bowl and add your child’s favourite Squish 100% Fruit or Vegetable Puree. Stir well to blended.  Finger food tip: Cutting food into wedges or batons is best. Make them around 7cm long so that your baby can hold in their fist. It is essential to steam or roast crunchy vegetables so that they can’t break into large chunks and become a choking hazard.  SWEET POTATO PANCAKES Sweet potatoes are packed with beta-carotene and vitamin C and their natural sweetness makes them an excellent choice as your baby gets used to new flavours. These pancakes are made using a pouch of Squish 100% Sweet Potato, Apple and Cinnamon Puree. They freeze well, so you can have them easily on hand when you need a tasty meal for your little one. Squish 100% Fruit and Veg Purees are made using quality fresh fruit and veg and are free from nasties like preservatives, flavourants and colourants.  Ingredients: 160 g (1 cup) cake flour 5 g (1 tsp) baking powder 2 eggs 125 ml (½ cup) milk (you can switch this out for breastmilk or formula) 1 x 110 ml Squish 100% Sweet Potato, Apple and Cinnamon Puree 15 ml (1 Tbsp) oil for frying Method: Sift together flour and baking powder. Whisk together eggs, milk and Squish Puree. Whisk the Squish mixture into the dry ingredients and beat to a smooth, thick batter. Heat the oil over a very low heat in a non-stick frying pan. Add spoons of the batter and shape into circles. Cook until bubbles form on the surface of the pancake, then flip over and cook on the other side until the pancake is firm to the touch. Repeat with remaining batter. Finger food tip: Sometimes little ones can ‘store’ food in their mouths. At the end of mealtimes give their mouth a quick check to see they have swallowed all of their food. VEGGIE-LOADED SCRAMBLED EGG From around six months it is safe to introduce eggs into your child’s diet. Although you might not think of scrambled eggs as finger food, your little one with love picking up the bits of egg and eating it. Just make sure when you’re scrambling that you don’t break the egg up into pieces that are too small. This scrambled egg has Squish 100% Veg Puree added to it – we used Squish 100% Mixed Veg Puree, but you could try different flavours too, including Butternut + Carrot or Pear + Sweet Potato. Serve with toast cut into fingers.  Ingredients 2 eggs 50 ml (½ pouch) Squish 100% Mixed Vegetable Puree (or any flavour you please) 45 ml (3 Tbsp) cheddar cheese, grated Method Crack the eggs into a bowl and whisk. Add Squish Puree and mix well.  Melt a blob of butter in a non-stick pan over medium heat. Add the egg and puree mix and cook, stirring, until just cooked. Stir in the cheese.  Finger food tip: When your baby first starts on finger foods you need to ensure the food is soft. Your baby should be able to squash the food between their fingers. 

RediscoverDairy

Cooking with Dairy – Less waste and more goodness

Milk, maas, cheese and yoghurt are frequently essential components of our family meals, adding not just flavour and texture but high nutritional value.  Dairy offers us a nutrient-dense option packing a punch with high-quality protein well-balanced with carbohydrate and fat, as well as important nutrients such as calcium, phosphorus, potassium and vitamins.  From young to old, dairy offers benefits to every family member.   When it comes to planning meals and managing the monthly food budget, dairy products also offer incredible flexibility and versatility.  Dairy can literally feature in any meal of the day – from yoghurt and fruit at breakfast, the cheese in a lunchbox sandwich to the heart-warming lasagne for family dinner.  Dairy can be used to enhance the nutritional value of a meal or snack, as well as improve the flavour and texture of a dish. Getting more from dairy, while avoiding food waste It helps to keep track of the ‘use-by’ dates on dairy products.  Many dairy products such as milk, yoghurt and hard cheeses freeze well, so, if it looks like there is going to be a surplus, divide into portions and freeze beforehand.  In these tough economic times, when we are trying hard to make the budget stretch, it helps to have some tips for making good use of leftover milk and other dairy, for instance: To save costs substitute milk for cream in soups and sauces. Add leftover or slightly soured milk to other soup and sauce recipes, as well as to your stock for risotto for a creamier result. Use any surplus of milk to bake bread, muffins, pancakes or cake.  It can also be used for dessert in a custard sauce or sago pudding or treating the kids to a cup of warm milk before bed. Turn a cup of leftover milk into a buttermilk substitute by adding it to a teaspoon of white vinegar and lemon juice.  Stir gently and let it stand before use. When it comes to leftover hard cheeses such as cheddar and gouda, cut off any mould that has developed, about one centimetre deep, and still use the remainder. Don’t discard the rinds of hard cheeses such as parmesan and pecorino.  Instead add them to soups and stocks while they cook.  They add a delicious umami flavour and slightly thicken soups and sauces.  Remove the remaining rinds before serving. Smart hacks for cooking with dairy Dairy such as yoghurt, cream, milk, crème fraiche and full-fat cream cheese should be added to sauces, soups and other dishes over a low heat and gently stirred in.  Dairy-based sauces such as a bechamel, cheese or custard should similarly be prepared over low to moderate heat, and boiling should be avoided. Yogurt, milk, cream and sour cream can benefit from a touch of flour during cooking to ensure that it doesn’t separate into curds and whey. Maas, buttermilk and yoghurt can all be used to tenderise meat and chicken.  Lactic acid in dairy helps to soften inexpensive cuts of meat giving you a more succulent result.  Marinate meat and chicken with dairy overnight or for a couple of hours in a covered dish kept in the fridge.  Dairy-marinated chicken is excellent for braaing, potjies, frying and oven-baking. Yoghurt is an excellent addition to soups, stews, sauces and curries.  Fold it into the dish gently over a low heat to maintain its rich and creamy consistency. Swop buttermilk or maas for milk in recipes for omelettes, flapjacks and pancakes for a fluffier result. To prevent your veggie quiche from turning out too watery, sprinkle a little flour over the veggies and then replace all or half the milk with cream, maas or double-cream yoghurt. Use yoghurt as a substitute for oil or mayonnaise in dips, salad dressings and sauces. Yoghurt is ideal for freezing and makes excellent frozen lollies for kids and yoghurt bars for the whole family. Swop buttermilk or maas for coconut milk in curry recipes for a creamier, flavourful result. Here are some Rediscover Dairy recipes that are perfect for cooking with maas, using left over milk, using dairy in salad dressings and baking with dairy: Amasi Pot Bread  Buttermilk Ranch Dressing Citrus Baked Sago Pudding Creamy Amasi Baby Marrow Soup For more dairy ideas join the Rediscover Dairy Facebook page: www.facebook.com/RediscoverDAIRY

Squish

Goodness-packed lunchbox fillers

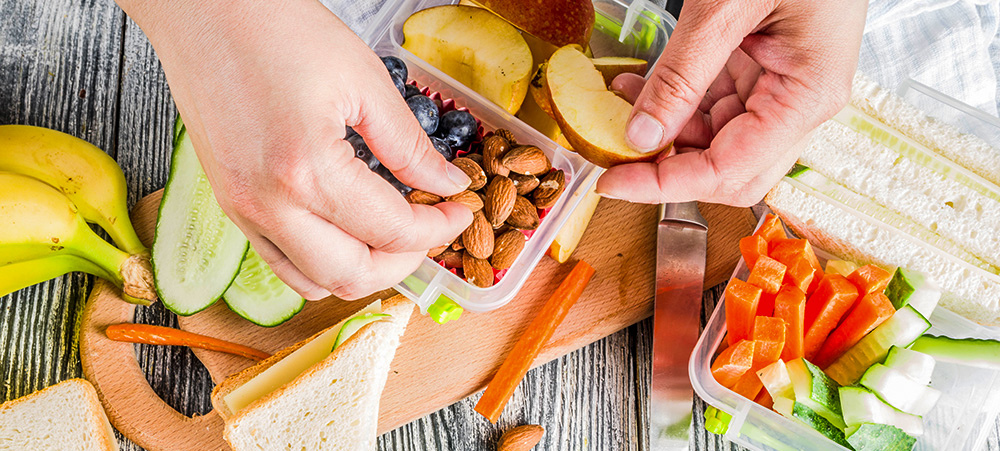
A nutritious and delicious lunchbox is essential to see your little one through the day. These quick and easy prep-ahead snacks are packed with Squish goodness and will take the hassle out of filling your child’s lunchbox every morning. Add a Squish 100% Pressed Juice box to their lunch bag to help keep your toddler hydrated as they go about their busy day. SQUISH BAKED BREAKFAST BARSSQUISH BAKED BREAKFAST BARS These breakfast bars store really well in a sealed container, which means if you bake a batch on the weekend, they should see you through the week. We’ve used Summer Berries in this recipe, but it works just as well with any of the many Squish flavours. Try Pear + Prune; Pear, Butternut, Yoghurt + Mango with Cinnamon; Apple + Guava; or Fruit Salad. Squish 100% Fruit and Veg Purees are made used quality ingredients and are free from preservatives, flavourants and colourants. Ingredients 1 x 110 ml Squish 100% Summer Berries Puree 750 ml (3 C) quick oats 125 ml (½ C) sugar 2.5 ml (½ tsp) salt 5 ml (1 tsp) baking powder 5 ml (1 tsp) ground cinnamon 125 ml (½ C) butter, melted 2 eggs Method Place the dry ingredients into a large bowl. Mix together the puree, butter and eggs. Add the puree mixture to the dry ingredients and stir until well blended. Line a baking tray with baking paper and spoon in mixture. Flatten with the back of a spoon. Bake in an oven that has been preheated to 180°C for 25 minutes or until firm to the touch. Leave to cool slightly then cut into fingers.  TIP: These breakfast bars are also delicious crumbled over some natural yoghurt and topped with Squish 100% Fruit Puree.  SQUISH FRUIT AND SPICE LOAF This moist tea cake stores well in the fridge so you can simply slice off as you need. The loaf is packed with grated carrot too, which is high in fibre, Vitamin A and beta-carotene. Ingredients 1 x 110 ml Squish 100% Pear, Butternut, Yoghurt + Mango with Cinnamon Puree  125 ml (½ C) Squish 100% Apple Juice 440 ml (1¾ C) cake flour 250 ml (1 C) sugar 5 ml (1 tsp) cinnamon 2.5 ml (½ tsp) baking powder 5 ml (1 tsp) bicarbonate of soda 125 ml (½ C) grated carrot 2 eggs 125 ml (½ C) sunflower oil Method Sift the flour, sugar, cinnamon, baking powder and bicarbonate of soda into a large bowl. Add the grated carrot. Mix together the eggs, oil, juice and puree. Add to the dry ingredients and beat well to mix. Pour the batter into a loaf pan that has been sprayed with non-stick spray. Bake in an oven preheated to 180°C for 35 minutes or until the loaf is well risen and a wooden skewer inserted into the middle comes out clean. Turn out and leave to cool. TIP: Use a frozen Squish 100% Pressed Fruit Juice box as a lunchbox cooler. Your child can then enjoy it later in the day once it has melted. CHEESY VEG BALLS These tasty little balls are so moreish, and they’re packed full of healthy veg! They’re a great way to use up half-empty Squish 100% Veg Purees you might have in your fridge – just make the quantity up to 110ml. All Squish Puree pouches come with a resealable screw-on lid, helping you cut back on food waste. Just use what you need, then pop in the fridge for later.  Ingredients 1 cup cheese  1 x 110ml Squish 100% Mixed Veg Puree (or any flavour you please) ¼ small onion, finely grated 2 cups breadcrumbs (simply put several slices of bread into your processor and blitz) ½ cup wholewheat flour 2-3 large courgettes, finely grated 2 large carrots, finely grated ½ clove garlic grated, finely grated 2 Tbsp olive oil/coconut oil 1 tsp dried herbs Method Combine all the ingredients then leave to rest for 20 minutes. Roll into small balls. Place on a baking tray lined with baking paper and bake in a preheated oven at 180 °C for 20-25 minutes.  For a dipping sauce, simply mix some full-cream plain yoghurt with Squish 100% Veg Puree. TIP: These can also be cooked in an air-fryer – 10 minutes tops. • Looking for more toddler-friendly lunchbox inspiration? Click here.

Squish

Turn leftovers into tasty toddler suppers

With a little culinary creativity, last night’sleftovers can be transformed into a quick and easy supper for your little one. These recipes will help you make tasty suppers in a flash – and help you cut back on food waste (and your grocery spend) too. It’s a win-win for everyone! CREAMY TUNA PIE This dinner is so delicious and easy, it is worth cooking a little extra mash each time you make it so that you have leftovers for this toddler-friendly fish pie. We used Squish 100% Mixed Vegetable Puree, but it will be as yummy with Squish 100% Butternut + Carrot. Squish 100% Fruit and Veg Purees allow you to conveniently add natural goodness to your toddler’s mealtimes. They’re made using quality fresh fruit and veg and contain no preservatives, colourants or flavouring, so they’re as good as homemade, just minus the fuss! Ingredients 1 cup mashed potato 1 x 110 ml Squish 100% Mixed Vegetable Puree 1 x tin tuna, drained 2 Tbsp milk 1 Tbsp grated cheddar, for topping Method Stir drained tuna, and Squish Puree into leftover mashed potato, mixing gently. Add milk to make the mixture more creamy. Place mixture in ramekins and top with grated cheese. Bake in the oven at 180° for around 15 minutes until heated through. TIP: Got a little leftover cooked chicken in the fridge too? Switch the tuna for shredded chicken and follow the same method. VEGGIE SAUCE Leftover cooked pasta loves this sauce – and so does mash! This is also a great way to use up the leftover Squish 100% Fruit and Veg Purees you may have in your fridge too. You can use a mixture of them to make up the required amount – this recipe is forgiving so you could use a little more or a little less too. All Squish Purees come with a convenient resealable screw-on lid, so you don’t need to waste a drop. Just use what you need then pop it back in the fridge for later. Ingredients 2 Tbsp olive oil 1 medium onion, finely chopped 1 clove garlic, crushed 1 x 410 g can Rhodes Quality Chopped & Peeled Tomatoes 1 x 110ml Squish 100% Butternut + Carrot Salt and pepper 2 Tbsp basil leaves, finely chopped Method Heat the oil in a medium saucepan. Add the onions and fry until softened. Add the garlic and fry for a few minutes more. Add tomatoes and Squish Puree. Simmer over low heat for 15 minutes or until thickened. Remove from the heat, season to taste and stir in the fresh basil. TIP: This sauce freezes well. Make a batch and divide into meal-size portions so you can just grab out of the freezer and use when needed. CHICKEN AND VEG RICE The convenience of Squish 100% Fruit and Veg Puree means you can always serve your child a nutritious meal, no matter how little time you have – especially when you have other tasty leftovers on hand too! This recipe uses cooked rice and chicken.  Ingredients 1 cup cooked rice 100g chicken, shredded 1 x 110 ml pouch Squish 100% Apple, Sweet Potato + Sweetcorn Method Heat a small saucepan over medium heat, adding a dollop of butter. Add rice and chicken and fry briefly. Add Squish Puree and continue stirring until heated through.  TIP: Having ready-cooked chicken breasts in your fridge is the key to easy suppers. Steam a batch on Sunday night so you’re prepped for the week. You can add to leftover rice, mash or pasta and stir through a pouch of Squish 100% Veg Puree.  

Squish

Nutritious packed snacks and lunches for a day out with your toddler

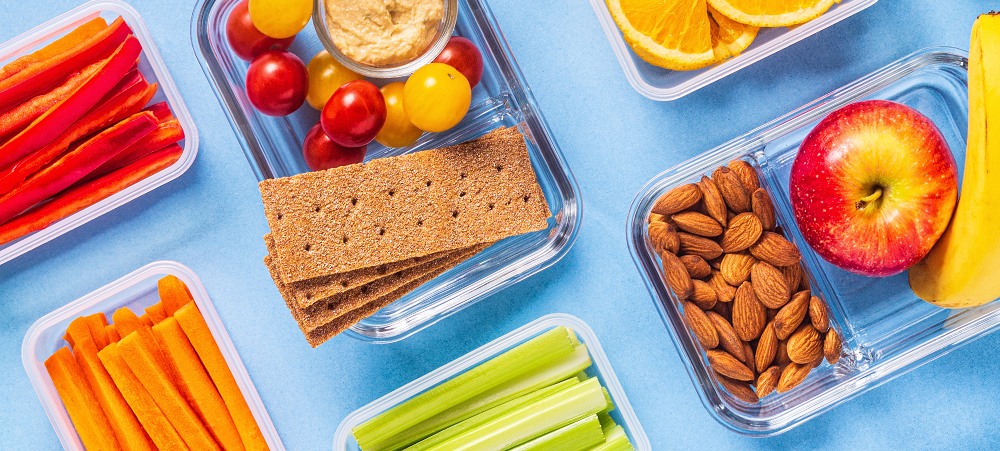
With a little careful planning – and an extra change of clothes! – heading off for a day out with your toddler in tow needn’t be daunting. Packing a variety of nutritious single-serve snacks and treats is essential to keep hunger at bay. These recipes are tasty and packed full of natural goodness – your little one will love them! FRUIT CRUNCHIES These treats are full of sweet fruit which means less cane sugar. We used Squish 100% Apple Fruit Puree in the recipe, but you can switch it for any flavour you choose, or use a combination of leftover Squish Purees from your fridge. All Squish 100% Fruit and Veg Purees have a screw-on lid, which means you can just pop the lid back on and save leftovers for later.  Ingredients: 230 g (1 cup) rolled oats 60 g (½ cup) desiccated coconut or ground almonds 125 g (¾ cup) cake flour 2.5 ml (½ tsp) baking powder 1 ml (¼ tsp) bicarbonate of soda 60 g (⅓ cup) dried apricots, finely chopped 65 g (¼ cup) butter 55 g (¼ cup) brown sugar 1 x 110 ml Squish 100% Apple Fruit Puree Method: Place the oats, coconut (or nuts) and cake flour into a bowl and stir to mix. Add the baking powder and bicarbonate of soda. Add the apricots. In a small saucepan melt the butter and the sugar together. Whisk in the Squish Puree and leave to cool. Add the apple mixture to the dry ingredients and stir well until evenly blended. Press the mixture into a baking pan that has been sprayed with non-stick spray and lined with baking paper. Bake in an oven that has been preheated to 160°C for 30 minutes or until golden brown. Remove from the oven and slice into bars in the pan. Leave to cool. TIP: Use a frozen Squish 100% Pressed Fruit Juice as an ‘ice pack’ in your cooler bag. Your little one can drink it later in the day once it has melted. CREAM CHEESE DIP AND CRUDITÉS This snack is so quick and easy to make and travels well. Plus, it provides a perfect combo of protein, dairy and healthy fruit and veg. Squish 100% Fruit and Veg Purees are made from quality fresh fruit and veg and are free from preservatives, colourants and flavouring, which means they’re just like homemade. And there is no added sugar or starch. Ingredients ½ cup plain cream cheese  ½ pouch of Squish 100% Fruit and Veg Puree  Fresh veggies or fruit, for dipping. Method Place cream cheese in a bowl and add your child’s favourite Squish 100% Fruit + Vegetable Puree. Stir well to blended. Serve with washed and cut fruit and vegetables. TIP: Switch the cream cheese for cottage cheese for a different taste and texture.  POTATO POPS These filling and delicious pops are mess-free and easy to serve. You can switch the regular potatoes for sweet potato if you like.  Ingredient 500 ml (2 cups) mashed potato 1 x 110 ml Squish 100% Veg Butternut + Carrot Puree  250 ml (1 cup) grated cheddar cheese 1 egg 295 ml (1 cup + 3 Tbsp) breadcrumbs salt and freshly cracked black pepper 30 ml (2 Tbsp) sunflower oil Method In a large bowl, combine the mash, Squish Puree and cheese. Add the egg and 45 ml (3 Tbsp) of breadcrumbs and mix well. Season to taste. Shape into balls and roll in breadcrumbs. Heat the oil in a non-stick frying pan. Fry the potato pops in batches for 3 to 4 minutes until golden brown. These can also be cooked on a baking tray in the oven at 180°C for 15 minutes.  TIP: These pops freeze well. Make a double batch and keep a stash in the freezer for lunchbox fillers.  For more delicious delicious toddler-friendly recipes, visit www.squish.co.za

Squish

Veggie-loaded lunchbox fillers

On busy mornings the last thing you want to be stressing about is what you’re going to put in your little one’s lunchbox. These simple recipes can be prepped ahead so that you always have snacks packed with natural goodness ready to go.  CHEESY VEG BALLS These little balls of deliciousness are filled with veggies, including baby marrows, carrots, and Squish 100% Veg Puree – you can choose whichever flavour you like or use up your leftover Squish pouches. Our pouches come with resealable screw-on lids, making them super-convenient and cutting back on waste. You can just use what you need, then pop the leftovers back in the fridge to use later. These veggie balls freeze well, so you can make ahead and freeze then just grab what you need each day for your child’s lunchbox. Ingredients 1 cup cheese  1 x 110ml Squish 100% Veg Puree of your choice  ¼ small onion, finely grated 2 cups breadcrumbs (simply put 3 or 4 slices of bread into your processor and blitz) ½ cup wholewheat flour 2-3 large baby marrows, finely grated 2 large carrots, finely grated ½ clove garlic, finely grated 2 tablespoons olive oil or coconut oil 1 teaspoon dried herbs Method Combine all the ingredients and let the mixture rest for 20 minutes. Roll into small balls. Place on a baking tray lined with baking paper and bake in a preheated oven at 180°C for 20-25 minutes. (If you have an Air-fryer, 10 minutes tops.) For a dipping sauce, mix some full-cream plain yoghurt with a little Squish Veg Puree. TIP: Double the recipe. If you have older children, they’ll love these in their lunchbox too. Just roll up in a wrap or pita. BEANY DIP Beans are an excellent source of protein and are packed with calcium, potassium, magnesium, folate, iron, and zinc. In other words, they’re an excellent addition to your child’s diet. We used Squish 100% Pear + Sweet Potato Puree in this recipe, but you can switch up the flavour by picking a different Squish Puree flavour, like Apple, Beetroot + Guava or Butternut + Carrot.  Remember, Squish 100% Fruit and Veg Purees are completely free of added nasties like flavourants, colourants and preservatives – and there is no added cane sugar or starch. Pack along with mini pitas or fresh veggie sticks. Little ones always enjoy dipping!  Ingredients 1 x 410g can of Rhodes Quality Butter Beans  ½ clove of garlic  1 x 110ml Squish 100% Pear + Sweet Potato Puree  1 tbsp fresh herbs of your choice and a pinch of salt Method Drain butter beans and place into a food processor – or you can use a stick blender.  Add garlic and Squish Puree. Add fresh herbs and a little salt. Puree until well blended. TIP: Keep leftover dip in a well-sealed container in the fridge and use within 3-4 days. FRUIT AND SPICE LOAF It is always nice to include a ‘treat’ in your toddler’s lunchbox, but that doesn’t mean you need to rely on shop bought snacks which are often full of preservatives and other additives. This home-baked loaf is bulked up with grated carrots – which are high in fibre, Vitamin A, and beta-carotene – and Squish 100% Pear, Butternut Yoghurt + Mango with Cinnamon Puree. It also contains a box of Squish 100% Apple Juice. Squish juices come in four flavours and are made from top quality 100% pressed fruit and vegetables and are preservative free. Remember to put one in your child’s lunchbox too, to keep them hydrated during their school day. Ingredients 1 x 110 ml Squish 100% Pear, Butternut, Yoghurt + Mango with Cinnamon Puree  125 ml (½ C) Squish 100% Apple Juice 440 ml (1¾ C) cake flour 250 ml (1 C) sugar 5 ml (1 tsp) cinnamon 2.5 ml (½ tsp) baking powder 5 ml (1 tsp) bicarbonate of soda 125 ml (½ C) grated carrot 2 eggs 125 ml (½ C) sunflower oil Method Sift the flour, sugar, cinnamon, baking powder and bicarbonate of soda into a large bowl. Add the grated carrots. Mix together the eggs, oil, Squish Juice, and the Squish Puree. Add to the dry ingredients and beat well to mix. Pour the batter into a loaf pan that has been sprayed with non-stick spray. Bake in an oven preheated to 180°C for 35 minutes or until the loaf is well risen and a wooden skewer inserted into the middle comes out clean. Turn out and leave to cool. TIP: This loaf cake is lovely and moist and stores well in the fridge so you can simply slice off as you need.

RediscoverDairy

Add “Cheesy Breakfast Cups with Amasi” to your weekly meal plan

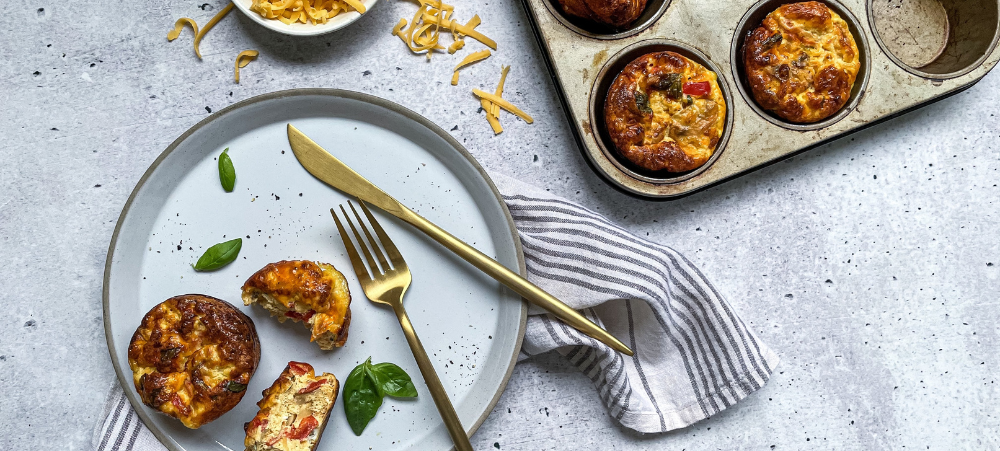
Planning ahead for the week’s breakfast meals and school lunchboxes helps to keep healthy eating on track and is much easier on the grocery budget than daily tuck shop money or those last-minute runs to the local store for emergency lunchbox items. Planning also helps to ensure that these meals include nutrient-rich whole foods and fresh, seasonal produce. This Rediscover Dairy “Cheesy Breakfast Cups with Amasi” recipe, created by food stylist and busy mom Leila Saffarian, can be a healthy, nutrient-rich breakfast (or breakfast-on-the-run) or a great addition to the school lunchbox, together with a yoghurt, some biltong and fresh fruit.  They are a popular because: They are easy to make They can be made on a Sunday for the week ahead The kids can get involved in choosing their favourite ingredients  The recipe can be adapted to include veggies They are a great protein boost including egg and dairy Amasi, milk or yoghurt can be used They are great for portion control – two of them are perfect for a fast-growing tween and contribute towards the daily protein and calcium requirements. They are versatile and can be used as a post-sport snack or for those ‘I’m hungry’ before supper is done moments. See here how to make the “Cheesy Breakfast Cups with Amasi”: Ingredients 3 Tbsp (45 ml) softened butter 2 Tbsp (30 ml) olive oil 1 small onion finely chopped 1 small red pepper deseeded and diced 100 g baby/ cocktail / Rosa tomatoes halved 200 g sliced button mushrooms Salt and pepper to taste 4 Tbsp roughly chopped fresh basil For the egg custard: 8 large eggs ¼ cup (60 ml) Milk or amasi or double cream yoghurt Salt and pepper to taste ½ cup (125 ml) grated cheddar cheese Instructions Preheat the oven to 200°C. Grease a silicone or 12-hole muffin tin with 3 Tbsp (45 ml) softened butter, place on a baking tray and set aside. Add 2 Tbsp (30 ml) olive oil to a medium, non-stick frying pan over high heat. Add the onion and fry for 1-2 minutes to soften. Add the red pepper and tomato halves and continue to cook for a further 5 minutes until softened, stirring every few minutes. Add the sliced mushrooms and cook for a further 5 minutes. Season with salt and pepper to taste. Remove from the heat and stir in the basil. For the egg custard, in a medium bowl, combine the eggs, milk / or Maas/ or yoghurt, season with salt and pepper and add the grated cheddar cheese. Whisk well to combine. Add the cooked vegetables to the egg custard, whisk well and divide the egg mixture between the muffin tin. Place the muffin tin into the oven to bake for 25-30 minutes, or until the egg mixture is set and golden on top. Remove from the oven and allow to cool in the tin before unmoulding. Nutrition Facts Per Cheesy Breakfast Cup Serving Size: 150 g Amount per Serving Energy:  1009 kJ Fat: 19.4g Protein: 11.5g Calcium: 118 mg Visit https://www.rediscoverdairy.co.za/resources-and-tools-2/recipes/

Squish

Quick meals and treats using pureed fruit and veg

Fruit and veg purees are a quick and easy way to add natural goodness to your toddler’s mealtimes. These yummy recipes all include Squish 100% Fruit and Veg Purees, which means you can simply grab a pouch from your pantry or fridge and get cooking – how convenient is that? Cheesy Veg Balls Little ones love finger foods – and these nutritious and delicious veggie balls are perfect for a meal on their own or as on on-the-go snack when you’re out and about with your child. We made these using a whole sachet of Squish 100% Mixed Veg Puree, but you can switch it up and use any of your child’s favourite Squish flavours, including Butternut + Carrot and Apple, Sweet Potato + Sweet Corn. Squish 100% Fruit and Veg Purees contain no nasties, which means they’re free from preservatives, colourants and flavourants and have no added sugar or starch.  Ingredients 1 cup cheese  1 x 110ml Squish 100% Mixed Veg Puree  ¼ small onion finely grated 2 cups breadcrumbs (simply put several slices of bread into your processor and blitz) ½ cup wholewheat flour 2-3 large courgettes, finely grated 2 large carrots, finely grated ½ clove garlic grated, finely grated 2 tablespoons olive oil/coconut oil 1 teaspoon dried herbs Method Combine all the ingredients then leave to rest for 20 minutes. Roll into small balls. Place on a baking tray lined with baking paper and bake in a preheated oven at 180 °C for 20-25 minutes. (If you have an air-fryer, 10 minutes tops.) For a dipping sauce, simply mix some full-cream plain yoghurt with Squish 100% Veg Puree. Veggie Mac and Cheese The great thing about Squish 100% Veg Purees is that they allow you to add veggie goodness to some of your children’s favourite meals, like scrambled eggs, bolognaise, or this delicious mac and cheese. It’s a good idea to double this recipe so that you can freeze the extra portions and have a whole batch of ready to heat-and-eat meals for those evenings when you’re short on time. And because every toddler loves mac and cheese, they’re great to have on hand when your little one has friends over for a playdate too. Ingredients 1 x 110 ml Squish 100% Butternut + Carrot Puree 250 ml (1 cup) milk Salt and freshly cracked black pepper 250 ml (1 cup) cooked macaroni pasta, drained 125 ml (½ cup) cheddar cheese 65 ml (¼ cup) cream cheese 1 ml (¼ tsp) ground nutmeg 65 ml (¼ cup) breadcrumbs 15 ml (1 Tbsp) butter Method Cook the pasta according to the package instructions. Mix the Squish Puree and milk together, then add the drained pasta.  Add the cheddar and cream cheeses and stir well to combine. Season to taste with salt, pepper, and nutmeg. Spoon into ramekins, top with breadcrumbs and a dot of butter. Bake in an oven pre-heated to 180°C for 20 minutes or until lightly golden and crisp. Allow to cool slightly before serving. Apple, Cinnamon and Rice Pudding This rice pudding is perfect for winter – it’s warm, nutritious, and full of flavour. Add even more fruity goodness by topping with sliced banana and a sprinkling of raisins. You can try different variations on this rice pudding by using a combination of different Squish 100% Fruit Purees – this is a great opportunity to finish up any half-pouches in your fridge. For a dairy-free option, you can use almond milk instead. Remember, even children with special dietary requirements can enjoy Squish 100% Fruit and Veg Purees – they’re free from egg, soya, wheat, nuts, dairy, and gluten. Only Squish 100% Fruit Yogi Purees contain cow’s milk.  Ingredients 750 ml (3 cups) milk  pinch of salt  30 ml (2 Tbsp) coconut sugar or brown sugar (optional) 2.5 ml (½ tsp) vanilla essence 100 g (½ cup) white rice 2.5 ml (½ tsp) ground cinnamon  1 x 110ml Squish 100% Apple + Banana Puree Method Place milk, salt, sugar (if using) and vanilla essence into a saucepan and bring to the boil. Reduce the heat to a low simmer and add the rice and cinnamon. Cook stirring occasionally for 40 minutes or until the rice is tender and the pudding thick and creamy. Remove from the heat and stir in the puree.

Squish

Simple toddler suppers for busy moms

 Time-saving toddler suppers for busy moms Sometimes the day runs away with you, and before you know it, it is time to put supper on the table for your little one. These easy supper recipes will help you quickly prep and serve a meal that is full of natural goodness – and delicious too! BUTTERNUT AND CARROT MASHED POTATO Get supper sorted in a flash with this tasty supper – if you have leftover mash in the fridge, it can be on the table in minutes! You can serve this on its own, or add a bit of tuna, cooked chicken or mince for some extra protein and flavour. Squish 100% Fruit and Veg Purees are a smart choice for your growing child – they are made with quality fresh fruit and vegetables and are free of nasties like colourants, flavourants and preservatives, and have no added sugar or starch.  Ingredients 1 cup mashed potato 1 x 110 ml Squish 100% Butternut + Carrot Puree Optional: Steamed tenderstem broccoli for dipping Method Heat mash in the microwave and stir through Squish Puree. Steam broccoli and serve alongside mash as dippers TIP: Always double-check the heat of food you have warmed in the microwave and stir before serving. CHEESY MIXED VEGETABLE EGG SCRAMBLE When you’re rushed for time, eggs are always a good option. They’re so versatile and are full of protein. This cheesy scramble is a good way to use up half-full Squish 100% Fruit and Veg Purees you might have in the fridge. Squish pouches come with convenient resealable lids, so you never need to waste a drop. Ingredients 2 eggs 50 ml (½ pouch) Squish 100% Mixed Vegetable Puree (or any flavour you please) 45 ml (3 Tbsp) cheddar cheese, grated Method Crack the eggs into a bowl and whisk. Add Squish Puree and mix well.  Melt a blob of butter in a non-stick pan over medium heat. Add the egg and puree mix and cook, stirring, until just cooked. Stir in the cheese. Serve warm with buttered toast. TIP: Use a cookie cutter to create fun-shaped toast. CHICKEN AND VEG RICE The convenience of Squish 100% Fruit and Veg Puree means you can always serve your child a nutritious meal, no matter how little time you have. This tasty one-bowl supper is super-easy to make – we used Squish 100% Mixed Veg, but you can switch up the taste by using any Squish flavour, including Pear + Sweet Potato Puree, Butternut + Carrot Puree, or Apple, Sweet Potato + Sweetcorn.  Ingredients 1 cup cooked rice 1 chicken breast, steamed and shredded 1 x 110 ml pouch Squish 100% Mixed Veg Method Heat a small saucepan over medium heat, adding a dollop of butter. Add rice and chicken and fry briefly. Add Squish Puree and continue stirring until heated through.  TIP: It’s always a good idea to have a couple of ready-cooked chicken breasts in your fridge to add to leftover rice, mash, or pasta or to stir through a pouch of Squish 100% Veg Puree.   You’ll find a whole range of easy-to-make, nutritious recipes on the Squish website. Click here.

RediscoverDairy

How dairy helps you to provide affordable, nutrient-rich lunchboxes

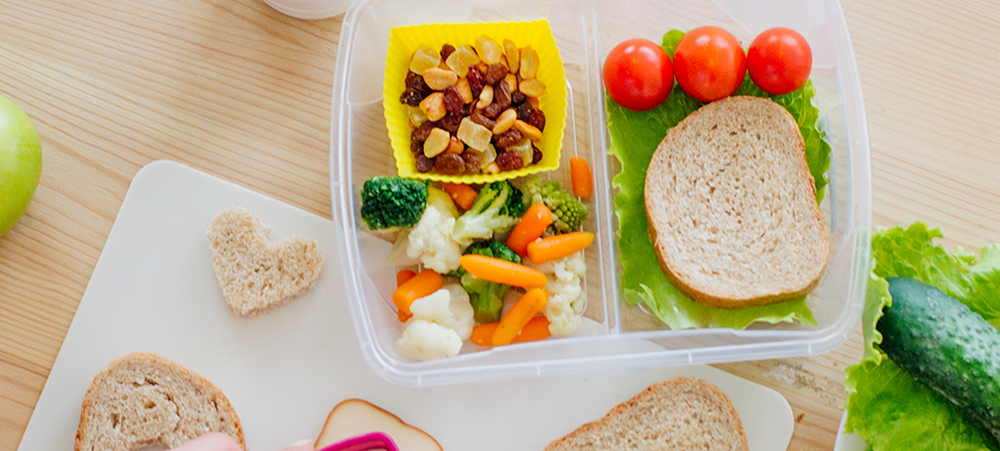
The weekday challenge is all about finding the balance between our work, school, home and family demands.  Facing severe time constraints and competing agendas, we have to still find the smart ways to help our kids eat well, avoid unnecessary snacking and be as physically active as possible during the weekdays.  This highlights the importance of starting each day with a healthy, nutrient-rich breakfast – even if that’s breakfast on-the-run, or just popping a yoghurt and a fresh fruit in your handbag for your kids to snack on the way to school.   Planning our kids’ school lunches and snacks for the school week helps to keep healthy eating on track and keeps our focus on providing them with nutrient-rich whole foods, making sure we are including fresh, seasonal produce.  Taking time to prepare for making school lunchboxes at home, using the many good ideas and time-saving hacks that are easy to find, is also far easier on the pocket than giving them money for tuck shop foods, which do not always adhere to healthy eating guidelines. This daily attention to eating well and developing the habit of being physically active every day is critical for South African children. ‘Be active!’ is one of the South African Food-based Dietary Guidelines.  Studies have shown that childhood obesity and overweight are increasing rapidly.  In addition, nutritional deficiencies and the resultant stunting of normal childhood development and growth are still prevalent in South Africa.  Maretha Vermaak, Registered Dietitian at Rediscover Dairy says, “Undernutrition includes protein-energy malnutrition and a number of micronutrient deficiencies. The health consequences of undernutrition include stunted physical growth and delayed mental development. These conditions affect millions of people, especially in the developing world, where approximately 60% of deaths among children under the age of five years are associated with undernutrition.  Like many other parts of the world, South Africa faces a double burden of disease where overweight and obesity as well as undernutrition can occur in the same country, the same communities and even in the same household.” The 11 South African Food-based Dietary Guidelines provides a simple framework to help maintain a healthy diet, assist in keeping weight in check and make nutrient-rich food choices.  They highlight five types of food that should be included in our daily diet – starchy foods as part of most meals; plenty of vegetables and fruit; legumes such as dried beans and lentils; dairy such as milk, maas and yoghurt; lean meat, eggs, fish and chicken.  Too often though, the typical South African diet is found to have little variety of foods and a low intake of vegetables, fruit and dairy, while processed foods, sugary and salty foods as well as drinks high in sugar are consumed all too regularly. The benefits of whole foods Whole foods are foods that are minimally processed or not processed at all, such as fresh vegetables and fruits, milk, eggs, whole grains and legumes.  The benefits of whole foods are that they are naturally complex, nutrient-rich foods providing a spectrum of nutrients that our bodies need to maintain healthy functioning. The health benefits from whole foods are more than the sum of its nutrients.  Taking charge of school-day lunches and snacks Good lunchbox choices for learners in primary school take into consideration both their nutritional needs and their priorities at break time.  Most young kids look forward to the bell because what they most want to do is run out and play.  Therefore, lunchbox foods need to be easy to handle and consume.  Your child’s stage of development is also a factor to think about.  Teens can be weight conscious, and they also often have a big need to fit in and be perceived as cool. Planning healthy options for lunchboxes by shopping for whole food ingredients over the weekend and prepping lunchbox ideas when you have the time avoids last minute decisions, which tend to be less healthy and more costly.  It helps to have a variety of suitable, convenient and nutrient-rich options on hand, and to involve your kids in planning their school lunches and snacks.  Think also about portion control if your child needs to manage their weight or is striving towards a healthier weight.   Keep your focus on both the nutritional value and convenience of your lunch box choices.  For example, adding a dairy component to a lunchbox such as a small full-cream yoghurt or a portion of cheese is easy to do, and it will boost their daily intake of vital nutrients such as calcium and Vitamin A. Flavoured milk is a great alternative to an energy drink after sports practice. It helps to rehydrate, refuel and repair and at the same time provides all the important nutrients provided by milk. Of course, budget is also a big consideration, and making up lunchboxes at home has the advantage of being more cost-effective than providing cash for takeaways and tuck shop snacks.   Cost, convenience and nutritional value – what are the options? Maretha Vermaak and Dr Hester Vermeulen, a specialist in consumer economics at the Bureau for Food and Agricultural Policy (BFAP) have teamed up to give some examples of school lunchboxes that are affordable, easy to prepare at home and nutrient-rich: Cheese, ham, lettuce and mayo sandwich on low GI bread plus an apple and 250ml UHT milk – R22,59 Hester says: “This choice is good nutritional value for money. It’s a top option containing good quantity of energy(3123kJ), protein (32g), fat (43g), and calcium (677mg). It is also high in fibre.” Maretha says: “Make sure you choose full cream milk so your child gets the benefits of Vitamin A as well.” Peanut butter sandwich on brown bread with flavoured milk plus an apple – R14,49 Hester says: “This cost-effective option provides good quality protein and the highest fibre content.” Maretha says: “This lunchbox meals will help your child to sustain their energy levels after break time and also gives them a good boost of calcium (531mg), which is
RediscoverDairy

The Sushi Sandwich, a great lunchbox idea!

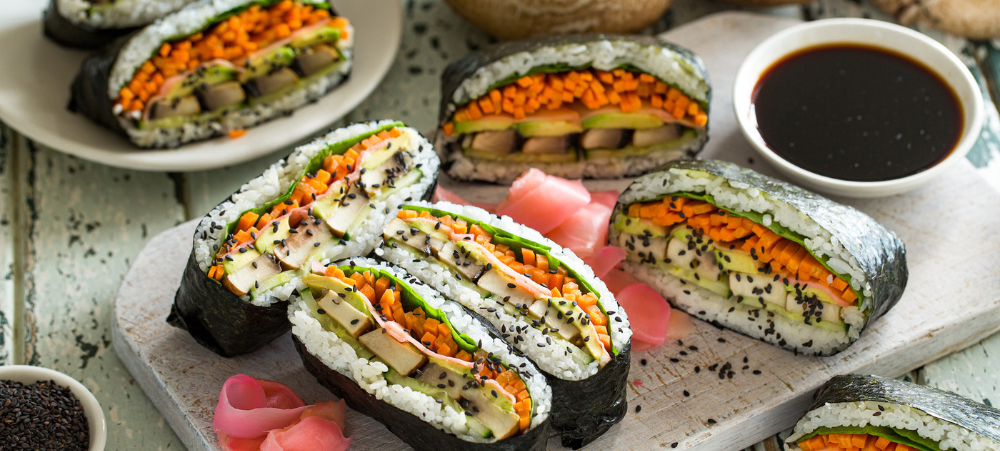
No matter their income, many South African families fall short of the recommendations for 2 to 3 servings of dairy a day.  However, given the versatility of dairy, it is really easy to include it in meals, snacks, drinks and lunchboxes.  The Rediscover Dairy Sushi Sandwich is a great addition to any lunchbox (big and small). We love it because: It is versatile, because different food items can be included.  It is a powerhouse lunchbox snack – high fibre, raw veggies and protein all in one. It is easy to eat, because each piece is  bite size, so can adjust to different levels of appetite. It includes dairy and counts towards the recommended 3-A-DAY intake – you can used full fat, plain or flavoured cream cheese or cheese spread or even cottage cheese (plain or smooth).  It is easy to make, so the kids can help and use their favourite ingredients. It can be made with high fibre, low GI brown or white bread. It caters to many different tastes and ingredients can include sticks of cheese, cream cheese, chicken, julienne vegetables (carrots, peppers, cucumber and baby marrow) and avo. It can include a combo of protein and veg and it a great way to include a daily raw veggie portion. The raw vegetables pair well with hard cheeses like gouda, cheddar or even feta and a protein like chicken, smoked chicken, tinned fish, salmon or beef strips. See here how to make the Sushi Sandwich. INGREDIENTS (1 Serving) 2 slices (2 x 30 g) of white bread, crusts removed 4 Tbsp (24 g) cream cheese or cheddar cheese spread A quarter red pepper (30 g), deseeded, thinly sliced A quarter carrot (20 g), peeled and thinly sliced TO SERVE Sweet chilli sauce to serve Cheese wedges to serve Raisins to serve Fruit to serve INSTRUCTIONS Place the bread on a clean, flat surface. Using a rolling pin, flatten the bread slightly. Spread the cheese spread evenly over the bread slices, leaving a 2 cm border along 1 edge. Top with red pepper and carrot strips (or any other fillings). Roll up to enclose filling and slice each roll into thirds. Serve with sweet chili sauce.

Squish

Quick and easy toddler meals and snacks you can freeze

As every busy parent knows, there often simply aren’t enough hours in the day to get everything done. But one thing you don’t want to compromise on is being able to give your child nutritious meals and snacks. These quick and easy freezer-friendly recipes will help make your life easier – and keep your toddler happy and well fed too! SNEAKY VEGGIE-LOADED MAC AND CHEESE The great thing about Squish 100% Veg Purees is that they allow you to add veggie goodness to your child’s favourite meals, like bolognaise, scrambled eggs, and mac and cheese, without them noticing – a great solve for picky toddlers. Squish 100% Fruit and Veg Purees contain no nasties, which means they’re free from preservatives, colourants and flavourants and have no added sugar or starch. Double this recipe so that you can freeze the extra portions and have a whole batch of quick and easy suppers ready to simply heat and serve when you’re pressed for time. Ingredients 1 x 110 ml Squish 100% Butternut + Carrot Puree 250 ml (1 cup) milk Salt and freshly cracked black pepper 250 ml (1 cup) cooked macaroni pasta, drained 125 ml (½ cup) cheddar cheese 65 ml (¼ cup) cream cheese 1 ml (¼ tsp) ground nutmeg 65 ml (¼ cup) breadcrumbs 15 ml (1 Tbsp) butter Method Cook the pasta according to the package instructions. Mix the Squish Puree and milk together, then add the drained pasta.  Add the cheddar and cream cheeses and stir well to combine. Season to taste with salt, pepper, and nutmeg. Spoon into ramekins, top with breadcrumbs and a dot of butter. Bake in an oven pre-heated to 180°C for 20 minutes or until lightly golden and crisp. Allow to cool slightly before serving. MINI FRUITY MUFFINS These mini muffins are perfect grab-and-go snacks and are great to add to your little one’s lunch box. Bake a batch (or two!) and freeze so you always have on hand when you need. These muffins are made using Squish 100% Fruit Puree, which adds natural sweetness meaning you can use less cane sugar. You can switch up the flavours by choosing different purees each time you bake a batch – try Summer Berries, Banana + Strawberry, or Pear. To make a variety in one go, divide the batter, and add the leftovers from your Squish pouches (even the Squish 100% Veggie Purees work well). Squish pouches come with a resealable lid, meaning you never need to waste a drop. Just use what you need then put them back in the fridge for later.  Ingredients 375 ml (1½ cups) cake flour 7.5 ml (1½ tsp) baking powder 5 ml (1 tsp) bicarbonate of soda 5 ml (1 tsp) ground cinnamon 125 ml (½ cup) brown sugar 1 egg 65 ml (¼ cup) sunflower oil 1 x 110 ml Squish 100% Banana + Apple Puree 1 x 110 ml Squish 100% Apple Puree Method Sift flour, baking powder, bicarbonate of soda and cinnamon into a large mixing bowl.  Stir in the brown sugar. Mix the egg and the oil together and stir in the puree. Add the puree mixture to the dry ingredients and fold gently until just mixed. Spoon the muffin batter into a muffin tray that has been lined with paper muffin cups. Bake the muffins in an oven that has been preheated to 180˚C for 15 minutes or until the muffins are golden and firm to the touch. CHEESY VEG BALLS These Cheesy Veg Balls are delicious and packed with natural goodness too. They are great as a meal on their own, a lunchbox filler, or as an on-the-go snack when you’re enjoying a day out with your toddler. This recipe uses a whole sachet of Squish 100% Mixed Veg Puree, but you can switch it up and use any of your child’s favourite Squish flavours, including Butternut + Carrot and Apple, Sweet Potato + Sweet Corn. Squish Purees are made using 100% fruit and vegetables with no dilution, which means they provide parents with convenience, without compromising on quality.   Ingredients 1 cup cheese  1 x 110ml Squish 100% Mixed Veg Puree  ¼ small onion, finely grated 2 cups breadcrumbs (simply put several slices of bread into your processor and blitz) ½ cup wholewheat flour 2-3 large courgettes, finely grated 2 large carrots, finely grated ½ clove garlic grated, finely grated 2 Tbsp olive oil/coconut oil 1 tsp dried herbs Method Combine all the ingredients then leave to rest for 20 minutes. Roll into small balls. Place on a baking tray lined with baking paper and bake in a preheated oven at 180 °C for 20-25 minutes. (If you have an air-fryer, 10 minutes tops.) For a dipping sauce, simply mix some full-cream plain yoghurt with Squish 100% Veg Puree. FREEZER HACK: Keep a stash of Squish Yogi pouches in your freezer. Pop into your toddler’s lunchbox and by snack time it will have gently melted creating a refreshing slushie (and keeping their lunchbox contents cool!).  Looking for more toddler-friendly recipe inspiration? Click here.

Lamelle Research Laboratories

Winter sun safety: Why sunscreen is essential during the colder months

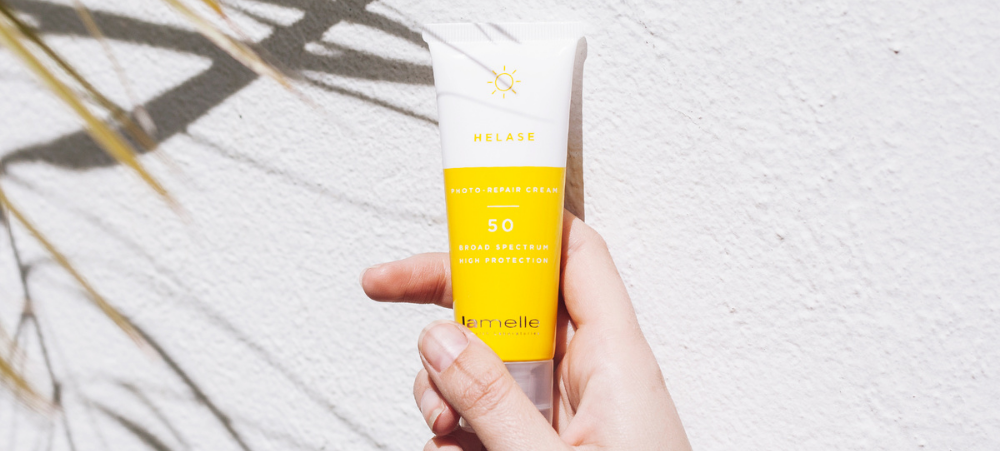
As South Africans we are accustomed to the harsh summer sun, and are used to applying SPF before heading down to the beach, or going for a run. But did you know that the sun’s UV rays are equally dangerous during the colder months? While you’re unlikely to experience a sunburn from UVB rays during winter, UVA rays (the ones that accelerate ageing) have the ability to wreak havoc on our skin, particularly on overcast days. “Even when it’s cold or overcast, UV rays that cause skin ageing and skin cancer are reaching your skin,” says Deborah S. Sarnoff, MD, president of The Skin Cancer Foundation. “In the right winter weather conditions, you can sustain sun damage just as easily as during the summer.” UVA rays have the ability to penetrate through clouds and fog, meaning your skin is vulnerable even on days when the sun isn’t shining. Did you know that UVA rays can also penetrate glass? That means it’s possible for the sun’s rays to harm your skin on a bright winters’ day, while you’re indoors!  UVA rays can accelerate ageing, meaning more fine lines and wrinkles, but they also make the skin vulnerable to skin cancer. Enter Lamelle Helase 50 – a broad spectrum sunscreen that offers full protection from UVA, UVB, blue light and infrared light. More than just a sunscreen, this DNA-correcting photo-protection product is in a class of its own.  Most people don’t realise that what we think of as the symptoms of ageing, are actually due to deep-seated damage inside our skin cells caused by years of sun exposure. Sunlight physically damages (breaks apart) or mutates skin DNA over time. To a large degree, preventing this damage is the reason we wear sunscreen.   Conventional sunscreens fall short The problem with currently available sunscreens is they have been developed to protect human skin from the most obvious of solar insults: ultraviolet A and B radiation. But our skin is susceptible to all five radiation subtypes, including visible light (radiation) and Infrared-A, B and C. If the only way to slow down the ageing process is to protect our skin against all these solar onslaughts, and conventional sunscreen is capable of protecting us from only two of the five, the case for more effective protection has never been stronger. That and the fact that the incidence of skin cancer still continues to climb! Recognising this unmet need, Lamelle Research Laboratories developed Helase 50. Unlike so many other cosmetic products available, this truly is a first to market one of a kind cosmetic; a breakthrough in ageing treatment and it’s being heralded as potentially the best photo-protection product available.  Until now, sunscreen and antioxidants have been our only defence against DNA damage; there’s been no means of reversing already existing damage. But now, with Helase 50, it’s possible to not only prevent, but also physically correct damaged DNA (dangerous DNA breaks and “kinks” such as dimers which left untreated, can produce more ‘abnormal’ cells. Correction is therefore essential to return cell function to normal).  Helase 50 – More than just a sunscreen Classified as a photo-protection product, Helase 50 is the only available product that can minimize the harmful effects of the full solar radiation spectrum. It includes several trailblazing technologies that set it apart from conventional sunscreens. The secret weapon in its formulation – that which is responsible for the correction process – is photolyase, a powerful DNA-repairing enzyme that’s missing in humans, but occurs naturally in most animals and plants. While we can’t produce our own photolyase, our body knows what to do with it when it’s introduced topically to the skin and the results are astounding. Another core ingredient often used in Lamelle products is Pycnogenol® (one of the most potent antioxidants available). Very simply, the inclusion of a Pycnogenol blend is what controls the inflammation typical from exposure and sunburn and it plays an important role in protecting the skin from damage.  There are several other enzymes, receptor inhibitors and filters that have been researched, tested, formulated and proven to deliver unprecedented protection.  Helase 50 – How to use it Helase 50 has sunscreen filters and an SPF of 50+.It’s not waterproof and should be applied 10 – 15 minutes before exposure and re-applied 3 – 4 hourly if possible. There is no need to use a “regular” sunscreen if you use Helase 50. It is fragrance free, and anyone over the age of six months is a candidate for Helase 50, but particularly those with fair skin, multiple sun-spots, or a history of skin cancer. It’s the ideal product to use after you have had a moderate peel (once re-epithelialised), and post-laser therapy and IPL.  Quite simply – a revolution in skincare has begun with the introduction of Helase 50! Learn more at www.lamelle.co.za 

Halo Dish Covers

The Basic Guide to Meal Prep for Busy Moms

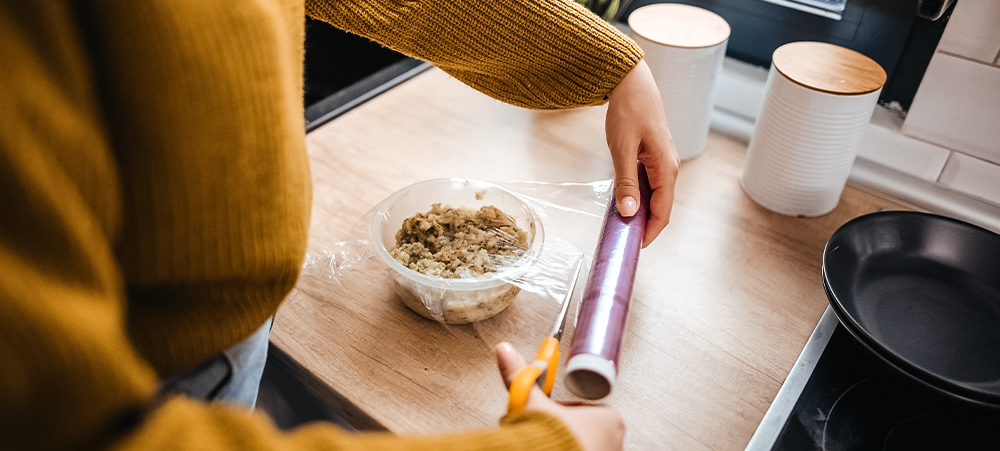
Every busy mom has had this moment at some point in their lives – the fantasy that plays out in their head where the picture perfect world exists and all they have to do on a busy weekday night is to open the freezer, pull out a pre-packed meal, heat and eat.  This isn’t the perfect world, though and reality tends to be a LOT different. For the majority of us, the real world looks like unwashed dishes, hangry kids and half the ingredients for tonight’s dinner still sitting on shelves at the nearest supermarket. The stress truly is enough to warrant popping open a bottle before Wine O’Clock (which according to a recent survey is 6:59pm, by the way).  But there are options! You could: Hire a full-time live-in chef Order takeout every night. Learn how to Meal Prep.  Now before you throw in the proverbial towel and start looking through your options on UberEats, take a minute to read through this guide to make dinner time a whole lot easier for next time.  Let’s start with the basics… What is meal prep? Meal prep is the process of preparing food ahead of time so that it’s readily available at mealtime and can be easily assembled to create full meals.  Meal prep differs from meal planning in that one requires making a decision about what meals will be served versus the other, that requires the actual preparation of ingredients for the meal. Either way, both processes are required steps in this guide.  What are the benefits? For busy moms, it can be a real juggling act to get good, healthy food on the table. By planning your meals out and prepping them beforehand, you can help ease your ‘mental load’ while preparing more nourishing meals, freeing up more time and saving money in the process.  How to begin meal prepping Let’s face it – efficient meal prepping can be overwhelming and won’t happen overnight. It’s a process that takes a lot of work but this is what I’ve found works for me: 1.Meal Plan Use an app, a piece of paper or a printable template to outline what meals you want to prepare for the week.  Top tip: Don’t feel the need to have a different meal at every interval. Oats three times a week for breakfast is perfectly okay. In fact, it’s encouraged, seeing as oatmeal can be prepared and covered with a dish cover overnight until it is ready for serving the next day.  2.Go through your pantry / cupboards  Once you’ve laid out your meals, you may be tempted to hit the grocery store right away. PAUSE. First take a look at what you have in your kitchen. You might find that you already have all the items needed for a full meal. In that case, simply adjust your meal plan accordingly.  This also presents a perfect time to clean out your fridge 😉 3.Head to the grocery store I highly recommend making use of a list here!  Ensure that you’ve listed down everything needed to create the meals on your meal plan and get to shopping. Top tip: If possible, try to shop during off-peak hours to avoid long lines and hoards of humans.  4.Prep your storage containers  If you plan on meal prepping consistently, you’ll want to invest in reliable containers that are durable and easy to clean. I prefer glass to plastic.  You’ll also want to invest in some reusable homeware, such as cotton dish covers, in order to keep food protected as it cools and also keep condensation at bay. These dish covers come highly recommended.  Top tip: Pull these out shortly after grocery shopping to remind you to begin your meal prep as soon as possible.  Chop veggies, prepare grains and prep your food for the week Now it’s time to get into the real work! This can look different each week but the basic premise is to make sure that all the chopping, dicing and boiling is done.  Top tip: Don’t be reluctant to use frozen fruits and veggies as these can go a long way.  Soak grains overnight and cover with a dish cover to allow for easy cooking the following day. Avoid preparing grains more than four days from the time you plan on serving them as they tend to degrade pretty quickly.  If you are preparing potatoes ahead of time, plan to eat them within the first few days of cooking.  5.Bake, cool, store If you are baking and roasting food, make sure that these items have cooled completely before putting them in the fridge. This is where dish covers really come in handy, as they allow food to cool without condensation and eliminate harmful toxins that may be absorbed into your food from plastic wrap. 6.Place your meal plan on the fridge and enjoy your week Having a meal plan and food prepped can truly be life changing. And guess what? You won’t have to answer the question of what’s for dinner? anytime soon, because it’s posted on the fridge! Everyone wins! Being a mom can mean a lot of things but being a magician when it comes to food doesn’t have to be one of them. By putting in the necessary effort and planning ahead, you can save time, money and be a lot less overwhelmed. 

Parenting Hub

HELPING FUSSY LIL’ EATERS BUILD STRONG BONES

Kids need more calcium as they get older to support their growing bones* and milk is one of the best and most widely available sources of calcium**. However, if your child is a picky eater who doesn’t love a glass of milk, it can be tough to ensure they are getting all the calcium they need. Whilst there are many foods that are great sources of calcium – sardines and dark leafy greens like spinach and kale – neither sound particularly tempting, especially if you are already struggling to cater for your child’s picky palette. Paul Mindry, SPAR Brand Group House Brand Manager, comes to the rescue with 3 easy, fast recipes that your children will love: Milkshake Melody  Milkshakes appeal to all ages. Try a different flavour each time, for a calcium-infused dessert the whole family can enjoy on a warm summer’s day. Prep Time: 10 mins   |    Servings: 4 Recipe Ingredients: 500ml SPAR Classic Vanilla flavoured ice cream Recipe Method: Combine both ingredients in a food blender or processor, or use a suitable jug and a stick hand-held blender if this suits you better. Whizz until foamy, creamy and thick. Beat in the flavouring ingredients of choice thoroughly.  Pour into tumblers and serve immediately. Delicious flavour-combos: 1 well mashed banana 125 ml SPAR vanilla custard and 50 ml Squillos strawberry flavoured milk powder  If you want more of a Fruit Whip type drink, introduce fresh chopped fruits that puree easily (berries, paw-paw, mango) Homemade Custard Good, wholesome creaminess that can be whipped up with the kids’ help. Prep Time: 10 mins   |    Cooking Time: 15 mins   |   Servings: 8 Recipe Ingredients: 200ml double cream  700ml SPAR UHT full cream milk 4 large egg yolks 3 tbsp cornflour 100g caster sugar 1 tsp vanilla extract Recipe Method: Put the cream and milk into a large pan and gently bring to just below boiling point. Meanwhile, in a large bowl, whisk the yolks, cornflour, sugar and vanilla. Gradually pour the hot milk mixture onto the sugar mixture, whisking constantly. Wipe out the saucepan and pour the mixture back into it. Heat gently, stirring with a wooden spoon until the custard is thickened, but before any lumps form. Eat hot or cold. Hints & Tips For a healthier alternative, you can substitute the caster sugar for honey. Pro-Nutro Puffs Besides the health and nutrient benefits of milk, these also offer wholewheat goodness and the supplemented vitamins of breakfast cereal. Prep Time: 10 mins   |    Cooking Time: 25 mins   |   Servings: 8 Recipe Ingredients: 480 g SPAR cake flour (4 Cups) 20 ml baking powder 500 ml ProNutro whole-wheat cereal 5 ml salt 100 ml SPAR canola oil 4 large eggs, lightly beaten 500 ml SPAR UHT full cream milk 250 ml water Recipe Method Preheat oven to 180ºC and grease 2 SPAR Good Living giant muffin pans. Measure all the ingredients into a 3 litre SPAR Good Living porcelain mixing bowl. Blend together using a wooden spoon. Do not over-mix. Spoon mixture into prepared pans and bake for 25 minutes. Hints & Tips Sprinkle with poppy or sesame seeds before baking if you like The apple-bake ProNutro may be substituted for the whole-wheat, but keep in mind it will give a slightly sweeter result For more recipes go to https://www.spar.co.za/Recipes Spar UHT milk comes in Full-cream, Low-fat and Fat-free and is available from Spar Retailers, nationwide. 

Parenting Hub

Fruity back to school lunch box ideas for a healthy start to 2022

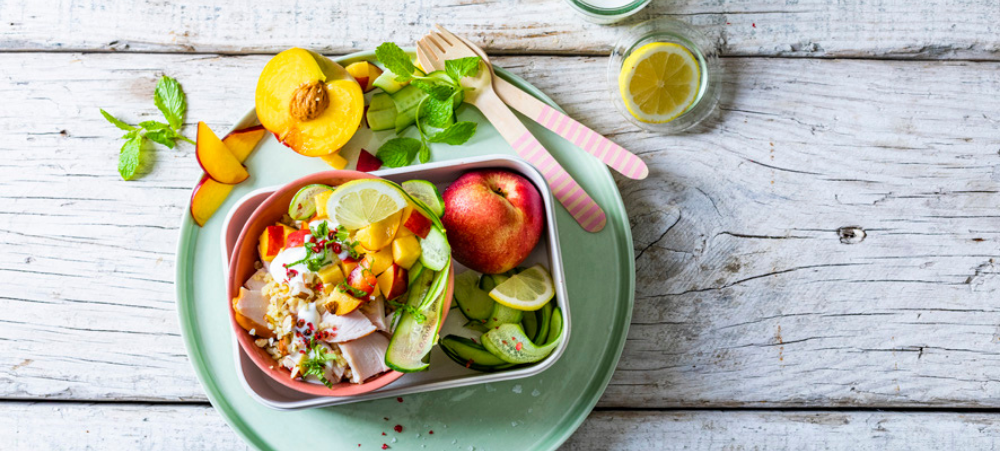
Make the morning rush a little easier with healthy lunch box recipes that all kids will love. Plums, peaches and nectarines, known collectively as stone fruit, pack a nutritious punch offering generous helpings of vitamins and other essential nutrients to keep budding learners sharp throughout the day. Make sure your children get their share of nature’s juicy summer bounty by including stone fruit as a snack in their lunch boxes or turn them into delicious, nourishing meals and treats. We all know how fussy children can be when it comes to balancing their daily food intake, so here are some nifty ideas to get nutritious stone fruit into their lunch boxes.  Celebrity chef, Jenny Morris, has created two moreish lunch box salads that tick all the right boxes. Her peach and bulgar wheat salad is a super easy and satisfying meal that can be prepared the night before. It is an absolutely yummy and filling alternative to regular school sandwiches, guaranteed to keep hunger pangs at bay.  Jenny’s nectarine and smoked chicken salad is another substantial lunch box meal your children will tuck into with glee. Bursting with colour and flavour, it is quick and easy to whip up.  For something sweet when energy stores start running low, Jenny’s plum jelly treats are the perfect lunchbox filler. These homemade treats are great for on the go snacking. Karen Hart’s peachy whole wheat muffins are a super nutritious lunch box filler. They are easy to make ahead of time and are sure to stay fresh and go the distance. Plums, peaches and nectarines are naturally sweet super fruit with a low glycaemic index (GI). They are high in fibre and abound in health-giving potassium and vitamins A, C and E, all-powerful antioxidants that protect against disease and help to build healthy minds and bodies. To keep children’s lunches fresh all day, Addis, the original and trusted food storage container brand, has the perfect solution. Addis Clip ‘n Seal lunch boxes come in various  sizes and great colours with a high quality, clip closing design that guarantees an airtight and leakproof seal. They are made in South Africa and are BPA free. Visit www.addis.co.za for more information. Feel inspired by following @juicydelicioussa on Instagram or visit www.juicydelicious.co.za for more tempting stone fruit recipes. Peach and Bulgar Wheat Salad     By Jenny Morris  Serves 4-6 Ingredients:  2 cups cooked bulgar wheat ½ red onion finely diced 2 spring onions with tops finely chopped ½ cup chopped mint 2 large cling peaches washed, stoned and finely diced ½ medium cucumber finely diced ½ cup finely diced red pepper 2 red chillies chopped (optional) Salt and pepper to taste Method: Toss all the ingredients together and add the dressing 30 minutes before serving. Dressing:  ½ cup orange juice ¼ cup lemon juice 1 Tbsp honey ¾ tsp salt Pepper to taste 2 cloves finely grated garlic 1 tsp mustard of your choice ½ cup olive or vegetable oil Method: Stir together all the ingredients except the oil, taste and adjust the seasoning, then whisk in the oil. Nectarine and Smoked Chicken Lunch Box By Jenny Morris Serves 4 Ingredients: 1 cup cooked bulgar wheat Zest of 1 yellow lemon 2 Tbsp chopped mint 1 cup cucumber, chopped or thinly sliced 2 large firm nectarines stone removed and chopped 300g chopped smoked chicken breast 30g toasted almonds chopped Salt and pepper to taste Dressing: ¾ cup mayonnaise 1 Tbsp olive oil 1 Tbsp lemon juice Stir together and season to taste. Method: Place all the ingredients together in a bowl, season with salt and pepper and lightly toss together, add the dressing and stir together gently. Divide into 4 portions and pack into lunch boxes. Plum Jelly Treats By Jenny Morris Makes: 24 – 30 (depending on the size of the mould) Ingredients: 15 plums, halved and stoned ½ cup water  ½ cup caster sugar 6 Tbsp gelatin powder Silicone mould of your choice Non-stick cooking spray Method: Place the plums in a small saucepan with the water and simmer until soft.  Place in a blender and process until smooth.  Strain the liquid through a sieve and return to the pot (alternatively, if you have a juicer, simply juice the fruit and place in the saucepan). Add the caster sugar and dissolve over low heat.  Sponge the gelatin in a little water, according to the package instructions.  Once, sponged, place the gelatin in the warm plum liquid and stir to dissolve. Lightly spray your mould with the non-stick spray and place on a baking tray.  Carefully pour the liquid into the mould – using a jug – and place in the fridge for an hour and a half, or until set. Pop out and enjoy! Whole Wheat Peach Muffins By Karen Hart Makes 12 muffins Ingredients:  1 cup whole wheat flour ¼ cup cake flour 1 ½ cup oats  ½ teaspoon bicarbonate of soda 1 ¼ tsp baking powder ¼ tsp salt ¼ tsp nutmeg ½ tsp cinnamon 11/2 cups peeled and diced fresh peaches or nectarines (2 peaches/nectarines) ⅓ cup buttermilk 1 tsp vanilla extract ⅓ cup honey ⅓ cup sunflower or canola oil 1 egg Extra oats to sprinkle on top (optional) Method: In a large mixing bowl, whisk together the flours, oats, baking soda, baking powder, salt, nutmeg and cinnamon. Stir in the peaches. In a separate bowl, combine the buttermilk, vanilla, honey, oil and egg. Add wet ingredients to the dry ingredients and stir until it is just mixed. Spoon the batter into a 12-hole muffin tin, lined with paper liners. Sprinkle a little oats over each muffin (optional). Bake in a preheated oven of 180ºC for 18 – 20 minutes or until cooked through and golden brown. Cool on a wire rack before serving.

Parenting Hub

HAPPY KIDS ARE GOOD KIDS

In the words of Oscar Wilde, “The best way to make children good is to make them happy,” and that’s what the Friends In Your Freezer are intent on achieving through delicious, healthy, fun, and convenient food. Oh, and a chance to win a family holiday worth R50 000 too! Two of the largest brands in the frozen food world are on a mission to create convenient and nutritious mealtime solutions, while bringing fun into the kitchen and onto kids’ plates. Whether their summer holiday was the greatest six weeks of their little lives, or a time spent ranting about having nothing to do, the back-to-school transition is daunting for most children, and more than likely, moms too. Having a stable eating routine with exciting food helps children to look forward to mealtimes, and a nutritious eating routine improves not only their energy levels, but their concentration and mental health too.  McCain and Sea Harvest offer the finest quality frozen fish and vegetables, which are incredibly healthy too. Their produce is harvested at its peak, sustainably sourced and snap frozen within hours to maintain freshness and lock in nutrients, meaning that your little ones not only get to enjoy a delicious meal, but one that’s packed with vitamins and minerals too. “Frozen foods are a convenient and affordable way of incorporating protein and vegetables into your children’s diets. The combination of products that McCain and Sea Harvest offer are sure to satisfy even the most discerning of little palates,” says Jared Patel, the Head of Marketing of the Sea Harvest Group. Get the kids involved in the kitchen and create a fun and fresh (or shall we say, frozen) take on sushi: Fish Finger ‘Sushi’ with Smiles Serves: 4 Prep Time: 30 minutes Cook time: 20 minutes Difficulty: easy Ingredients Fish & Smiles 8 Sea Harvest Fish Fingers 1 x 415 g bag McCain Smiles Sushi 8 slices of brown bread, crusts cut off 40 ml mayonnaise 8 slices of pre-sliced cheddar cheese 1 small cucumber, peeled into ribbons 1 large carrot, peeled and finely grated Dipping Sauce ¼ C (60 ml) mayonnaise 2 Tbsp (30 ml) chutney Method Fish & Smiles Preheat the oven to 200 ºC. Lay frozen Fish Fingers and Smiles onto a baking tray. Place into the oven for 15-20 minutes and cook until golden and crunchy. Alternatively, cook in an air fryer for the recommended time. Allow the fish fingers to cool completely. Sushi Roll each slice of bread with a rolling pin to flatten by half. Dollop roughly a teaspoon of mayonnaise on each slice of bread and spread evenly to all corners. Place a slice of cheese right on the edge of the side of the bread closest to you – this will ensure that there is a margin of bread left on the other side that will stick the sushi roll together. Place a cucumber ribbon on the edge of the cheese that is closest to you followed by a cooked Fish Finger. Top the fish finger with grated carrot, then roll the bread roll away from you to form a neat log shape. Press down on the seam to seal the roll. Trim off the ends off, then slice into 4-5 bite-size pieces of sushi. Repeat the rolling process until you have completed and sliced all of the rolls. Dipping Sauce Mix the mayo and the chutney together and set aside. To Serve Serve fish finger sushi rolls with potato smiles and dipping sauce on the side. Having these Friends In Your Freezer ensures that mealtime planning and creativity in the kitchen isn’t higher grade, so to speak. “Our purpose is to make mom’s lives easier, and kid’s lives happier. The first two months of the year are generally chaotic and there’s no doubt that having frozen meals on hand eliminates the added pressure of meal prep on a busy week night,” says Danielle De Villiers, Senior Brand Manager at McCain.  Purchase any 1 McCain and 1 Sea Harvest product from participating stores and stand a chance to WIN 1 of 4 family holidays valued at R50K each with McCain and Sea Harvest. Competition ends 28 February 2022, T&C’s apply. For more information, visit www.friendsinyourfreezer.co.za, McCain Facebook, McCain Instagram, Sea Harvest Facebook or Sea Harvest Instagram. You can also download this fun activity book filled with puzzles, games and jokes, to keep the kids busy!

Parenting Hub

Juicy Summer Salads for all Occasions

Summer is here which means more family time spent outdoors braaiing. Eating good food is high on everyone’s agenda, so why not make sure you have a juicy repertoire of salads on the menu to wow the whole family. Whether it’s as a side, a main, or accompanied by a juicy salad dressing, savour the goodness of summer days with these six delicious salad recipes using convenient Rhodes Quality beans, corn, chickpeas, gherkins, beetroot and more. Perfect at home, at work or just kicking back in the sun with your loved ones. Go with Goodness this summer, go with the right food choices for your family, go with Rhodes Quality. Add this grape juice salad dressing to any leafy salad for a sweet and juicy twist. Ingredients: 250 ml (1 cup) Rhodes Quality 100% Red Grape Juice 65 ml red wine vinegar 65 ml honey 65 ml olive oil salt and freshly cracked black pepper Method: In a small bowl, whisk together Rhodes Quality 100% Red Grape Juice, vinegar, honey, and olive oil. Whisk well. Season to taste. Stir before serving. Broccoli and bacon salad with curried mango dressing: a crunchy summer salad with a flavourful dressing. Ingredients: Serves 4 250 ml (1 cup) Rhodes Quality Mango & Orange 100% Fruit Juice 5 ml (1 tsp) Pakco Medium Curry Powder 10 ml (2tsp) Rhodes Quality Apricot Jam 15 ml (1 Tbsp) Dijon Mustard 30 ml (2 Tbsp) apple cider vinegar 15 ml (1 Tbsp) olive oil 15 ml (1 Tbsp) water 1 garlic clove, crushed salt and freshly cracked black pepper Salad 300 g broccoli, washed and chopped 125 ml (½ cup) red onion, finely chopped 125 g (1 packet) streaky bacon, crispy fried and chopped 1 x avocado, seeded and peeled and chopped Method: Place the Rhodes Quality Mango & Orange juice, Pakco Medium Curry Powder and Rhodes Quality Apricot Jam into a blender along with the remaining dressing ingredients. Process until smooth and well blended. Season to taste. Mix all the salad ingredients in a large bowl. Pour over the desired amount of dressing. Toss lightly to mix. Chill until serving. Mixed bean salad with tangy dressing: you can prepare this simple mixed bean salad in just a few minutes. Enjoy as a great braai side or as a nutritious protein-rich lunch. Ingredients: 1 x 400 g can Rhodes Quality Three Bean Mix 1 x 410 g Rhodes Quality Green Beans 30 ml (2 T) lemon juice 5 ml (1 t) Dijon Mustard 80 ml olive oil 1 clove garlic, finely crushed 5 ml (1 t) sugar salt and freshly ground pepper Method: Whisk all the dressing ingredients together until well blended. Season the dressing to taste with the salt and freshly ground black pepper and set aside. Pour the Rhodes Quality Three Bean Mix and the Rhodes Quality Green Beans into a large bowl. Add the red onion, red pepper and chopped coriander, and toss to mix. Pour the dressing over the bean salad and stir gently to coat. Crumble the feta cheese into the salad and stir to combine. Season to taste with salt and black pepper. Serve well chilled. Mexican salad with black beans and pepper: A colourful and crunchy Mexican-style braai salad. Give the dressing a chilli kick or leave it plain – it’s completely up to you. Ingredients: 2 x 400 g cans of Rhodes Quality Black Beans 1 red pepper, cut into small dice 1 yellow pepper, cut into small dice red onion, cut into small dice Method: Pour the Rhodes Quality Black Beans out into a colander. Rinse well with cold water until the water runs clear. Leave to stand until the beans are well drained. In a large bowl, gently combine the beans, chopped peppers and onion. To make the dressing, measure out all the ingredients into a medium bowl. Whisk until well blended. Season the dressing to taste. Add enough of the dressing to coat the beans. Season to taste. Stir in the chopped coriander leaves and refrigerate until serving. Beetroot salad with yoghurt dressing: Simple to prepare yoghurt dressing over Rhodes Quality Beetroot slices, a tangy braai salad. Ingredients: 1 x 780 g jar Rhodes Quality Sliced Beetroot 125 ml (½ cup) plain thick yogurt 1 garlic clove, crushed 65 ml (¼ cup) flat-leaf parsley, chopped 65 ml (¼ cup) fresh dill, chopped salt and freshly cracked black pepper Method: Drain the Rhodes Quality Sliced Beetroot, rinse and drain well in a colander. Place the yoghurt, garlic and herbs into a bowl and stir to mix. Season to taste. Place the Beetroot into a bowl, add the dressing and toss to mix. Serve chilled. Black bean and corn Buddha bowl: Packed full of colour and fresh flavour, Buddha Bowls are filling, nutritious and quick to prepare. Ingredients: 1 x 400 g can Rhodes Quality Whole Kernel Corn, drained 1 x 400 g can Rhodes Quality Black Beans, drained and rinsed 1 red onion 2 whole tomatoes Salt and freshly cracked black pepper 30 ml (2 Tbsp.) chopped coriander leaves 500 ml (2 cups) cooked brown rice 1 avocado, peeled and chopped 375 ml (1 cups) grated cheddar cheese 3 spring onions, chopped To serve: Fresh coriander leaves, croutons and herb salad dressing Method: Finely chop the red onion and the tomatoes and mix. Season with salt and pepper and stir in 30 ml (2 Tbsp.) coriander and set aside. Create 4 Buddha Bowls by dividing the rice between four bowls. Add equal amounts of the Rhodes Quality Kernel Corn and Rhodes Quality Black Beans to each bowl. Divide the tomato salsa, chopped avocado between the bowls. Add the cheese. Sprinkle the bowls with the spring onions, coriander leaves and croutons. Serve with the herb salad dressing. For more inspiration packed with wholesome goodness and to find out how to win visit: www.rhodesquality.co.za or on Instagram and Facebook #GoWithG

Parenting Hub

It’s All About the Hass

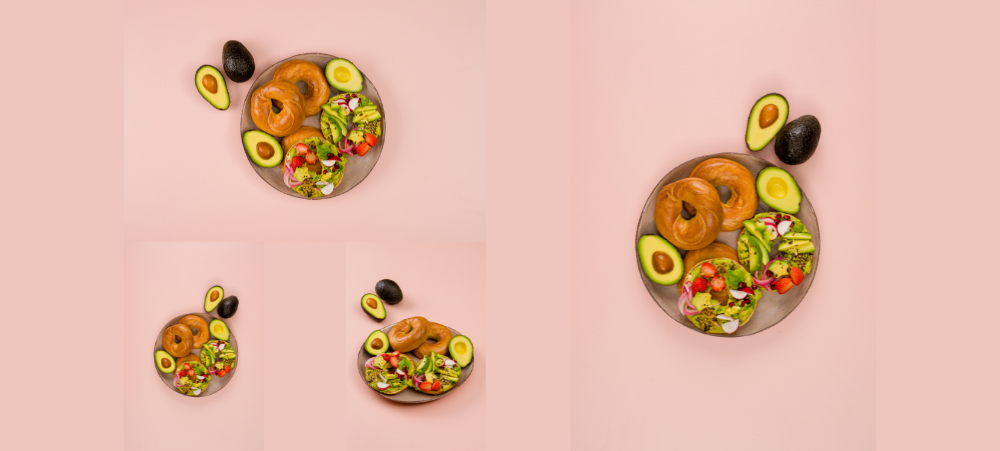
Did you know that the Urban Dictionary defines the word Hass as “anything kick ass”? We’d say that with the Hass avocado’s rich, nutty, addictive taste, they got that absolutely right!  Named after California postman Rudolph Hass, who grew the first tree of its kind from a seed he bought in the 1920s, the Hass avocado cultivar has a thick, pebbly skin and a creamy, slightly nutty tasting flesh. The skin colour of Hass avocados assists in telling whether the fruit is ripe: they usually turn from green to a dark purple-brown as they ripen.  But enough of the biology and history lessons; Hass is actually the world’s most popular avocado cultivar, and it’s not difficult to understand why. Besides the fact that the Hass a wonderfully luxurious taste, its thicker skin allows for a longer shelf life. And luckily for us South Africans local Hass avocados are available all the way from March until November. Recent research conducted by SAAGA, revealed that South Africans are very traditional when it comes to eating avo and prefer it with bread, in a salad or simply on its own. Try a Hass the way we all like it – on bread – but with a twist and a bit of extravagance. For further information and avo recipes, visit www.avocado.co.za , like us on Facebook iloveavocadoSA and follow us on Instagram iloveavossa AVOCADO BAGELS WITH FURIKAKE SEASONING  Furikake seasoning is a Japanese seasoning of dried seaweed, toasted sesame seeds and spices, usually used on rice; it is also delicious with avocado!  Serves 4  Preparation time: 10 minutes  Ingredients: 4 Bagels 2 large ripe avocados Toppings of your choice; strawberries, radishes, micro greens, pickled red onion,  pomegranate seeds, toasted seeds such as pumpkin and sunflower For the Furikake: ¼ cup toasted sesame seeds 1 tablespoon black sesame seeds  1 sheet nori, torn into pieces Pinch of sea salt flakes  Pinch of chilli flakes (optional) Pinch of sugar  Method: To make the Furikake: In a mini food processor or spice grinder, whizz the all the Furikake ingredients for a few pulses to break up the nori, take care not to over blend. Assemble the bagels by slicing the avocado or cutting into interesting shapes (with  miniature cookie cutters), top with toppings of your choice and sprinkle with the Furikake.  Remaining Furikake will keep stored in an airtight container for up to a month. 

Parenting Hub

Braai Day: Lekker Braai Sides for Any Occasion

Heritage Day, also fondly known by South Africans as National Braai Day (24th September) is a great time to fire up the flames and rustle up some quick and easy braai side dishes to share with family and friends.  Savour the goodness of our unique food heritage by dialling up the braai menu and special family times, this Braai Day. Rhodes Quality has a range of ideal braai sides like corn, chakalaka, beetroot, gherkins and beans that that will have you making the tastiest braai recipes with ease. Not to mention sticky finger-licking jam marinades and refreshing Rhodes Quality juices to compliment any braai. With the goodness of mother nature sealed into every product you can create nourishing and satisfying meals for your family prepared with love. Gather your family around the patio table and make memorable mealtimes. From a crunchy mixed bean salad, to the ultimate chakalaka and cheddar cheese braai broodjies, a beetroot and red cabbage salad with feta, and much more this braai day. Crunchy Mixed Bean Salad:  An easy salad, as a side dish with your favourite meat or perfectly filling on its own. INGREDIENTS (Serves 6) 1 x 400 g can Rhodes Quality Black Beans, drained and rinsed 1 x 400 g can Rhodes Quality Whole Kernel Corn, drained and rinsed 1 x orange pepper, seeded and chopped 1 x red pepper, seeded and chopped 1 x small red onion, finely chopped 65 ml (¼ cup) flat leaf parsley, finely chopped 1 x 410 g can Rhodes Quality Baked Beans 10-15 ml (2-3 tsp) fresh lemon juice] Salt and freshly cracked black pepper METHOD Place the Rhodes Quality Black Beans and the Rhodes Quality Whole Kernel Corn into a large bowl and toss to mix. Add the peppers, onion and parsley and mix again. Stir in the Rhodes Quality Baked Beans. Season to taste with the lemon juice and salt and pepper. Chill until serving. Beetroot & Red Cabbage Salad with Feta:  This beetroot and red cabbage salad with feta is quick and easy to prepare. Try this crunchy and colourful salad at your next braai. INGREDIENTS (SERVES 4) Rhodes Quality Sliced Beetroot 30 ml lemon juice 5 ml Dijon Mustard 90 ml olive oil Cabbage Apple sliced Feta cheese 1 clove garlic, finely crushed 5 ml sugar salt and freshly ground pepper METHOD Whisk all the dressing ingredients together until well blended. Season the dressing with the salt and freshly ground black pepper to taste and set aside. In a large bowl toss the cabbage and the apple slices together. Pour enough of the dressing over the salad to lightly coat the cabbage and apple. Add the Rhodes Quality Sliced Beetroot and toss gently to mix. Crumble the feta cheese over the top of the salad. Serving suggestion: Sprinkle over some fresh parsley and nuts over the salad and serve. Chakalaka and Cheddar Cheese Braai Broodjies:  A twist on the traditional broodjie, with added Rhodes Quality Chakalaka, you’re sure to win your family over with these lekker braai broodjies. INGREDIENTS (MAKES 6) 1 x 400 g can Rhodes Quality Mild & Spicy Chakalaka 1 farm style loaf Butter for spreading 200 g (2 C) grated cheddar cheese Salt and black pepper METHOD Remove the crusts and slice the loaf lengthwise into 4 even slices. Butter two slices of bread on 1 side and place buttered side down on a board. Sprinkle the cheese evenly over both slices. Spread a generous layer of the Rhodes Quality Mild & Spicy Chakalaka down the centre of each slice. Cover with the 2 remaining slices of bread and butter the tops. Place the sandwiches inside a braai grid and slowly toast them over warm coals until golden brown. Serve hot off the fire. Boerewors Pita Pizzas:  Need pizza in a hurry? Using leftover braaied boerewors, these South African Pita Pizzas can be on the table in under 15 minutes. INGREDIENTS (MAKES 4) 4 pita breads 1 x 400g can Rhodes Quality Tomato Braai Relish 200 g cooked boerewors, sliced 65 ml (¼ cup) fruit chutney 250 ml (1 cup) mozzarella cheese, grated METHOD  Place the pita breads on a baking tray. Spread the pitas with a generous helping of Rhodes Quality Tomato Braai Relish. Toss the sliced boerewors in the chutney and arrange on top of the relish. Sprinkle with the mozzarella cheese. Bake in an oven preheated to 190°C for 4-5 minutes, or until the pitas are crisp and the cheese is melted. Slice and serve. Apple and Kiwifruit Salad Dressing:  This quick and easy dressing is packed with a Vitamin C punch and is a tasty additional to a fresh leaf salad. INGREDIENTS (Makes dressing for 1 medium sized salad) 125 ml (½ cup) Rhodes Quality Apple Fruit Juice Blend 30 ml (2 Tbsp) apple cider vinegar 15 ml (1 Tbsp) olive oil 15 ml (1 Tbsp) water 3 ripe Kiwifruit, peeled and chopped 1 garlic clove, crushed salt and freshly cracked black pepper To serve: fresh salad greens, sliced cucumbers, sliced avocado, sliced spring onions. METHOD Place the Rhodes Quality Apple juice into a blender along with the remaining ingredients. Process until smooth and well blended. Season to taste. Chill until serving. Mix together all the salad ingredients in a large bowl. Pour over the desired amount of dressing. Toss lightly to mix. Orange Tahini Dressing:  This salad dressing it packed with Vitamin C and makes for a fresh addition to your side salad or vegetables. INGREDIENTS (Makes dressing for 1 medium sized salad) 65 ml tahini 125 ml Rhodes Quality Orange 100 % Fruit Juice Blend 30 ml (2 Tbsp.) apple cider vinegar salt and freshly cracked black pepper 15 ml (1 Tbsp) honey METHOD Place all the tahini paste, Rhodes Quality Orange 100 % Fruit Juice Blend and vinegar into a blender. Add salt and black pepper to taste. Add honey. Process for 1-2 minutes until well blended and creamy. Thin with a little water if desired. Serve chilled over salad or vegetables. For more #RootedInGoodness inspiration visit: www.rhodesquality.com/recipes or follow Rhodes

Parenting Hub

One-Pot Winter Winners (6 delectable easy recipes)

Looking for some convenient, easy to prepare winning winter dishes that only use one pot to prepare? Look no further! From a simple one-pot roast chicken to a boerewors spaghetti, West African Jollof rice, a chicken veg stew, sausage and baked bean stew or a hearty breakfast and brunchtime snack, with the convenience and goodness of the Rhodes Quality products the goodness sealed in is the goodness you get out in the wholesome recipes for you to make for the whole family with love. Enjoy these convenient and easy-to-make recipes to keep you warm and cosy during the long nights and short days. Jollof Rice A spicy one-pot tomato rice dish from West Africa. Ingredients (serves 4-6) 1 x 400 g can Rhodes Quality Tomatoes Chopped & Peeled 2 red peppers, seeded and chopped 1-2 chillies (Scotch bonnet are authentic) 45 ml (3 Tbsp) sunflower oil 1 onion, finely chopped 4 cloves garlic, crushed 65 ml (1 x 115 g) Rhodes Quality Tomato Paste 750 ml (2½ cups) prepared chicken stock 10 ml (2 tsp) Packo Mild & Spicy Curry Powder 5 ml (1tsp) dried thyme salt and freshly cracked black pepper 500 ml (2 cups) white rice 2 bay leaves to serve: 30 ml (2 Tbsp) chopped parsley Method Place the Rhodes Quality Tomatoes Chopped & Peeled, the red peppers and the chillies into a food processor and blend until smooth. Heat the oil in a large saucepan. Add the onion and fry until soft and translucent. Add the garlic and Rhodes Quality Tomato Paste and fry for two minutes more. Add the tomato-pepper puree and stir. Bring to the boil and then reduce the heat and simmer for ten minutes. Add chicken stock, Packo Mild & Spicy Curry Powder and thyme. Season to taste with the salt and pepper. Simmer for a further 5 minutes. Add rice and bay leaves and stir well. Reduce heat and cover the saucepan with a lid. Simmer, stirring often, until all the liquid is absorbed and the rice is cooked. Add extra water or chicken stock if needed during cooking. Remove the jollof from the heat. Remove the lid and leave to stand for 5 minutes. Fluff the rice with a fork, sprinkle with parsley and serve. Sausage and baked bean stew A quick & easy throw-together meal with delicious pork sausages. Ingredients (serves 4) 15 ml (1 Tbsp) sunflower oil 1 onion, finely sliced 1 garlic clove, crushed 8 frozen pork sausages 1 x 400 g can Rhodes Quality Tomatoes Chopped & Peeled 5 ml (1 tsp) Dijon mustard 160 ml (⅔ cup) prepared chicken stock 1 x 410 g can Rhodes Quality Baked Beans in Tomato Sauce salt and freshly cracked black pepper 60 g (1 cup) baby spinach leaves, washed to serve: mashed potato or fresh bread Method Heat the oil in a large saucepan. Add the onion and fry over low heat until softened. Add the garlic and fry for two minutes more and set aside. In the same saucepan, brown the sausages on all sides. Return the onions and garlic to the pan. Add the Rhodes Quality Tomatoes Chopped & Peeled, the mustard and the chicken stock. Bring to the heat and then add the Rhodes Quality Baked Beans in Tomato Sauce. Continue simmering the sauce until the sausages are cooked through. Season well to taste. Stir in the spinach and turn off the heat. Serve over mashed potatoes or with a fresh bread. Breakfast bacon and potato hash A one-pan easy breakfast or perfect brunchtime meal. Ingredients (serves 4)  4 potatoes, peeled 30 ml (2 Tbsp) olive oil 200 g back bacon, diced 2 spring onions, finely chopped 1 x 400 g can Rhodes Quality Tomatoes Chopped & Peeled salt and freshly cracked black pepper handful of chopped Parsley 4 eggs 65 ml (¼ cup) mozzarella cheese Method Dice the potatoes into even sized cubes. Heat the oil in a large non-stick frying pan. Add the potatoes and cook until tender, golden and crispy. Add the bacon pieces and fry until crisp. Add the spring onions. Add the Rhodes Quality Tomatoes Chopped & Peeled and bring the sauce to the boil. Season well to taste and stir in the parsley. Reduce the heat to a simmer. Make four wells in the hash and crack an egg into each well. Sprinkle each egg with a little mozzarella cheese. Replace the lid and cook until the eggs are cooked. Serve immediately. Cooking Tip: Replace the bacon with chicken rashers if preferred. One-pot roast chicken A simple roast chicken made with Rhodes Quality Chickpeas is true home-style cooking. The whole chicken cooks in one pot with vegetables and potatoes – making sure that no flavour is lost. Made with Rhodes Quality Chickpeas. Ingredients (serves 4-6)  1 x 400g can Rhodes Quality Chickpeas, drained 65 ml (¼ C) butter 45 ml (3 T) sunflower oil 1 whole chicken, cleaned 10 ml (2 t) fresh thyme leaves 1 medium onion, chopped 4 carrots, chopped 2 cloves garlic, chopped 200 g baby potatoes, peeled 250 ml (1 C) prepared chicken stock Method Heat the butter and the oil together in a large heavy-bottomed casserole dish. Season the whole chicken with salt, pepper and thyme and place into the casserole dish. Brown the skin well on all sides. Remove the chicken from the dish and set it aside. Add the onions, carrots and garlic to the dish and fry for a few minutes, stirring occasionally until the onions begin to soften. Add the baby potatoes and stir well to coat. Return the chicken to the casserole dish. Add the chicken stock and place the lid on the casserole dish. Place the casserole dish into the oven preheated to 170˚C and roast slowly for 45 minutes. Add the Rhodes Quality Chickpeas to the vegetables and stir well. Replace the lid and continue cooking until the chicken is cooked through and the vegetables are tender. Your choice: To thicken the sauce, remove one cup of the vegetables together with

Parenting Hub

Perfect Brunch Recipes to Celebrate the Women in Your Life

Women’s month is the perfect time to celebrate and pay tribute those special ladies in your life What better way than to host a delicious brunch to show them how much you appreciate them? Set a pretty table and host the perfect brunch this Women’s month with these tasty recipes from Rhodes Quality. Everything from an easy-to-make guava sorbet packed with Vitamin C, to a one pan breakfast bacon and potato hash, add mouthfuls of yumminess with strawberry cheesecake blondies, a trio of bean bruschetta’s, buttery apricot danish pastries, orange chicken liver pate, and to finish off, a refreshing mango and ginger mocktail. Rhodes Quality has a range of canned veg, fruit, jams and 100% fruit juice that will have you making the tastiest, heartiest brunch recipes with ease. With the goodness of mother nature sealed in every Rhodes Quality can, let your love and appreciation for your special person be shown through every dish. Guava Sorbet Packed with vitamin C this refreshing sorbet made with guava, is proven to have immune boosting qualities. If you don’t have an ice cream machine, a bit of light whisking will do. Ingredients (serves 4) 2 x 410 g cans Rhodes Quality Guava Halves in Syrup 65 ml (1/4 C) castor sugar 30 – 45 ml (2 – 3 T) lemon or lime juice 2 egg whites, stiffly beaten Method Drain the can of Rhodes Quality Guavas in Syrup and place the fruit in a blender with the sugar and lemon or lime juice and blend until smooth. Push the mixture through a sieve and place in a metal mixing bowl. Fold in the egg whites and place the bowl in the freezer. Stir and break up any ice crystals every 30 minutes or so until the sorbet is too frozen to stir any longer then transfer to a storage container, cover and keep frozen until required. Breakfast Bacon and Potato Hash An easy one pan brunch meal. Ingredients (serves 4)   1 x 400 g can Rhodes Quality Tomatoes Chopped & Peeled  4 potatoes, peeled 30 ml (2 Tbsp) olive oil 200 g back bacon, diced 2 spring onions, finely chopped salt and freshly cracked black pepper handful of chopped Parsley 4 eggs 65 ml (¼ cup) mozzarella cheese Method Dice the potatoes into even sized cubes. Heat the oil in a large non-stick frying pan. Add the potatoes and cook until tender, golden and crispy. Add the bacon pieces and fry until crisp. Add the spring onions. Add the Rhodes Quality Tomatoes Chopped & Peeled and bring the sauce to the boil. Season well to taste and stir in the parsley. Reduce the heat to a simmer. Make four wells in the hash and crack an egg into each well. Sprinkle each egg with a little mozzarella cheese. Replace the lid and cook until the eggs are cooked. Serve immediately. Cooking Tip: Replace the bacon with chicken rashers if preferred. Chocolate Orange Marble Mielie loaf Sweet orange cake seeped in orange syrup. Delicious for dessert. Ingredients (10 slices) Syrup 125 ml (½ cup) Rhodes Quality Orange 100% Fruit Juice 250 ml (1 cup) caster sugar 5 ml (1 tsp) vanilla essence 2 oranges, unpeeled, sliced Batter 4 large Eggs 250 ml (1 cup) caster sugar 250 ml (1 cup) self-raising flour 250 ml (1 cup) maize meal 125 ml (½ cup) Rhodes Quality Orange 100% Fruit Juice 80 g dark chocolate, melted Glaze 65 ml (¼ C) Rhodes Quality Orange 100% Fruit Juice 190 ml (¾ C) icing sugar Method To make the syrup, place the caster sugar and Rhodes Quality Orange 100% Fruit Juice into a small saucepan. Bring to the boil and stir to dissolve the sugar. Add the vanilla essence and the orange slices. Reduce the heat and simmer for 15 minutes until the oranges are seeped. To make the batter, beat together the eggs and the caster sugar until light and fluffy. Sift together the flour and the maize meal and add to the eggs alternatively with the Rhodes Quality Orange 100% Fruit Juice. Line a baking loaf pan with baking paper and spray well with non-stick spray. Remove the orange slices from the syrup, reserve the syrup, and arrange on the bottom of the pan. Spoon in the cake batter. Pour the melted chocolate over the top of the batter and use a wooden skewer to swirl the chocolate through the cake batter. Bake the orange loaf in an oven that has been preheated to 180°C for 35 minutes or until a wooden skewer inserted near the middle comes out clean. Remove the loaf from the oven and poke a few holes in the top with a small knife. Pour over the reserved syrup and leave to cool. To make the glaze, whisk small amounts of Rhodes Quality Orange Juice into the icing sugar, adding just enough to make a smooth thick paste. Drizzle the orange glaze over the top of the loaf. Strawberry Cheesecake Blondies These tasty squares will serve mouthfuls of yumminess with every bite. Ingredients (serves 8)   Cream cheese topping 120 g smooth, plain cream cheese, softened 65 ml sugar 1 egg yolk 2.5 ml vanilla essence Blondies 65 ml Rhodes Quality Strawberry Jam, gently warmed 250 g (1 cup) butter, melted 250 g brown sugar 125 ml sugar 2 eggs 1 egg yolk 10 ml (2 tsp) vanilla essence 565 ml cake flour 10 ml (2 tsp) corn flour 2.5 ml baking powder 5 ml (1 tsp) salt 160 ml white chocolate chips Method Strawberry Swirl Whisk the cream cheese in a medium bowl until smooth Whisk in the sugar. Whisk in the egg yolk and vanilla essence and set aside. To make the blondies, combine the melted butter and sugar in a large bowl and stir well. Add the eggs, egg yolk, and vanilla essence and stir until well blended. In a separate bowl, sift together flour, corn flour, baking powder, and salt. Gradually stir the dry ingredients into the egg mixture until well blended. Fold in white

Toptots Head Office

3 healthy foods to feed your toddler

We all know the importance of our children having a healthy diet, but it’s not always easy to get your toddler to eat what they should. We know the struggle of trying to get your child to eat what they should, and so we have put together a list of ‘Superfoods’ that aren’t only amazingly good for your child’s health, but also taste great. 1.Bananas for a healthy child This simple and affordable fruit is packed full of nutrients for your child.  What do they have: Vitamin B6 for producing red blood cells and keeping up a healthy nervous system Vitamin C to prevent tissue and cell damage, boost their immune system, absorb iron and help them produce serotonin (the hormone that amongst other things helps them sleep better). Potassium to grow a healthy heart and keep a stable blood pressure. Fibre to keep a healthy gut, control blood sugar, aid digestion and minimise constipation. Energy that is slow releasing and will give your child what they need to play and learn If your child doesn’t like the texture of bananas, try incorporating them into this healthy flapjack recipe instead: Mash one ripe banana well with little to no pieces. Add 1/8 tsp baking powder, 1/8 tsp of salt, 1/4 tsp of vanilla extract, 1 tablespoon of raw honey to the bananas Combine banana mixture and two eggs thoroughly Cook on medium heat using a non-stick pan 2.Sweet potatoes for a healthy child Again, these are easy to make, affordable and tasty. They also have numerous health benefits for your child. What do they have:  Beta Carotene helps raise Vitamin A levels in their blood – and works really well in children Vitamin C to prevent tissue and cell damage, boost their immune system, absorb iron and help them produce serotonin (the hormone that amongst other things helps them sleep better). Potassium to grow a healthy heart and keep a stable blood pressure. Vitamin B6 for producing red blood cells and keeping up a healthy nervous system Vitamin E to protect their bodies against oxidative damage. Fibre to keep a healthy gut, control blood sugar, aid digestion and minimise constipation. Energy that is slow releasing and will give your child what they need to play and learn You can cook these like potatoes and mash them up, for a sweet potato mash dish. Or try this Sweet Potato chips recipe: Pre-heat your oven to 200C Wash the sweet potatoes thoroughly, dry them and slice them into chip sized strips with the skin on. Coat the strips with a tablespoon of olive oil Sprinkle with salt Sprinkle with Rosemary (only if your toddler doesn’t mind seeing green things on their food!) Bake in the centre of the oven for 35-40 minutes, shifting them half-way through 3.Plain Greek yoghurt and Blueberries for a healthy child Even though both of these foods carry their own benefits, together they taste good enough for most fussy toddlers to eat. What does Greek yoghurt have:  Calcium for optimal bone health and growth in children Protein is essential in any diet; it also helps them feel fuller for longer and keeps their metabolism functioning. Probiotics to balance your child’s gut with good bacteria, which has an effect on many things within their bodies.  What do Blueberries have: Vitamin C to prevent tissue and cell damage, boost their immune system, absorb iron and help them produce serotonin (the hormone that amongst other things helps them sleep better). Antioxidant compounds to help your child’s cells fight damage, help prevent chronic diseases, and boost brain function. Blueberries have the highest levels of antioxidants compared to other fruit and vegetables Fibre to keep a healthy gut, control blood sugar, aid digestion and minimise constipation.  While blueberries are great to eat as is, depending on the age of your toddler, they may be a chocking hazard. Try incorporating the Greek yoghurt and make this Smurf Shake for your child. Blend together: 1 cup of blueberries  1 banana ½ cup of plain Greek yoghurt ½ cup of milk of your choice ½ cup of water Raw Honey to taste

Parenting Hub

The Scoop on Soup

Five benefits of enjoying a hearty bowl of homemade soup We’ve just come out of a country-wide cold snap and it’s likely we will face another before winter is up. The cooler weather definitely offers the perfect opportunity to indulge in a hearty bowl of homemade soup. Be it a bisque or broth, Catherine Clark, the owner and founder of Harvest Table says that soups are not only an easy choice to warm you up, they are the ultimate healthy meal or snack that the whole family will love.  “Whatever the season, my favourite go-to meal for my family is soup. The most wonderful thing about this easy, convenient meal is the health benefits that come with it. Combining so many essential food groups, soups are rich in the vitamins, minerals and other nutrients that your body needs to keep you going, especially in the colder months,” Catherine says. She offers five reasons why you should be eating more soup this winter are: 1. Soup is inexpensive Making soup is a great way to use up all the leftovers you’ve got in your fridge and a little goes a long way. If you have veggies that are starting to wilt, tossing them into a soup can give them new life. Play around with ratios and measurements to create a warming, delicious bowl of goodness and add a variety of herbs and spices to create new flavours.  2. Soup is easy to prepare Soup is one of the easiest, stress-free meals to cook. You need zero “cheffy” skills to whip up a mouth-watering homemade delight. It’s simply a case of sweating off some onions, leeks or even celery, adding water or stock and whatever else you fancy, be it root vegetables, chicken or greens, and just waiting until everything is cooked through. It couldn’t be simpler.  3. It’s good for you Soups are versatile and you can pack them chock full of nutrient-dense fibrous vegetables, meats, lentils and beans. And because soups are slow-cooked, these ingredients retain their nutritional value, delivering a meal in a bowl that is easy to digest, appealing in texture and tastes great. Just go easy on the salt and cream, and your bowl of soup will always be a nutritious and filling option. 4. It freezes well Forget ready-made meals, soup is the last word in convenience foods. To prepare lunches or dinners in advance, whip up a big batch of your favourite soup over the weekend and you can stash half in the freezer to enjoy later. A bonus: you’ll have a healthy, homemade meal at the ready when you’re busy, under the weather or too tired to cook.  5. It can give your immune system a boost While all the ingredients used to make a homemade soup are nutritious, you can also give your immune system an extra boost by adding Harvest Table Bone Broth Powder to your soup. Good immunity starts in your gut, and bone broth ensures a well-functioning digestive system as it helps seal up any holes, heals the lining and nourishes the gut with important nutrients. Plus, bone broth is mild enough to be able to blend into almost any dish without the risk of it overpowering, or even changing the flavour. In fact, in soups, it is known to enhance the flavour. In hopes of tempting even beginner cooks to jump on the soup bandwagon, here is a much-loved simple, but delicious soup recipe by @drjoshaxe from the Harvest Table kitchen: Home-made Chicken Broth INGREDIENTS: 2kg chicken necks/feet/wings 3 carrots, chopped 3 celery stalks, chopped 2 medium onions, peel on, sliced in half lengthwise and quartered 4 garlic cloves, peel on and smashed 1 teaspoon Himalayan salt 1 teaspoon whole peppercorns 3 tablespoons apple cider vinegar 2 bay leaves 3 sprigs fresh thyme 5–6 sprigs parsley 1 teaspoon oregano 18–20 cups cold water **Optional: 8 tablespoons of The Harvest Table Bone Broth DIRECTIONS: Place all ingredients in a 10-quart capacity slow cooker. Add in water. Simmer for 24–48 hours, skimming fat occasionally. Remove from heat and allow to cool slightly. Discard solids and strain remainder in a bowl through a colander. Let stock cool to room temperature, cover and chill. Use within a week or freeze up to three months. Harvest Table has a wide range of collagen products that are available from www.harvesttable.co.za. Follow Catherine on Instagram: @whole_healthy_me.

RediscoverDairy

14 July is Mac and Cheese Day!

This easy-to-make classic is a failproof winner for all busy moms! We’ve taken our version of this dish to the next level by adding more flavour and some extra crunch. Cheese is a good source of calcium, protein, and phosphorus; three nutrients particularly important to help build and maintain healthy bones, making our Triple Mac and Cheese a nutritious meal with each serving including about 60 grams of cheese.  Serves 4-6 people Ingredients 100 g salted butter 100 g (3/4 cup) flour  750 ml full-cream milk 180 g (1.½ cup) grated mild cheddar cheese 120 g (1 cup) grated white mature cheddar cheese 40 g (1/3 cup) parmesan cheese 1/4 tsp paprika 1/2 tsp mustard powder 500 g pasta – fusilli is recommended For the topping  60 g (1/2 cup) mild cheddar cheese (as a topping) 1 small packet sour cream and chives crisps – crushed (get the kids to help out)  salt and pepper to taste Method Pre-heat the oven to 180°C.  Bring a big pot of water to the boil then season well with salt. Cook the pasta by following the package instructions. Whilst the pasta is cooking, start the triple cheese sauce. In a large saucepan, on a medium-high heat, melt the butter, then add all the flour. Whisk it together and cook them for about a minute. It should form a smooth paste called a roux. Then remove from the heat.  Heat up the milk in the microwave for about 2-4 minutes, this will prevent lumping. Add small amounts of the hot milk to the roux, and mix well until incorporated each time.  Cook the sauce for a few minutes, whisking the entire time with a hand whisk for about 5-10 min. Your white sauce should be nice and smooth and quite thick. If it’s too thick then just add a bit more milk. Remove the pan from the heat and then add the cheeses, give it a good stir until all the cheese have melted. Add the paprika and mustard powder, mix well. Season with salt and ground pepper. Set aside. Once the noodles are done, firm to the bite – al dente, drain and then return them to the pot, pour about 3/4 of the cheese sauce into the pasta and give it a good stir with spoon. Pour the Triple Mac and Cheese into a greased, oven proof dish. Add the remaining cheese sauce on top of the pasta and smooth it out using the back of a spoon. Make sure you cover the entire surface. In a small bowl decant the packet of crisps and crush it. Mix the half cup of grated cheddar cheese with the crisps. Sprinkle this mixture on top of the Mac and Cheese. Pop it in the oven for about 20 minutes or until the top is golden brown. Enjoy!  Nutrition analysis Serving size: 280 g Energy (kJ) 1434 Protein (g) 13.2 Total Carbohydrates (g) 34.2 Fat (g) 16 Calcium (mg) 162 To download the recipe card and find other dairy inspired recipes, visit  https://www.rediscoverdairy.co.za/otw-portfolio-category/recipes-dairy/

Parenting Hub

The Goodness of Tomatoes – 5 simple meals

Winter is here, it’s the ideal time to spend with family by the fireside, wrapped up snuggly with deliciously warm meals. Winter is also a time to stay healthy and boost your immune system. Did you know? Tomatoes are rich in natural vitamins and antioxidants and perfect to fight off those nasty winter bugs! Rhodes Quality has a range of canned tomato and paste products that will have you making the tastiest, heartiest winter recipes with ease. With the goodness of mother nature sealed in every can, rest assured you will create nourishing and satisfying meals for your family prepared with love. Everything from lasagne to slow-cooked pulled pork, an easy pumpkin and chickpea curry, beef and veg pie or a lighter lunch with chicken parmesan wraps – these 5 simple meals all have the goodness of Rhodes Quality tomatoes in them. Mexican Baby Marrow Lasagne A delectable, spicy, Mexican-inspired no-carb lasagne that is perfect for a cosy Mexican themed dinner night in with the family. This dish uses Rhodes Quality Mexican Style Tomatoes, Onions & Chilies, which has been made by sealing in all the goodness of the spices in one can for your convenience – for an added Vitamin C boost serve the dish with  a glass of pineapple juice. A delectable, spicy, Mexican-inspired no-carb lasagne that is perfect for a cosy Mexican themed dinner night in with the family. This dish uses Rhodes Quality Mexican Style Tomatoes, Onions & Chilies, which has been made by sealing in all the goodness of the spices in one can for your convenience – for an added Vitamin C boost serve the dish with  a glass of pineapple juice. Ingredients (serves 6)    1 x 400g can Rhodes Quality Tomato Mexican Style 15 ml (1 Tbsp) 1 onion, finely chopped 1 garlic clove, crushed 500 g lean beef mince salt and freshly cracked black pepper 400 g baby marrows, washed and thinly sliced lengthways 250 g plain cream cheese 2 eggs 60 g (½ cup) grated mozzarella cheese 60 g (½ cup) grated cheddar cheese 1 red pepper, seeded and diced Method Heat the oil in a heavy-bottomed saucepan. Add the onion and fry until softened. Add the garlic and fry for a few minutes more. Add the can of Rhodes Quality Tomatoes, Mexican Style and bring to the boil then reduce the heat and simmer gently for 15 minutes and season to taste. In a casserole dish that has been sprayed with non-stick spray, layer up the mince alternatively with the baby marrow slices, ending with a layer of mince. Whisk together the cream cheese and the eggs until smooth and season to taste. Pour the cream cheese mixture over the top of the mince. Mix the cheeses and sprinkle over the cream cheese then sprinkle over the red pepper. Bake the lasagne in an oven that has been preheated to 180° c for 30-40 minutes or until the top is golden and set. Serve hot. Slow-cooked pulled pork Tender enough to pull apart with a fork, this slow-cooked pork can be served on buns, in wraps or over rice and mash and is a versatile meal for lunch or dinner and the sauce uses Rhodes Quality Tomato and Onion Gravy for your convenience. Pair with a delicious Rhodes Quality 100% orange juice to pack a vitamin C punch. Ingredients (serves 6) 2 x 400 g cans Rhodes Quality Tomato and Onion Gravy 500 ml (2 cups) Rhodes Quality Orange 100% Fruit Juice Blend 1.5 kg pork shoulder salt and freshly cracked black pepper 125 ml (½ cup) brown sugar 4 garlic cloves, crushed 250 ml (1 cup) prepared chicken stock Method Place the pork into the bottom of a slow cooker and season well. Pour the Rhodes Quality Tomato and Onion Gravy and the Rhodes Quality Orange 100% Fruit Juice Blend over the meat. Add the brown sugar, garlic, and chicken stock. Cook over medium heat for 5 -6 hours or until it shreds easily. Remove the meat from the sauce and shred using two forks. Pour any excess oil off the top of the sauce and whisk well. Season to taste. Serve the meat on buns or wraps with the sauce on the side. Pumpkin and Chickpea Curry An easy vegetarian curry, prepared in under and hour made with Rhodes Quality tinned Chickpeas for your convenience. Ingredients (serves 6)   1 x 400 g can Rhodes Quality Chickpeas, drained and rinsed 1 x 115 g Rhodes Quality Tomato Paste Cup 500 g (2 cups) peeled and chopped pumpkin 30 ml (2 Tbsp) vegetable oil 1 onion, finely chopped 2 carrots, peeled and chopped 1 red pepper, seeded and sliced 1 garlic clove, crushed 30 ml (2 Tbsp) Pakco Curry Paste  1 x 400 ml can coconut milk 200 g broccoli, washed and cut into florets to serve: rice, poppadums and fresh coriander Pepper Steak Pie A South African winter favourite. Homemade conveniently with Rhodes Quality Tomatoes Chopped and Peeled. Deliciously saucy. Ingredients (makes 4 pies) 1 x 400 g can Rhodes Quality Tomatoes Chopped & Peeled 1 x 50 g Sachet Rhodes Quality Tomato Paste 1.5 kg beef steak, de-boned and cubed 125 ml (½ cup) cake flour salt & freshly cracked black pepper 30 ml (2 Tbsp) sunflower oil 1 onion, finely chopped 2 cloves garlic, crushed 10 ml (2 tsp) dried mixed herbs 500 ml (2 cups) prepared beef stock 20 ml (1Tbsp + 1 tsp) cracked black pepper 1  x 400 g roll ready-made puff pastry 1 egg, lightly beaten Method Place the beef cubes in a large bowl. Add the cake flour and season well with salt and pepper. Toss to coat. Heat the oil in a large heavy bottomed saucepan. Shake the excess flour off the meat and fry in batches until sealed on all sides and set aside. Add the onions to the saucepan and, over a low heat, fry until softened. Add the garlic and herbs and fry for a few

RediscoverDairy

Why sMOOthies can make your breakfast seamless

About one in three people tend to skip breakfast. Breakfast is undeniably one of the most important meals of the day and smoothies are a quick and easy way to provide you with all the important nutrients you need to start your day. Why smoothies for breakfast? They can be prepared with as little as three simple, nutritious ingredients that are part of a healthy eating pattern. MILK contains a powerful combination of 9 important nutrients, such as high quality protein, calcium, potassium, vitamins A, B12 and B2, as well as magnesium, phosphate and zinc. Milk is a versatile ingredient, because in a single product you get a variety of nutrients, that are easily absorbed and ready to be used. YOGHURT, like milk, is a source of high quality protein, which helps to keep you satisfied and at the same time builds and maintains your muscles. Yogurt is a fermented dairy product that is a vehicle  of friendly bacteria and contributes to good intestinal health. These friendly bacteria are used during the manufacturing process to acidify the milk. Similar bacteria also occur naturally in the human digestive system to ensure that nutrients are absorbed efficiently from food. By eating yogurt, you help maintain the bacterial population in your intestinal tract so that you can get the best possible nutritional value from food. FRUIT is packed with important nutrients, which complement milk and yogurt. It is a rich source of folic acid, vitamin C and fiber. Together with milk and yoghurt, it makes a perfect combination for your smoothie. You can also add nuts, seeds, peanut butter, vegetables or oatmeal for texture and flavor. Smoothies are so easy to make! Try this delicious Peanutbutter Whip With Apples smoothie created by the team at Rediscover Dairy. Make it at home with a regular whisk or in a food processor. You can make it in advance and freeze it and then use it to keep your lunch box cool. It is advisable to use plain, unflavoured yoghurt because in this way you can limit unnecessary sugar. Milk and yoghurt are also available in different options. From full-cream, low-fat, medium-fat to fat-free milk which means there is an option for everyone. Alternate the type of fruit and vegetables you add to ensure variety and to give it a new, interesting flavor every day. Smoothies are a quick, easy and “trendy” breakfast option, packed with nutrients. They are a delicious, easy grab-and-go meal. Make sure you give your body the support and nutrients it needs. Try to include 2-3 servings of milk and dairy in your diet daily. Milk and dairy are good for the whole family – young and old! For more dairy tips and recipes visit the Rediscover Dairy Facebook page.

Parenting Hub

AMASI is simply amazing!

Amasi (also known as maas) is a well-loved product that forms part of many cultures within South-Africa. Our ancestors traditionally prepared this fermented drink by storing unpasteurised cow’s milk in a calabash or hide sack. This allowed the milk to ferment. Today amasi is made by adding live cultures to full-cream pasteurised cow’s milk. These live cultures help the fermentation process along, which gives amasi its distinct sour taste and additional health effects.  This Mzansi culinary treasure is absolutely great for baking! Amasi is a perfect substitute if you can’t find buttermilk near you. Here is a fabulous, quick and easy Rediscover Dairy scone recipe you can try: You will need: 250 ml amasi (maas) or buttermilk  1 cup self-raising flour  1 cup grated cheddar cheese  ½ teaspoon salt 1 egg Pinch of cayenne pepper (optional)  Some extra goodies you can add to the batter:  Chopped spring onions (or chives) topped with feta Melted butter and a little honey which makes a pouring sauce for the top Directions: 1. Pre-heat oven to 180°C. Spray and Cook a muffin tin. 2. Add all the ingredients to a big bowl and mix until incorporated. Do not overmix, as it could result in dense scones. 3. Spoon the mixture into your muffin pan. Pro-Tip: use an ice-cream scoop to get equal sized scones. 4. Bake until golden brown 15–20 min, or until a skewer inserted into the centre comes out clean.  Take out and rest on a wire rack. Serve and enjoy!    The Rediscover Dairy team loves this recipe because it is quick and easy to prepare and suitable for many occasions from breakfast, snacks, quick dinner served with cheese. It’s made with amasi, but you can use plain yoghurt or milk Amasi is good for the whole family: the live cultures in amasi help to build a strong digestive system and keep the immune system strong  like other fermented milk products, amasi is generally tolerated well by people who are lactose intolerant. it is also a good meal replacement when your household’s meat stores are low.  For better health, make amasi part of your three servings of dairy a day!

Parenting Hub

New delights and a new look for SASKO Bake Mixes

Much loved South African household brand, SASKO, has announced the launch of two new flavour variants in its popular SASKO Bake Mix range, Red Velvet and Sweet Dough. SASKO’s new Red Velvet Bake Mix, a signature cake that should evoke as much excitement as the first slice of cake placed on a plate will now be easy to whip up and bake in the comfort of your home. This delicious and easy to bake mix is versatile and is equally well received as a cupcake or even as a cake pop.  The new SASKO Sweet Dough Mix is an equally tasty and versatile offering. It’s a welcome shortcut for busy cooks who are hankering after vetkoek, doughnuts or delicious juicy koeksisters. This indulgent memory trip in a bite tastes just as good as the fresh doughnuts Ouma used to serve over weekends – or when mom wasn’t watching. In addition to the two new flavours, SASKO Bake Mixes packaging has also received a makeover and features clean lines, with SASKO’s signature Seshweshwe-inspired print, which speaks to our South African Heritage. The SASKO Bake Mix range also features Vanilla Flavoured Bake Mix, Chocolate Flavoured Bake Mix, Bran Bake Mix, Scone Bake Mix, and a very handy Pancake, Flapjack and Waffle Mix. There is something for everyone and thanks to SASKO, it’s simply a case of adding a handful of extra ingredients to satisfy that craving.  For more information on SASKO, visit the website or follow SASKO on Facebook and Instagram for news and inspiration.  ##SASKOBakeMixes  #DeliciouslyEasy RECIPES: SWEET DOUGH RING DONUTS Ingredients: 500 g SASKO Sweet Dough Bake Mix 90 g Butter 2 Extra large eggs 125 ml Milk 125 ml Boiling water 5 ml Vanilla essence 10 g Instant dry yeast Vegetable oil for frying Method:  Add butter to boiling water in a mixing bowl and cool. Add eggs and vanilla essence to the butter mixture and mix. Add milk and mix. Add bake mix, yeast and make a dough. Close the dough with cling wrap and allow to rise for approximately1 hour. Roll into thick coil and cut, shape into donuts and allow to rise again until preferred height. Once oil has heated, place ring donut in oil and fry until golden brown. SWEET DOUGH VETKOEK   Ingredients: 500 g SASKO Sweet Dough Bake Mix 10 g Instant dry yeast 350 ml Lukewarm water Vegetable oil Method Mix bake mix and yeast in a large mixing bowl by hand. Add the lukewarm water and make a dough. Close the dough with cling wrap and allow to rise for approximately 1 hour. Roll into a small round shape or preferred size. Once oil has heated, place vetkoek in oil and fry until golden brown. RED VELVET CAKE POPS Ingredients: 1 x SASKO Red Velvet Baked Cake (see recipe as per above) 200 g White cooking chocolate Cake Pop sticks 75 g Butter / Margarine 1⁄2 tsp Vanilla essence 150 g Icing sugar Method:  Add 1 x 18 cm layer cake to a large bowl and crumble until it resembles fine crumbs. For buttercream: Soften butter and add the icing sugar and vanilla essence. Mix well until all is blended. Add in buttercream a little at a time until cake is moist, still slightly crumbly and can hold a ball shape. Roll into balls. Melt at least 3 blocks of white cooking chocolate in the microwave. Dip the tip of the cake pop sticks into white chocolate and insert into cake balls. Freeze for 20 minutes. Melt the remaining chocolate in a microwave-proof bowl. Carefully dip the cake balls into the chocolate until covered. Swirl and tap gently to let the excess chocolate drip o. Decorate with sprinkles while the chocolate is still soft. RED VELVET CUPCAKES Ingredients: 500 g SASKO Red Velvet Bake Mix 2 Extra large eggs 90 ml Milk 80 ml Water 160 ml Vegetable oil Method:  Preheat oven to 180°C. Beat oil, milk, water and eggs together with a whisk in a mixing bowl. Add the bake mix to the egg mixture. Mix with an electric beater (low speed) or by hand with a whisk for 1 minute. Equally divide cupcake batter into a well-greased mun pan with cupcake holders. Bake for 20-25 minutes. Once cooled down, decorate with desired icing and decorations.

Parenting Hub

Happy Kids; Healthy meals!

Happy Kids; Healthy meals! (and they’re also super delicious!) Before you say, “My kids will never eat them”, read on because, although mushrooms often seem to be the “not on my plate” vegetable right up there with Brussels sprouts, we’ve got good reasons and great ways to get kids to eat them. Firstly, the great way to add mushrooms: A selection of studies have found that the meaty taste of mushrooms make them easy to blend unobtrusively into any minced protein (beef, chicken, lamb, turkey and even fish work equally well) by chopping them into the same consistency.  Mushrooms then immediately increase the nutritional value of your child’s meal without compromising on the flavour kids would expect from their favourite burger, lasagna or cottage pie. Secondly, the good reason to add mushrooms: By blending mushrooms into their favourite meat or fish options, you are able to decrease their total calorie, fat and saturated fat intake without losing any of the flavour.  In fact, mushrooms have a rich umami flavour profile that actually enhances and deepens the flavour of the meat naturally whilst adding healthful nutrients such as potassium, fibre, minerals, vitamins and antioxidants to every bite. You will also be reducing their sodium intake by 25%! Now that’s good news coming from our favourite Superfood! But as we know with kids, who can be picky eaters, the proof is in the pudding (in this case in the blend!) So, we’ve developed a range of recipes, blending mushrooms into kid friendly favourites for an easier and much healthier way  to dish up delicious options even they will love! SAMFA Chicken, Mushroom & Corn Meatloaf Makes 1 standard sized loaf tin (± 20cm x 10cm) Ingredients: 400g white button mushrooms 2 shallots, diced 2 cloves garlic, minced 1 cup breadcrumbs 1 XL free-range egg, lightly beaten  ½ cup parmesan cheese, finely grated 1 large marrow, grated, salted, degorged & squeezed dry  1 corn on the cob, steamed and cut off the cob ¼ cup parsley, chopped Zest of 1 lemon 1 Tbsp lemon juice ¼ cup spring onions, sliced 2 tsp dried oregano 400g chicken mince Extra virgin olive oil  Salt and pepper, to taste  Pink sauce: 4 Tbsp mayonnaise 4 Tbsp tomato sauce Fresh lemon juice, to taste Method: To make the pink sauce: Mix mayonnaise and tomato sauce together in a bowl.  Add a little squeeze of lemon juice and salt, to taste. Set aside in the fridge for serving.  Preheat oven to 180˚C. Lightly spray a ± 20cm x 10cm loaf tin with non-stick olive oil spray. Using a food processor, pulse the mushrooms until they are finely chopped.  In a large pan sauté the mushrooms with a little drizzle of olive oil until they have sweated off most of their water, about 10 to 15 min. Set mushrooms aside. Add a fresh drizzle of olive oil to the pan and add the shallots.  Cook until soft. Add the garlic and cook until fragrant. Season well and set aside.  In a large bowl combine the cooled mushrooms and shallots and the rest of the ingredients except the chicken, mix very well.  Add the chicken mince and season with salt and pepper.  Mix to combine.  Spoon mixture into loaf tin.  Bake for 30 minutes until browned on top and cooked through.  Remove from the oven and remove from the loaf tin.  Return to the oven on a baking tray for another 10 minutes to brown the sides.  Slice and serve with pink sauce and a side salad.  SAMFA Mushroomy Chicken Burgers  Makes 6 burgers  Ingredients: 500g white button mushrooms 500g free-range chicken mince ½ onion, grated ½ cup breadcrumbs 1 XL free-range egg, lightly beaten 1 ½ tsp salt ½ tsp freshly ground black pepper To build the burgers:  6 burger buns, lightly toasted Tomato slices, for serving Lettuce, for serving Sliced mild cheddar cheese, for serving Mayonnaise, for serving Tomato sauce, for serving Method: Using a food processor, pulse the mushrooms until they are very finely chopped.  In a large saucepan sauté the mushrooms in a drizzle of olive oil.  Sauté until the mushrooms are fully cooked and have lost most of their liquid, 10-12 min.  Set aside to cool. In a large bowl combine the remaining ingredients and the cooled, cooked mushrooms.  Form into 6 equally sized patties. In a hot cast iron pan or on the braai, cook the patties until golden brown on both sides and fully cooked through. 10-12 minutes.  Assemble burgers with all your favourite fixings and serve warm.  SAMFA Mighty Mushroom Bolognese with Hidden Veg Serves 6 Ingredients: 500g portabellini or white button mushrooms 1 onion, finely diced 2 stalks celery, finely diced 1 large carrot, finely grated 1 large zucchini, finely grated  2 cloves garlic, minced 1 tsp dried oregano 2 Tbsp tomato paste 2 x 400g tinned crushed tomatoes 1 cup mushroom or vegetable stock Salt and pepper, to taste  Extra virgin olive oil  350g dried spaghetti Parmesan cheese, for serving Fresh parsley, for serving  Method: Using a food processor, pulse the mushrooms until they are very finely chopped.  In a large saucepan add a drizzle of olive oil and the mushrooms. Sauté until the mushrooms give off all their water and begin to brown.  Remove from the heat and set aside in a bowl.  In the same saucepan sauté the onion in a little olive oil. Cook until soft.  Add the celery, carrot, zucchini, garlic and dried oregano. Cook until the vegetables are very soft. Use your spoon or spatula to mash them in the pan so they break down.  Add the tomato paste and cook stirring constantly for 2-3 min.  Add the tinned tomatoes and stock, bring to a gentle simmer.  Allow to simmer for 30 min until reduced and thickened.  Taste for seasoning.  In a large pot of boiling salted water, boil the spaghetti according to package instructions.  Once al dente, drain the pasta.  Divide the spaghetti between bowls and top with the mushroom bolognese.  Sprinkle bowls with

Sidebar Image

Scroll to Top